
Main Courses
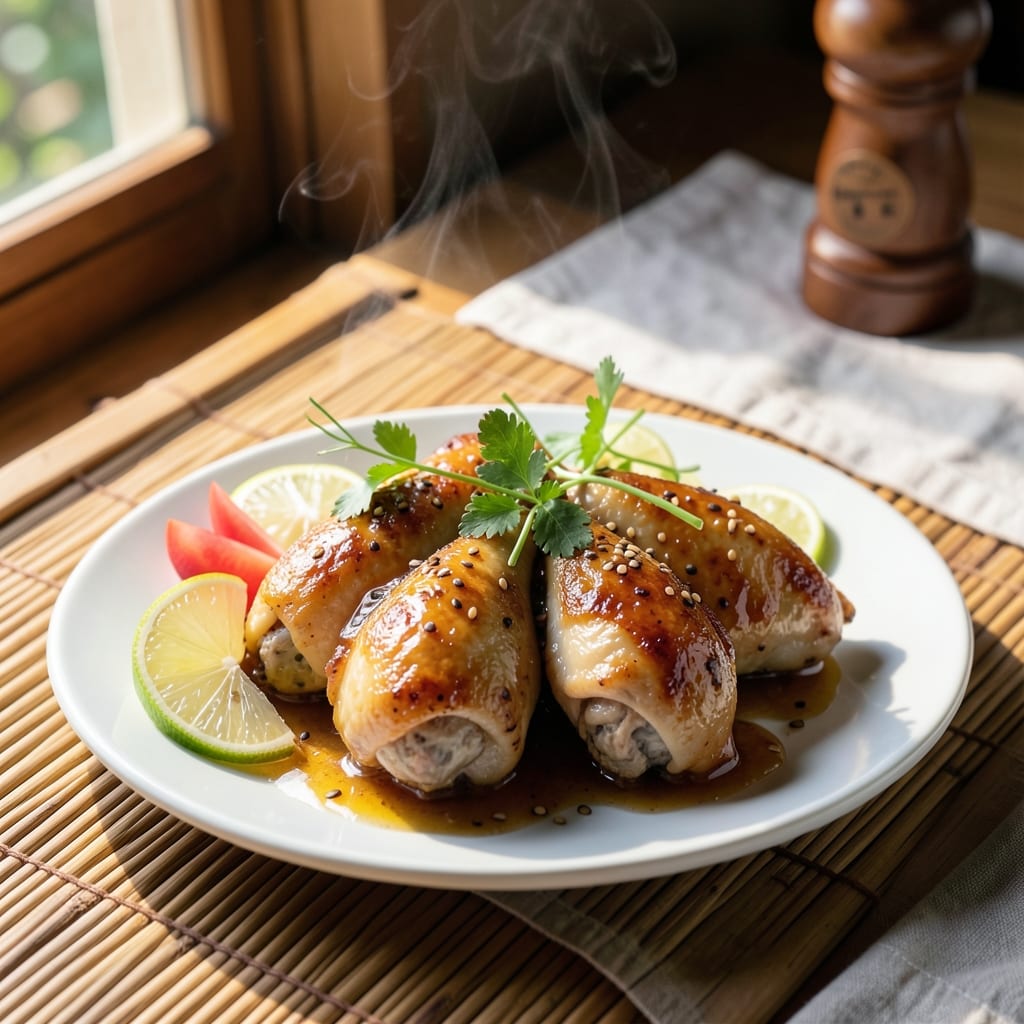
This authentic Chinese lemon chicken recipe delivers the perfect balance of crispy skin and tangy-sweet sauce that defines Cantonese cuisine. ✨ The secret lies in a precise marinade of soy sauce, rice wine, and cornstarch that creates that signature caramelized crust, while the lemon and chili add the signature bright, spicy kick. I've perfected this technique through years of testing—no shortcuts, just the real deal.
The magic happens in the stir-fry, where high heat and a well-seasoned wok create that coveted wok hei (breath of the wok) aroma. Fresh ginger, garlic, and scallions form the aromatic base, while the sauce reduces to a glossy, sticky finish that clings perfectly to each tender piece. This isn't just another lemon chicken—it's the version you'd find in a dim sum parlor or family kitchen in Guangzhou.
What you'll end up with is golden, crisp-skinned chicken thighs with a sauce that's perfectly balanced—tart from the lemon, sweet from the sugar, and just a hint of heat from the chili. The texture contrast is what makes it unforgettable: crispy exterior, juicy interior, and that addictive sauce that makes every bite sing. Serve with steamed jasmine rice and a drizzle of homemade scallion oil for the full experience.
This recipe scales beautifully for family dinners or gatherings, and the marinade can be prepped ahead while you handle other components. The key to success is patience—letting the marinade work its magic and cooking the chicken just until it reaches that perfect doneness. Let's get started on making this restaurant-quality dish at home.
Ingredients for authentic chinese lemon chicken
Pantry staples plus a few key Asian ingredients for that signature crispy-tart balance.
| Ingredient | Amount | Notes |
|---|---|---|
| Boneless, Skin-On Chicken Thighs 🍗 | 1 ½ lb | Large, even-sized pieces preferred |
| Light Soy Sauce 🥄 | ½ cup | Kikkoman preferred for authenticity |
| Rice Wine 🍶 | ¼ cup | Shaoxing wine for best flavor |
| Cornstarch 🌾 | 3 tbsp | For crispy coating |
| Fresh Lemon Juice 🍋 | ¼ cup | From 2-3 lemons |
| Granulated Sugar 🍚 | 2 tbsp | White sugar preferred |
| Dried Red Chili Flakes 🌶️ | 1 tbsp | Adjust for heat preference |
| Fresh Ginger 🧄 | 2 tbsp | Finely minced, peeled |
| Garlic Cloves 🧄 | 6 cloves | Minced, fresh preferred |
| Scallions 🧅 | 3 whole | White and green parts, chopped |
| Neutral Oil 🫒 | ½ cup | Peanut or vegetable oil |
| Sesame Oil 🫒 | 1 tbsp | For aroma, toasted |
| Jasmine Rice 🍚 | 2 cups | Uncooked, for serving |
The chicken thighs are non-negotiable—skin-on and bone-in for that authentic texture. Look for large, even-sized pieces at your local Asian market or grocery store's meat counter. I always grab mine from H Mart if I'm near one, but the regular supermarket's chicken works too. The skin needs to stay intact, so handle them gently. For the soy sauce, Kikkoman light soy sauce is the gold standard—it's what you'll find in Cantonese kitchens. If you can't find Shaoxing wine, dry sherry works in a pinch, but it's not the same. The ginger and garlic? Fresh is a must—no shortcuts here.
No Shaoxing wine? Dry sherry or even a splash of white wine vinegar will work, but the flavor won't be identical. Want to cut the heat? Reduce the chili flakes to half a tablespoon—or skip them entirely if you're serving kids. The cornstarch is crucial for that crispy crust, but if you're out, all-purpose flour works at double the amount. For the scallions, use the white and light green parts for the sauce, and save the darker greens for garnish. The sesame oil should be toasted—heat it in a pan for 30 seconds to bring out the aroma, then let it cool before using.
Marinate the chicken for at least 30 minutes—overnight is even better if you're planning ahead. The sauce can be made a day in advance and reheated gently. Store leftovers in an airtight container in the fridge for up to 3 days. The rice? Cook it fresh for the best texture, but leftover rice reheats beautifully with a splash of water. Freeze any extra sauce in ice cube trays for quick future meals—just thaw and warm through.
Why You'll Love This Recipe
- Skin-On Magic: The crispy, golden skin on those thighs? That’s where the real flavor lives—no deep-frying required. Just a quick sear in the pan, and you’ve got that addictive crunch without the fuss.
- Citrus-Soy Bomb: That bright lemon juice cutting through the soy and rice wine? It’s like a flavor explosion—sweet, salty, and tangy all at once. Honestly, I’ve never met a sauce that balances so perfectly in just a few ingredients.
- Leftovers That Last: This dish reheats like a dream—crispy edges stay intact, and the sauce doesn’t turn gloopy. I’ve had it cold the next day, and it’s still my go-to for packed lunches (yes, even on a Tuesday).
- Pantry Staple Power: You’re probably already stocked for this—light soy, rice wine, cornstarch, and lemons. No specialty ingredients, no last-minute grocery runs. Between us, it’s my secret weapon for when I’m too tired to think.
Step-by-step instructions for authentic Chinese lemon chicken
Here's how to nail that perfect crispy skin and tangy-sweet balance—just like your favorite Chinese takeout.
👨🍳 Step 1: Marinate the Chicken for Maximum Flavor
Start by patting the 1.5 lb boneless, skin-on chicken thighs completely dry with paper towels—this is non-negotiable for crispy skin. In a bowl, whisk together the 0.5 cup light soy sauce, 0.25 cup rice wine, 0.25 cup fresh lemon juice, and 2 tbsp granulated sugar until the sugar dissolves. Add the minced fresh ginger, minced garlic cloves, and chopped scallions, then pour this marinade over the chicken.
Let the chicken marinate for at least 30 minutes (I like to do this in the fridge for 1-2 hours if I have time). This step infuses the meat with flavor and helps tenderize it. The lemon juice will start to break down the proteins slightly, ensuring juicy chicken even after frying.
🍳 Step 2: Create the Crispy Cornstarch Coating
Remove the chicken from the marinade (don't worry about drips—we'll use those later) and let it air-dry on a wire rack for 10 minutes. This drying step is what creates that legendary crispy skin. While it dries, mix the 3 tbsp cornstarch with 1 tbsp dried red chili flakes in a shallow dish.
Dredge each chicken thigh in the cornstarch mixture, pressing gently to ensure an even, thin coating. The cornstarch will absorb any excess moisture from the chicken, creating that perfect crispy barrier when we fry it. Don't skip this—it's what makes the skin crackle when you bite in.
🔥 Step 3: Fry Until Golden Brown and Cooked Through
Heat 0.5 cup neutral oil in a large skillet over medium-high heat until it shimmers but isn't smoking. Add the coated chicken thighs and fry for 4-5 minutes per side until the skin is deep golden brown and crispy. The internal temperature should reach 165°F—use a meat thermometer to check.
Here's the thing—I press down gently on the fillet during the first minute to prevent curling. You'll know it's ready to flip when the skin releases easily from the pan. Transfer the fried chicken to a paper towel-lined plate to drain excess oil, but leave it warm while you make the sauce.
🍳 Step 4: Make the Signature Tart-Sweet Sauce
In the same skillet (don't wash it—those browned bits are flavor gold), reduce heat to medium and add 1 tbsp sesame oil. Pour in any leftover marinade from the bowl and let it simmer for 2-3 minutes until it reduces slightly. The sauce should coat the back of a spoon but still be pourable.
Taste and adjust—add a splash of water if it's too thick, or a pinch more sugar if you want it sweeter. The perfect sauce should balance the tangy lemon with the deep umami from the soy sauce and a hint of spicy heat from the chili flakes.
🥘 Step 5: Toss and Serve Over Steamed Rice
Return the crispy chicken to the skillet and spoon the sauce over it. Toss gently to coat the chicken evenly, letting it absorb the sauce for 1-2 minutes. The chicken will stay warm while the sauce finishes mopping up all those delicious juices.
Serve immediately over 2 cups jasmine rice (steamed to perfection) with extra scallions sprinkled on top. The contrast of the crispy, spicy chicken against the fluffy rice is what makes this dish so addictive. Pair it with steamed broccoli or a simple cucumber salad for a complete meal.
Pro Tips For Making Authentic Chinese Lemon Chicken
- Pound the Skin Flat: Skip the knife—use a meat mallet or rolling pin to flatten the skin-on thighs before seasoning. This ensures even cooking and a crispier finish, especially when frying. I used to skip this, and the skin always ended up chewy. Two firm whacks per thigh makes all the difference.
- Marinate in Rice Wine: Toss the chicken in rice wine and lemon juice for at least 20 minutes—don’t rush it. The acid tenderizes the meat while the wine cuts through the richness of the soy. I learned this the hard way when my first batch tasted flat because I skipped the wait.
- Double-Check the Cornstarch: Mix the cornstarch with cold water first—this prevents clumping when tossed with the chicken. A thick, smooth slurry (about 1:1 ratio) guarantees that golden, crispy crust you’re after. Trust me, lumpy coating = sad crunch.
- Fry in Two Batches: Overcrowding the pan drops the oil temperature and steams the chicken instead of searing it. Work in batches—even if it takes longer—so the skin gets that perfect blistery texture. Yes, it’s an extra step, but the payoff is worth it.
Storing and reheating your leftovers
Refrigerator Storage
Store your lemon chicken in an airtight container for up to 3 days in the fridge. I always let it cool completely first to prevent condensation, which can make the skin soggy. Place a paper towel on top of the chicken before sealing to absorb any excess moisture. The sauce will thicken slightly when refrigerated, so reheat it with a splash of water or chicken broth to restore its glossy texture. 🥬
Freezer Prep Tips
For longer storage, freeze the chicken and sauce separately in airtight containers or heavy-duty freezer bags. Portion the sauce into ice cube trays for easy single-serving use later. Label everything with the date—this dish keeps well for up to 3 months. When ready to eat, thaw overnight in the fridge, then reheat gently to preserve that crispy skin. 🧊
Reheating Perfection
Reheat chicken in a skillet over medium heat for 3-4 minutes per side until the skin is crispy again. Add 1 tablespoon neutral oil to the pan to help restore that golden crust. For the sauce, warm it in a separate pan over low heat with a splash of water or broth. Never microwave—it'll turn the skin rubbery. 🔥
Rice Handling
Steamed rice reheats best in the microwave with 2 tablespoons water per cup, covered for 1-2 minutes. For crispy rice, spread it on a baking sheet and broil for 1-2 minutes after microwaving. I like to keep the rice separate until serving to maintain its texture. Serve with a drizzle of homemade scallion oil to brighten up the flavors. 🍚
Sauce Refresh
If your sauce seems dull after storage, revive it with ½ teaspoon rice vinegar or a pinch of MSG for umami depth. For extra tang, add 1 teaspoon fresh lemon juice. The sauce should coat the back of a spoon but remain pourable. Adjust seasonings to taste—this is where you can customize it to your liking. 💡
Leftovers Strategy
Use leftover chicken in fried rice or noodle dishes the next day. The crispy skin adds amazing texture to these dishes. For a quick meal, toss reheated chicken with steamed bok choy and extra sauce. Store any unused sauce in the fridge for up to 1 week or freeze for 3 months. 🍜
Nutrition facts
Frequently asked questions
Why do I need to pat the chicken completely dry before marinating?
Drying the chicken removes surface moisture, which is crucial for creating that signature crispy skin. When wet skin hits hot oil, it steams instead of crisping. The 10-minute air-drying after marinating seals the deal—this step is what makes the difference between soggy and perfectly golden skin.
Can I use chicken breasts instead of thighs?
Not ideal—chicken breasts are leaner and more prone to drying out during frying. If you must use them, brining for 30 minutes in a saltwater solution first helps retain moisture. For authentic results, stick with thighs—they stay juicy and develop that coveted crispy skin better.
What if I don't have Shaoxing wine?
Use dry sherry as a substitute, or mix 1 tbsp rice vinegar + 1 tbsp water for a similar acidity. Avoid sweet wines—they'll throw off the balance of the sauce. The wine adds depth, so if you skip it, reduce the soy sauce slightly to compensate.
How do I fix soggy skin when reheating?
Reheat in a skillet over medium heat for 3-4 minutes per side with 1 tbsp neutral oil. The oil helps restore crispiness. Avoid microwaving—it steams the skin. For extra crunch, broil for 1-2 minutes after reheating.
Can I make this dish spicier?
Add 1 extra tbsp chili flakes to the marinade or stir in ½ tsp Sichuan peppercorns (toasted and ground) for a numbing-spicy kick. For heat lovers, serve with chili crisp on the side. Just remember—balance is key, so adjust other flavors accordingly.