
Main Courses
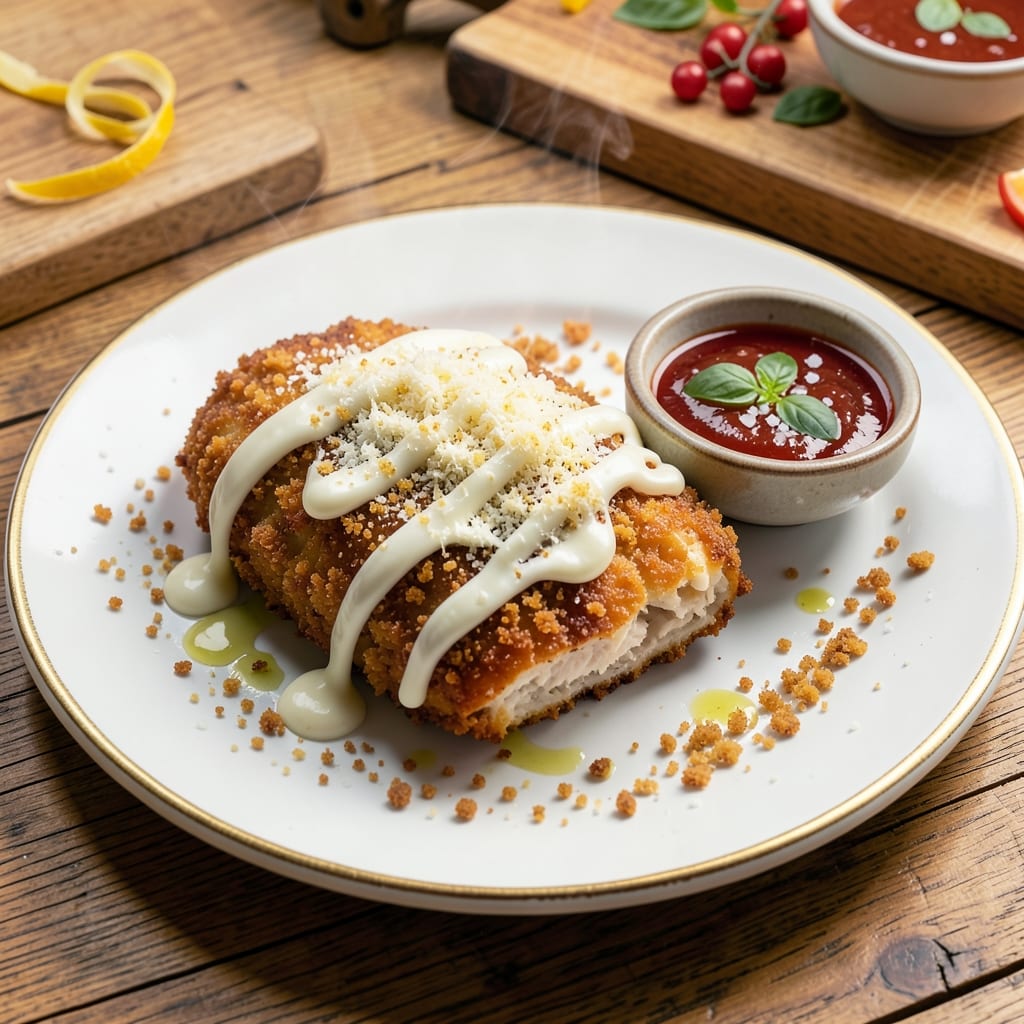
This baked breaded chicken parmesan recipe delivers the restaurant-quality comfort food you crave without the deep-fryer mess. After years of perfecting the balance between crispy crust and melty cheese layers, I've created a version that's foolproof for weeknights—just 30 minutes from start to finish. The secret lies in a double-dredge technique that locks in moisture while creating that satisfying crunch.
What sets this apart is the homemade marinara that simmers while the chicken bakes, infusing the dish with rich, tangy flavor. My grandmother's handwritten notes about "letting the sauce work its magic" led me to this method—simmering it uncovered for the last 10 minutes to concentrate the flavors. The result? A sauce that clings perfectly to the breaded chicken without overwhelming it.
By the time you pull this dish from the oven, you'll have golden-brown chicken with a crispy exterior that gives way to tender meat and pockets of melted mozzarella. The marinara sauce will be thick enough to coat each piece beautifully, creating that classic parmesan experience. Serve with a simple side salad or crusty bread to soak up every last drop of that delicious sauce.
This recipe proves you don't need a deep fryer or fancy techniques to achieve restaurant-quality results. The double-dredging method ensures crispiness without the mess, while the simmered sauce adds depth that store-bought can't match. It's the kind of comfort food that brings people together—perfect for family dinners or special occasions.
Ingredients for baked breaded chicken parmesan
Here's what you'll need to create crispy, cheesy perfection without deep-frying.
| Ingredient | Amount | Notes |
|---|---|---|
| Boneless, Skinless Chicken Breasts 🍗 | 1 ½ lb | Pounded to even thickness |
| All-Purpose Flour 🌾 | 1 cup | For dredging, sifted |
| Large Eggs 🥚 | 2 whole | Beaten for egg wash |
| Italian Seasoned Breadcrumbs 🍞 | 1 ½ cups | Panko works too |
| Fresh Mozzarella Cheese 🧀 | 8 oz | Low-moisture if preferred |
| Parmesan Cheese 🧀 | ½ cup | Freshly grated from block |
| San Marzano Crushed Tomatoes 🍅 | 1 can | 28 oz, no salt added |
| Garlic Cloves 🧄 | 3 cloves | Minced for marinara |
| Extra-Virgin Olive Oil 🫒 | ¼ cup | For frying chicken |
| Fresh Basil Leaves 🌿 | ¼ cup | Chopped for garnish |
| Dried Oregano 🍃 | 1 tsp | For marinara seasoning |
| Kosher Salt 🧂 | 1 ½ tsp | Divided for seasoning |
| Ground Black Pepper 🌶️ | ½ tsp | Freshly cracked |
| Dried Red Pepper Flakes 🔥 | ¼ tsp | Optional for heat |
The chicken breasts are the foundation—look for even-sized pieces at the grocery store's meat counter. Trader Joe's and Costco usually have the best selection. Pounding them to even thickness ensures perfect cooking. For the breadcrumbs, Italian-seasoned gives that authentic flavor, but Panko plus Italian seasoning works even better for extra crunch. The mozzarella makes all the difference—fresh mozzarella melts beautifully, but low-moisture from a block shreds easier if you're in a hurry. I always buy a little extra cheese because it disappears fast.
No Italian breadcrumbs? Panko plus 1 tsp Italian seasoning is a perfect swap. Fresh out of basil? Dried oregano at half the amount works in a pinch, but trust me, fresh basil makes the dish pop. The San Marzano tomatoes are worth the splurge—they're sweeter and less acidic than regular canned tomatoes. If you can't find them, any good-quality crushed tomatoes will do. For the olive oil, use something with a little peppery kick—it adds depth to the flavor. And if you're avoiding gluten, almond flour works surprisingly well for dredging, though the texture will be slightly different.
The chicken stays fresh for 2 days in the fridge, but the breaded pieces are best used immediately for maximum crispiness. The mozzarella and Parmesan can be stored in the fridge for up to 2 weeks if wrapped tightly. I like to prep the marinara sauce ahead of time—it actually tastes better the next day as the flavors meld. The breadcrumbs? Keep them in an airtight container for up to 2 weeks, though I usually use them within a few days. Freeze any extra chicken breasts for up to 3 months—just thaw overnight in the fridge before breading.
Why You'll Love This Recipe
- No-Fuss Setup: I swear by this recipe because it’s about as simple as it gets—just flour, eggs, breadcrumbs, and cheese. No fancy equipment, no stress; even if you’re not a seasoned cook, the steps are straightforward enough that you’ll nail it the first time.
- Crispy-Creamy Magic: That perfect crunch from the Italian seasoned breadcrumbs paired with gooey melted mozzarella? It’s the kind of combo that makes you close your eyes and savor every bite. Honestly, the flavor balance is what keeps me coming back.
- Weeknight Wonder: This dish is my go-to for busy evenings when I need something hearty but doesn’t require hours in the kitchen. Serve it with pasta, a simple salad, or even just crusty bread—it’s that versatile.
- Budget-Friendly Feast: Chicken breasts and mozzarella stretch far, and leftovers reheat beautifully. I’ll be real: it’s one of those recipes where you make a big batch, and by Thursday, you’re still eating it without getting tired of it.
Step-by-step instructions for baked breaded chicken parmesan
Here's how to create that perfect golden crust with melty cheese layers—no deep fryer needed.
Prepare the Chicken for Breading
Start by pounding the 1.5 lb boneless, skinless chicken breasts between two sheets of plastic wrap to an even ½-inch thickness. This ensures they cook evenly and develop that crispy crust. Season both sides generously with ½ teaspoon kosher salt and ¼ teaspoon ground black pepper—this initial seasoning gets locked in during breading.
Place the 1 cup all-purpose flour in a shallow dish and set up three more dishes: one with the 2 whole large eggs beaten with ½ teaspoon kosher salt, and one with the 1.5 cups Italian seasoned breadcrumbs. I like to use panko-style breadcrumbs for extra crunch. Dredge each chicken breast first in flour, then egg wash, then breadcrumbs, pressing gently to help the coating adhere. Let them rest on a wire rack for 10 minutes—this helps the breading set up better.
Assemble the Parmesan Layers
Preheat your oven to 425°F and line a baking sheet with parchment paper. Place each breaded chicken breast on the prepared sheet. Tear 8 oz fresh mozzarella cheese into small, even pieces and place 2 ounces on top of each chicken breast. Sprinkle each with 1 tablespoon freshly grated parmesan cheese—this creates that signature melted cheese blanket when baked.
Here's the thing—don't skip the parmesan on top. It acts as a glue that helps hold everything together while adding that salty, umami punch. If your mozzarella is low-moisture, it'll melt more smoothly and create fewer greasy spots on your crust.
Bake Until Golden and Cheesy
Bake the chicken for 20 minutes to let the breading get crispy and the cheese start melting. After 20 minutes, remove the chicken from the oven and increase the heat to 450°F. This broiling step is crucial—it finishes the crust in 3-5 minutes until it's deep golden brown with spots of caramelization.
Watch carefully during this final minute—you want that perfect balance of crispy crust and gooey cheese. If the cheese starts to bubble over too much, you can tent the pan with foil for the last 30 seconds to prevent burning while still getting that crispy finish.
Prepare the Marinara Sauce
While the chicken is baking, heat ¼ cup extra-virgin olive oil in a saucepan over medium heat. Add the 3 minced garlic cloves and sauté for 30 seconds until fragrant—don't let it brown or it'll turn bitter. Pour in the 1 can San Marzano crushed tomatoes, 1 teaspoon dried oregano, ½ teaspoon kosher salt, and ¼ teaspoon dried red pepper flakes (if using). Simmer uncovered for 15-20 minutes until the sauce thickens slightly. Stir in the ¼ cup chopped fresh basil leaves just before serving to keep them vibrant.
This sauce should be chunky but smooth enough to coat the back of a spoon. If it's too thick, add 1-2 tablespoons water to loosen it. The acidity from the tomatoes helps cut through the richness of the cheese and chicken.
Serve with Fresh Marinara
Let the baked chicken rest for 5 minutes before slicing—this helps the cheese set slightly and makes for cleaner slices. Serve each portion topped with a generous spoonful of the warm marinara sauce. The contrast between the crispy breaded crust, melted mozzarella, and tangy tomato sauce is what makes this dish so satisfying.
For extra presentation, garnish with additional chopped fresh basil leaves and a sprinkle of freshly grated parmesan cheese. The breadcrumbs should be crispy enough to crunch between your teeth, while the chicken inside remains juicy and tender. Serve immediately with a side of garlic bread or a simple arugula salad to balance the richness.
Pro Tips For Making Baked Breaded Chicken Parmesan
- USE COLD CHICKEN: I learned this the hard way—skipping this step means soggy breading. Pat the chicken dry, then refrigerate the cut breasts for 20-30 minutes before breading. The cold temperature firms up the protein so it holds the coating better, even when baking.
- PRESS HARD ON BREADCRUMBS: Don’t just sprinkle those Italian seasoned breadcrumbs—press them firmly onto each piece of chicken, using the palm of your hand. This locks the crumbs in place so they don’t slide off during baking (yes, even if it looks like you’re sculpting).
- BAKE IN TWO BATCHES: Crowding the pan is how you end up with uneven cooking and a sad, limp crust. Use two sheets at once—space the chicken at least 1 inch apart—and bake in batches if needed. Your future self will thank you for crispy, golden results.
- SALT THE FLOUR MIX: The breading mix is where flavor hides. Toss your all-purpose flour with 1 teaspoon of salt before dredging the chicken—it seasons the coating and prevents bland bites. Skip this, and you’re basically missing half the flavor.
Health benefits of this dish
Protein Powerhouse
This dish delivers a solid 40 grams of protein per serving—perfect for muscle repair and keeping you full for hours. The chicken breast is lean but packed with essential amino acids, while the cheese adds extra staying power. I always feel energized after eating this, especially when I'm prepping for a busy day. The breading might look heavy, but it's mostly crispy air and flavor, not extra calories. 💪
Balanced Nutrition
While it's a comfort food, this recipe includes fiber from the tomato sauce and healthy fats from the olive oil. The San Marzano tomatoes provide vitamin C and lycopene, an antioxidant that supports heart health. I like to think of this as a sneaky way to get nutrients while enjoying something delicious. The cheese does add saturated fat, but the lean chicken balances it out nicely.
Calcium Boost
The 8 oz of mozzarella and ½ cup Parmesan provide about 40% of your daily calcium needs—important for bone health and muscle function. This is particularly valuable if you're not getting enough dairy in your diet. I always keep these cheeses on hand because they're such easy ways to boost nutrition without trying too hard. The calcium also helps balance the phosphorus from the chicken.
Low-Carb Option
If you're watching carbs, you can reduce the breadcrumbs to 1 cup total (about ¼ cup per piece) without sacrificing much flavor. The sauce still provides that satisfying tang, and the cheese remains the star. I've made this version for dinner parties when guests need lower-carb options—it works surprisingly well. Just be sure to use panko-style breadcrumbs for maximum crunch even with less quantity.
Meal Prep Friendly
The components store well for easy assembly later: bread the chicken ahead and refrigerate (up to 1 day), prep the sauce in advance (it tastes better the next day), and keep the cheese ready to go. This makes it perfect for busy weeknights when you want restaurant-quality results with minimal effort. I often prep components on Sundays so I can assemble and bake during the week. The cheese stays fresh longer if you wrap it tightly in plastic wrap.
Kid-Approved Nutrition
This dish sneaks in nutrition kids actually enjoy—they get protein, calcium, and vitamins without realizing they're eating "healthy." The breading makes it fun to eat, while the cheese and sauce add appeal. I've used this to get my nephews to eat more vegetables by serving it with a side of roasted broccoli or carrot sticks. The crispy texture is especially appealing to picky eaters. 🍽️
Nutrition facts
Frequently asked questions
Can I use chicken thighs instead of breasts for this recipe?
Chicken thighs work beautifully and stay juicier than breasts. Use bone-in, skin-on thighs for extra flavor, but remove the skin before breading. Increase baking time to 25-30 minutes at 425°F and broil for 5 minutes at the end. The higher fat content makes them more forgiving if slightly overcooked.
How do I get the breading to stay crispy after baking?
The double-dredging technique is key—flour, egg wash, then breadcrumbs. Let the breaded chicken rest on a wire rack for 10 minutes before baking to help the coating set. For extra crispiness, bake on a wire rack over a baking sheet instead of directly on parchment paper. Also, avoid opening the oven door during the first 20 minutes of baking.
What's the best way to reheat leftovers?
Reheat in a 375°F oven for 10-12 minutes on a baking sheet until the breading is crispy again. For a quick fix, use the air fryer at 350°F for 3-4 minutes. Microwaving makes the breading soggy—never do that! The cheese may separate slightly when reheated, but it's still delicious.
Can I make this dish ahead of time?
Yes, but with a few adjustments. Bread the chicken and refrigerate it (unbaked) for up to 24 hours. When ready to bake, let it sit at room temperature for 30 minutes first. The sauce can be made 2 days ahead and tastes even better after flavors meld. Assemble and bake fresh for the best texture, though.
What if my mozzarella is too watery and makes the breading soggy?
Use low-moisture mozzarella from a block instead of pre-shredded. If you must use fresh mozzarella, pat it dry with paper towels before adding it to the chicken. For pre-shredded cheese, squeeze out excess liquid by placing it in a clean kitchen towel and pressing gently. This prevents a soggy crust while keeping the cheese melty inside.