
Main Courses
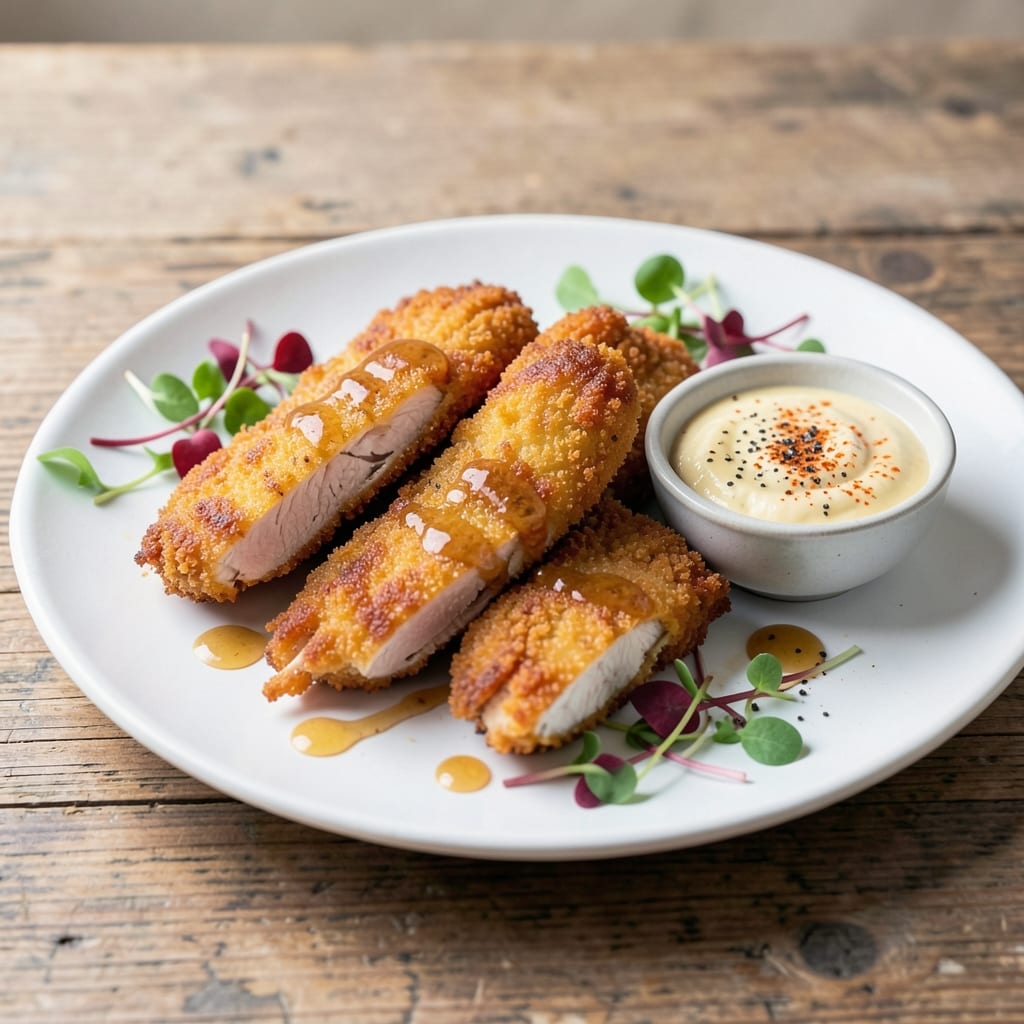
This baked buttermilk chicken tenders recipe delivers the perfect balance of crispy golden edges and juicy centers—no deep fryer required. 💛 After years of testing, I've perfected a method that guarantees restaurant-quality results with simple pantry staples and just 30 minutes of active time. The secret? A buttermilk marinade that tenderizes while creating that signature crispy texture when baked.
The process is straightforward but precise: pound the chicken to even thickness, marinate in buttermilk and spices, then coat in a light cornstarch mixture before baking. This technique ensures every bite stays tender while developing that irresistible golden crust. I've made these for family dinners, game days, and even as a quick weeknight meal—always with rave reviews.
What you'll end up with is a plate of crispy tenders that hold their shape perfectly, with juicy meat that practically melts in your mouth. The buttermilk marinade adds subtle tanginess that complements the crispy exterior beautifully. Serve with honey mustard dipping sauce, ranch, or even a simple lemon aioli for the ultimate comfort food experience.
These tenders reheat beautifully too, making them perfect for meal prep or feeding a crowd. The recipe scales easily, and leftovers keep well in the refrigerator for up to 3 days. Whether you're cooking for picky eaters or hosting a game night, this method delivers consistent, crowd-pleasing results every time.
Ingredients for baked buttermilk chicken tenders
Simple pantry staples transform into restaurant-quality crispy tenders with juicy centers—no deep fryer needed!
| Ingredient | Amount | Notes |
|---|---|---|
| Boneless, Skinless Chicken Breast 🍗 | 1 ½ lb | Pounded to even 1/4-inch thickness |
| Buttermilk 🥛 | 1 cup | Full-fat for optimal tenderness |
| All-Purpose Flour 🌾 | 1 cup | For breading mixture |
| Cornstarch 🌾 | ½ cup | Light coating for crispiness |
| Granulated Garlic Powder 🧄 | 1 tbsp | Freshly ground preferred |
| Paprika 🌶️ | 1 tbsp | Smoked or sweet variety |
| Ground Black Pepper 🌶️ | ½ tsp | Freshly cracked for best flavor |
| Diamond Crystal Kosher Salt 🧂 | 1 tsp | For seasoning marinade |
| Extra-Virgin Olive Oil 🫒 | 1 tbsp | For greasing baking sheet |
| Fresh Lemon Juice 🍋 | 1 tbsp | Brightens the marinade |
| Unsalted Butter 🧈 | 2 tbsp | Melted for brushing tenders |
| Cornmeal 🌾 | ¼ cup | Optional for extra crunch |
The chicken breast is the foundation—look for plump, evenly sized pieces at the meat counter. Costco or Whole Foods carry high-quality cuts, but any grocery store's fresh chicken works. Pounding to even thickness ensures perfect cooking—1/4-inch is ideal. For the buttermilk, full-fat is non-negotiable—it delivers that signature tangy crunch. If you're short on time, substitute plain yogurt with 1 tbsp lemon juice, but buttermilk gives the best texture. The cornstarch creates that irresistible crispiness without deep frying, and Bob's Red Mill brand is my go-to for consistency.
No cornstarch? All-purpose flour works in a pinch, but you'll lose that signature crunch. Short on buttermilk? Mix 1 cup milk with 1 tbsp vinegar or lemon juice—let it sit 5 minutes to curdle. For extra flavor, add 1 tsp onion powder or 1/2 tsp cayenne to the marinade. The smoked paprika adds depth, but regular paprika works too. Pro tip: Pat the chicken completely dry before marinating—this ensures maximum crispiness. And if you're feeling fancy, mix in 1 tsp honey with the lemon juice for a subtle caramelized touch.
Marinated chicken keeps in the fridge for up to 24 hours, but fresh is always best. The cornstarch mixture stays crispy for 2 hours at room temperature before baking—set it up right before you're ready to cook. Leftovers reheat beautifully in a 350°F oven for 10-12 minutes—just cover with foil to prevent drying. For meal prep, portion into airtight containers with a paper towel to absorb moisture. These reheat even better the next day, making them perfect for game day or quick weeknight meals.
Why You'll Love This Recipe
- Fewer Messy Steps: I swear by the buttermilk marinade—just toss the chicken in a bowl, pour in that tangy liquid, and let it sit. No chopping, no frying, no flipping. The cornstarch in the coating gives it that golden crunch without deep-frying drama.
- Crispy-Creamy Magic: That buttermilk tenderizes the chicken inside while the flour-cornstarch mix creates a shatteringly crisp exterior. Honestly, the garlic powder isn’t just for flavor—it makes the crust taste like it’s been kissed by something fancy.
- Game for Any Meal: Serve them with honey mustard for a quick lunch, toss them into a pasta for dinner, or pack them for school lunches. Between us, they’re the only thing my picky teen will eat after soccer practice.
- Leftovers That Don’t Suck: Bake a big batch, and they stay crispy for days in the fridge—no soggy nightmares. I reheat them in the oven for two minutes, and they’re basically as good as fresh. Budget win: chicken breast is cheap, and this recipe stretches it far.
Step-by-step instructions for crispy buttermilk chicken tenders
Here's how to achieve that perfect golden crust with tender, juicy chicken every time.
👨🍳 Step 1: Marinate the Chicken in Buttermilk Magic
Cut the 1.5 lb boneless, skinless chicken breast into 1-inch thick strips (about 12-15 tenders). Place them in a shallow dish and pour the 1 cup buttermilk over the top. Add 1 tbsp fresh lemon juice, 1 tbsp granulated garlic powder, 1 tbsp paprika, ½ tsp ground black pepper, and 1 tsp kosher salt. Stir gently to coat the chicken evenly.
Let the chicken marinate in the refrigerator for at least 2 hours (overnight works even better). This step is non-negotiable—it tenderizes the meat and creates that signature crispy crust. The buttermilk's acidity breaks down proteins, while the spices infuse flavor deep into each tender.
🍳 Step 2: Create the Crispy Breading Station
In a large bowl, whisk together 1 cup all-purpose flour and ½ cup cornstarch (this combo gives you that perfect crispiness). In another bowl, mix ¼ cup cornmeal (for extra crunch) with 1 tbsp paprika and ½ tsp black pepper. Set up a breading station with three shallow dishes: one for flour mixture, one for cornmeal mix, and one for any excess.
I like to dip each marinated tender into the flour first, letting any excess drip off, then into the cornmeal mix, pressing gently to adhere. Double-coating ensures maximum crispiness without making the tenders too thick. Work quickly but carefully—wet chicken breads best when handled gently.
🔥 Step 3: Prep and Bake for Perfect Crispiness
Preheat your oven to 425°F and line two baking sheets with parchment paper. Lightly grease the sheets with 1 tbsp extra-virgin olive oil—this prevents sticking and helps create that golden crust. Arrange the breaded tenders in a single layer, leaving 1 inch between each piece for even browning.
Bake for 12-15 minutes, flipping halfway through at the 8-minute mark. You'll know they're done when the edges are deep golden brown and the internal temperature reaches 165°F. The cornmeal will give you that extra crunch while the buttermilk marinade keeps the centers juicy and tender.
🥘 Step 4: Finish with Melted Butter Brilliance
While the tenders bake, melt 2 tbsp unsalted butter in a small saucepan over low heat. Once melted, remove from heat and let it cool slightly. After baking, transfer the tenders to a wire rack and brush each piece with the melted butter while still hot.
This final step is what takes these tenders from good to spectacular—the butter adds richness and helps set that perfect crispy crust. Serve immediately with your favorite dipping sauces (honey mustard, ranch, or spicy mayo all work perfectly) while they're still piping hot and crispy.
Pro Tips For Making Baked Buttermilk Chicken Tenders
- USE COLD CHICKEN: Pull the chicken breasts straight from the fridge—no thawing needed. Cold chicken holds its shape better during baking, so you won’t end up with sad, flattened tenders. Plus, it crisps up faster when it hits the oven.
- WHISK THE BUTTERMILK: Give that buttermilk a good stir before dipping—it separates over time, and you want a smooth, even coating. A few extra seconds with a fork makes a real difference in how the flour sticks and the crust turns out.
- DON’T OVERMIX THE BATTER: Dip, turn once, and let the excess drip off. Stirring the battered chicken like crazy just turns it into gluey, dense clumps. A quick shake over the bowl keeps it light and crispy.
- BAKE IN BATCHES: Crowd the tray, and you’ll steam instead of crisp. Work in single layers with space between tenders—even if it means two trips to the oven. Trust me, the wait is worth the golden, crunchy result.
Flavor customization for this dish
Spicy Kick
For a fiery twist, add ½ teaspoon cayenne pepper or 1 teaspoon hot sauce (like Cholula) directly to the buttermilk marinade. This subtle heat enhances the crispy exterior while keeping the centers tender. I love adding a pinch of smoked paprika too—it deepens the flavor without overpowering. 🌶️
Sweet & Tangy
Balance the richness with a touch of sweetness by mixing 1 tablespoon honey or maple syrup into the buttermilk marinade. The caramelized notes complement the crispy texture beautifully. For extra brightness, add 1 teaspoon Dijon mustard—it adds a tangy depth that pairs perfectly with the buttermilk.
Herbaceous Twist
Infuse fresh herbs like Italian parsley or thyme into the marinade for an aromatic touch. Finely chop 2 tablespoons fresh herbs and mix them into the buttermilk before marinating the chicken. The herbs add a subtle earthiness that elevates the dish without overwhelming the crispy crust. 🌿
Cheesy Crunch
For a decadent variation, sprinkle ¼ cup shredded Parmesan cheese over the cornmeal mix before pressing it onto the tenders. The cheese adds a savory crunch that pairs wonderfully with the buttermilk marinade. I recommend using Parmigiano-Reggiano for its rich, nutty flavor.
Smoky BBQ
Transform these tenders into a smoky BBQ-inspired dish by adding 1 tablespoon BBQ seasoning (like Montana BBQ) to the cornmeal mix. Serve with a side of honey BBQ sauce for dipping. The smoky, sweet flavors create a delicious contrast to the crispy exterior.
Citrus Zing
Brighten up the tenders with a burst of citrus by adding 1 tablespoon fresh orange juice or lemon zest to the marinade. The citrus cuts through the richness and adds a refreshing twist. Garnish with a sprinkle of zest before serving for an extra pop of flavor. 🍊
Nutrition facts
Frequently asked questions
Can I use chicken thighs instead of breasts for this recipe?
Yes, but you'll need to adjust the cooking time. Chicken thighs are more forgiving and stay juicier, so bake them for 18-20 minutes at 400°F instead of 425°F. The skin will crisp up beautifully without drying out the meat. Just skip the pounding step—thighs are naturally thicker and don't need even thickness for perfect results.
Why did my tenders turn out soggy instead of crispy?
Soggy tenders usually happen when the chicken isn't fully dried before breading or when overcrowding the pan. Always pat the chicken completely dry after marinating, and arrange them 1 inch apart on the baking sheet. Also, avoid stacking them during baking—this traps steam and prevents crispiness. For extra crunch, broil for 1-2 minutes at the end if needed.
How can I make this recipe gluten-free?
Replace the all-purpose flour with 1 cup gluten-free flour blend (like Bob's Red Mill 1:1) and use ½ cup cornstarch for the coating. The cornmeal can stay as-is since it's naturally gluten-free. For best results, use a blend with xanthan gum—it helps mimic the binding properties of regular flour and ensures the coating sticks properly.
Can I bake these ahead of time for a party?
Bake the tenders up to 2 hours ahead and keep them warm in a 200°F oven on a wire rack. To refresh the crispiness, broil for 2-3 minutes before serving. For even better results, reheat in a 375°F oven for 5-7 minutes—this maintains moisture while restoring that golden crust. Serve with warm dipping sauces to keep everything fresh.
What's the best way to store leftovers?
Store leftovers in an airtight container with a paper towel on top to absorb any moisture. They'll stay fresh in the refrigerator for 3-4 days. To reheat, place tenders on a baking sheet and bake at 375°F for 8-10 minutes until heated through. For microwave reheating, cover with a damp paper towel and heat for 20-30 seconds—this helps restore some crispiness.