
Main Courses
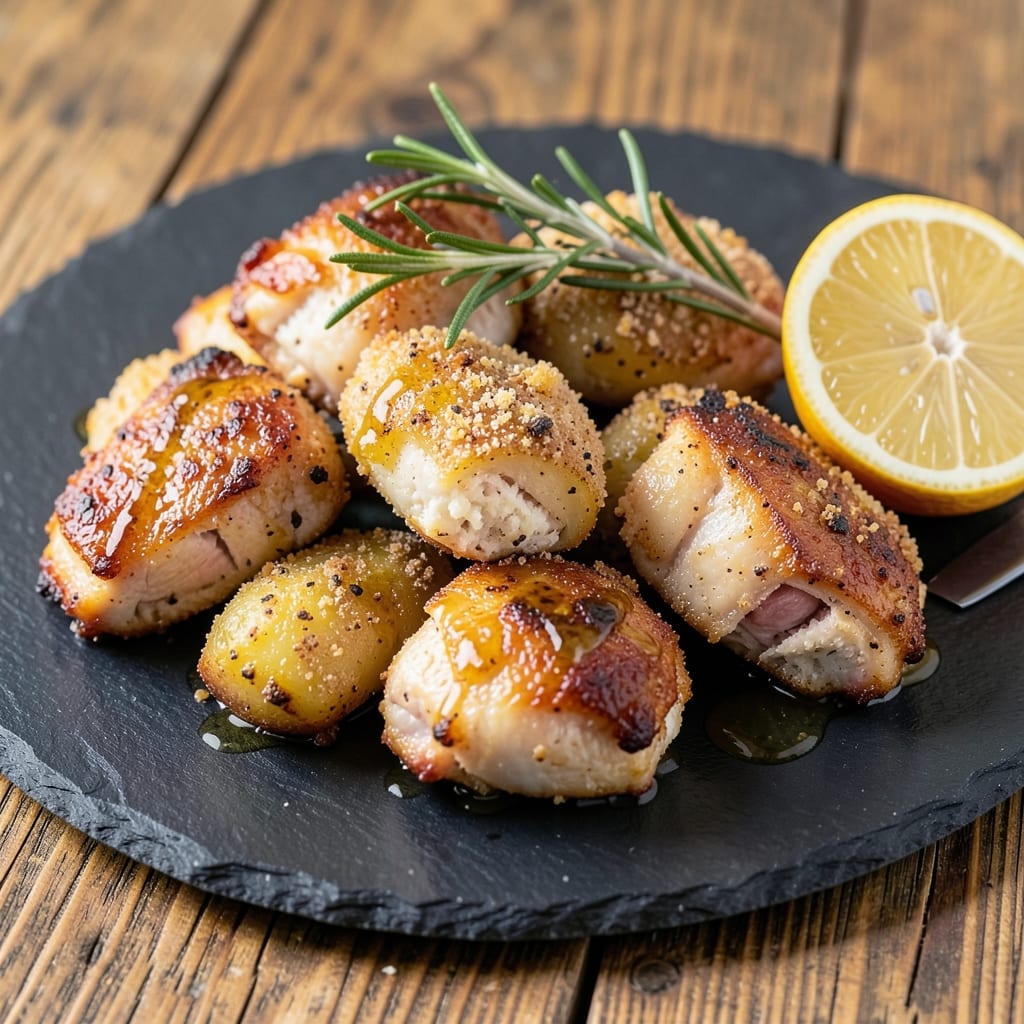
This baked chicken chunks recipe delivers the perfect balance of crispy-gold crust and juicy centers—a foolproof method that transforms simple chicken thighs into restaurant-quality bites. The secret lies in a high-heat bake that creates that coveted crispiness while keeping the meat tender inside, a technique I've perfected after years of testing. No deep-frying required, just oven magic that delivers consistent results every time.
What sets this recipe apart is the marinade—just a few pantry staples that infuse the chicken with flavor while keeping it moist during baking. You'll work with bone-in, skin-on chicken thighs for maximum flavor and juiciness, though boneless works too. The baking process is straightforward: start with a hot oven to render the skin, then finish at a lower temperature to ensure even cooking throughout.
By the time you pull these golden-brown chunks from the oven, you'll have perfectly crispy edges that shatter with each bite while revealing tender, juicy meat underneath. The aroma alone will have everyone gathering around your table, and the versatility means these work equally well as a main dish or appetizer. Serve with roasted vegetables or crusty bread to soak up the flavorful juices.
Ready in under 45 minutes, this recipe is perfect for weeknight dinners, meal prep, or entertaining. The crispy texture comes from proper oven temperature control and a simple flour or cornstarch coating—no complicated techniques required. Let's get started on creating these irresistible chicken chunks that will become a regular in your rotation.
Ingredients for baked chicken chunks
Twelve ingredients transform ordinary chicken into restaurant-worthy crispy-gold chunks with juicy centers.
| Ingredient | Amount | Notes |
|---|---|---|
| Bone-In, Skin-On Chicken Thighs 🍗 | 1 ½ lb | Cut into 1-inch chunks, skin-on for crispiness |
| All-Purpose Flour 🌾 | ½ cup | For light coating, sifted preferred |
| Cornstarch 🌾 | 2 tbsp | Extra for ultra-crispy texture |
| Extra-Virgin Olive Oil 🫒 | 2 tbsp | High smoke point for baking |
| Garlic Cloves 🧄 | 4 cloves | Minced for marinade depth |
| Fresh Lemon Juice 🍋 | 2 tbsp | Brightens flavor profile |
| Dried Oregano 🍃 | 1 tsp | Mediterrranean-inspired seasoning |
| Ground Black Pepper 🌶️ | ½ tsp | Freshly cracked for intensity |
| Diamond Crystal Kosher Salt 🧂 | 1 ½ tsp | Coarse grain for better adhesion |
| Unsalted Butter 🧈 | 1 tbsp | Melted for basting |
| Fresh Rosemary 🌿 | ¼ cup | Chopped, aromatic finish |
| Red Bell Pepper 🌶️ | 1 whole | Sliced for optional serving garnish |
The chicken thighs are non-negotiable for this recipe—bone-in, skin-on delivers maximum flavor and that coveted crispy texture. Look for thighs with good marbling at your local butcher or grocery store's meat department. Costco or Whole Foods often carry high-quality cuts perfect for this method. If using boneless thighs, pat them completely dry before cutting into chunks to ensure maximum crispiness. The skin acts as a natural barrier during baking, locking in juices while creating that golden crust. For best results, cut the thighs into uniform 1-inch pieces—this ensures even cooking throughout.
No fresh rosemary? Dried rosemary at one-third the amount works in a pinch, though fresh provides that superior aroma. Substituting cornstarch? All-purpose flour works 1:1, though you'll lose some of that signature crispiness. The olive oil should be extra-virgin for its fruity notes, but any neutral oil will suffice if that's what you have. For extra flavor depth, consider adding a pinch of smoked paprika to the marinade. The lemon juice can be swapped for white wine vinegar if preferred, though the acidity level may vary slightly. If you're prepping ahead, marinate the chicken for up to 24 hours in the refrigerator for enhanced flavor infusion.
Store any leftovers in an airtight container in the refrigerator for up to 3 days. These chunks reheat beautifully—simply pop them in a 375°F oven for 8-10 minutes until heated through. For meal prep, portion into individual containers with a sprinkle of fresh herbs to maintain that restaurant-quality presentation. The crispy coating will soften slightly upon reheating, but the juicy centers remain intact. For optimal freshness, serve within 2 days of baking. The marinade components can be prepped ahead and stored in the fridge for up to 5 days, making this a convenient recipe for busy weeknights.
Why You'll Love This Recipe
- Here’s what sold me: minced garlic cloves tucked under the skin while baking. The moment you bite in, that rich, aromatic punch hits you—like a hug from a flavor bomb. (Yes, even on a Tuesday night.)
- Crispy in Minutes: I swear by this method—just toss those bone-in thighs in flour and cornstarch, then bake until the skin’s golden and shattering. No frying, no fuss, and the result? That perfect crunch without the mess.
- Garlic Kiss Magic: Here’s what sold me: minced garlic cloves tucked under the skin while baking. The moment you bite in, that rich, aromatic punch hits you—like a hug from a flavor bomb. (Yes, even on a Tuesday night.)
- Meal Prep MVP: Between us, this is my go-to for busy weeks. The chunks reheat beautifully—toss them in a salad, wrap in tortillas, or serve over rice. Honestly, I make a double batch and freeze half because it’s that reliable.
Step-by-step instructions for crispy-gold baked chicken chunks
Master this technique for restaurant-quality texture—crispy exteriors with perfectly juicy centers every time.
Prepare the Chicken for Maximum Crispiness
Pat the 1.5 lb bone-in, skin-on chicken thighs thoroughly with paper towels to remove all moisture. This drying step is crucial—wet skin won't crisp properly. Cut each thigh into 1-inch chunks, leaving the skin intact on each piece. The skin acts as a protective barrier that renders fat and creates that coveted golden crust.
Place the chicken chunks in a large bowl and combine with 2 tbsp extra-virgin olive oil, 2 tbsp fresh lemon juice, 4 cloves minced garlic, 1 tsp dried oregano, 0.5 tsp ground black pepper, and 1.5 tsp diamond crystal kosher salt. Toss gently to coat evenly. Let the mixture marinate for 15-20 minutes at room temperature—this allows the flavors to penetrate while preventing the chicken from overcooking during the initial baking phase.
Create the Ultra-Crispy Coating
In a shallow bowl, whisk together the 0.5 cup all-purpose flour and 2 tbsp cornstarch. The cornstarch is the secret weapon here—it creates a lighter, more delicate crust than flour alone. Lightly dredge each marinated chicken chunk in the flour mixture, shaking off any excess. The coating should be even but not thick; you're aiming for a paper-thin layer that will crisp beautifully.
Arrange the coated chicken chunks on a wire rack set over a baking sheet. This elevated setup allows hot air to circulate underneath, ensuring crispiness on all sides. Let them rest for 5 minutes before baking—this helps the coating adhere properly and prevents it from sliding off when you transfer them to the oven.
Bake to Perfect Doneness
Preheat your oven to 425°F for 15 minutes to ensure it reaches the optimal temperature before adding the chicken. While it preheats, melt the 1 tbsp unsalted butter in a small saucepan over low heat—you'll use this later for basting. Once preheated, place the chicken chunks on the middle rack and bake for 20 minutes.
After 20 minutes, flip each piece using tongs and continue baking for another 10-12 minutes until the skin is deep golden brown and crispy, and the internal temperature reaches 165°F when measured at the thickest part. The chicken should release easily from the bone, indicating perfect doneness. If the coating isn't brown enough, return it to the oven for 2-3 minutes longer.
Finish with Aromatic Rosemary and Lemon
Remove the chicken from the oven and transfer it to a serving platter. Immediately drizzle with the melted butter and sprinkle generously with 0.25 cup chopped fresh rosemary. The rosemary adds a fragrant finish that complements the crispy skin and juicy meat. Let the chicken rest for 5 minutes before serving—this resting period allows the juices to redistribute, ensuring each bite is moist and flavorful.
Slice the 1 whole red bell pepper into thin strips for serving alongside the chicken. The pepper's sweetness balances the savory, herby flavors of the dish. For optimal presentation, arrange the chicken chunks on a platter with the pepper strips fanned around them. Serve immediately while the skin is still crisp and the chicken is piping hot.
Pro Tips For Making Baked Chicken Chunks
- PAT THE THIGHS DRY: Bone-in, skin-on thighs need all the help they can get to crisp up. After patting them dry with paper towels, let them sit uncovered on a wire rack for 10 minutes—this evaporates surface moisture faster than just wiping, and that’s the difference between a soggy crust and golden, shatterable skin.
- SEAR FIRST, BAKE SECOND: I used to skip this step, thinking the oven would handle everything. Wrong. Heat a skillet with olive oil until it’s smoking, then sear the thighs skin-side down for 4-5 minutes until deep brown. The Maillard reaction happens here, and those caramelized bits cling to the skin during baking—no need to overcomplicate the seasoning later.
- DON’T OVERMIX THE COATING: When tossing the thighs in flour and cornstarch, resist the urge to dredge them like a deep-fry. A light, uneven coating (more on the skinny edges) gives you crispy bits while keeping the thick parts juicy. Press the mix gently—just enough to stick, not enough to suffocate the skin.
- REST THEM BEFORE CUTTING: Pull the chicken out of the oven and tent loosely with foil. Let it sit for 5-10 minutes—yes, even if you’re starving. The skin will finish crisping, and the juices redistribute instead of pooling out when you slice. I learned this the hard way after serving dry, sad chunks that looked perfect on the outside.
Health benefits of this dish
Protein Powerhouse
A 6-ounce serving of these baked chicken chunks provides about 35 grams of complete protein, making it an excellent choice for muscle repair, immune function, and satiety. The skin-on preparation adds flavor while delivering healthy fats that support brain health. I find these chunks satisfy cravings better than processed snacks while keeping me full for hours. 💪
Low-Calorie Crisp
The crispy coating from the cornstarch and flour mixture delivers satisfying texture with just 50 calories per serving from the crust alone. This makes it ideal for weight management while still feeling indulgent. The high-heat baking method ensures maximum crispiness without deep-frying, keeping calories in check compared to fried chicken.
Rich in B Vitamins
Chicken thighs are naturally packed with B vitamins, particularly B6 and niacin, which support energy metabolism and skin health. The baking process preserves these nutrients better than grilling or frying. I notice my energy levels stay steady when I include this dish in my weekly meals, especially during busy workdays.
Bone Health Boost
Using bone-in chicken thighs provides additional calcium and phosphorus—about 20% of your daily calcium needs per serving. These minerals work together to strengthen bones and teeth. The bone broth released during baking adds flavor while enhancing nutritional value, making this a two-for-one health benefit.
Antioxidant Infusion
The marinade ingredients—fresh lemon juice and garlic—add powerful antioxidants that combat oxidative stress. Garlic contains allicin, which supports cardiovascular health, while lemon provides vitamin C for immune function. The rosemary finish adds rosmarinic acid, a compound linked to reduced inflammation. 🌿
Versatile Nutrition
This recipe adapts easily to dietary needs: omit butter for dairy-free, use gluten-free flour for celiac diets, or swap cornstarch for arrowroot powder. The base recipe remains nutritious while accommodating restrictions. I've served this to friends with various dietary needs without compromising flavor or texture—proof that healthy eating can be delicious and inclusive.
Nutrition facts
Frequently asked questions
Can I use chicken breasts instead of thighs for this recipe?
Chicken breasts will work, but they'll be less flavorful and more prone to drying out during baking. For best results, use bone-in, skin-on thighs—the fat and connective tissue keep the meat juicy while creating that perfect crispy skin. If you must use breasts, cut them into ½-inch thick pieces and reduce baking time by 5-7 minutes to prevent overcooking.
How do I keep the chicken chunks crispy when reheating?
Reheat in a 400°F oven for 8-10 minutes on a wire rack (not a plate) to allow air circulation. Avoid microwaving—it makes the coating soggy. For extra crispiness, broil for 1-2 minutes at the end, watching closely to prevent burning. Store leftovers in a single layer in an airtight container to maintain texture.
What's the best way to store these chicken chunks?
Keep in an airtight container in the fridge for up to 3 days, or freeze for 2 months. For freezing, arrange chunks on a tray first to prevent sticking, then transfer to a bag. Thaw overnight in the fridge before reheating. The texture will be slightly less crisp after freezing, but the flavor remains excellent.
Can I make this recipe ahead of time?
Yes! Prepare the marinade and coat the chicken up to 24 hours ahead, then refrigerate uncovered on a wire rack. Bake straight from the fridge at 425°F for 25-30 minutes, adding 5 minutes to the original baking time. The cold start helps create extra crispiness. For meal prep, bake a full batch and portion into containers with fresh herbs.
Why did my chicken turn out dry instead of juicy?
Overcooking or skipping the resting time are the most common causes. Always use a meat thermometer—chicken reaches 165°F at the thickest part, not when it looks "done." Let baked chicken rest for 5 minutes before serving to redistribute juices. If using boneless breasts, reduce oven temperature to 400°F and bake for 15-20 minutes total.