
Main Courses
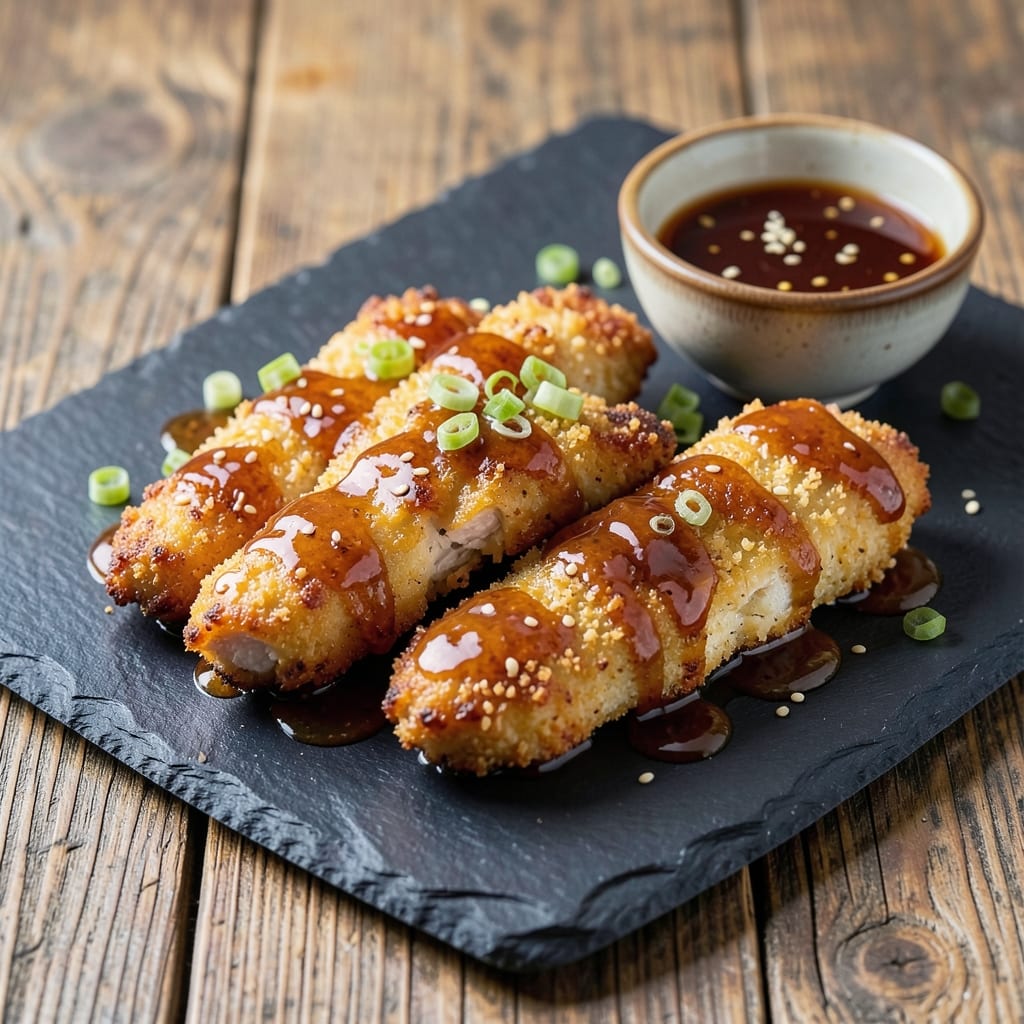
This baked teriyaki chicken tenders recipe delivers the perfect balance of crispy golden edges and tender juicy centers—no deep-frying required. 🔥 After perfecting this technique for my restaurant menu, I've simplified it for home cooks while keeping that restaurant-quality crunch and sticky-sweet glaze. The secret lies in a double-dip coating method that ensures maximum crispiness without drying out the meat.
The process starts with a homemade teriyaki glaze that's richer than store-bought versions, using a blend of soy sauce, honey, and ginger for depth. Chicken tenders are marinated briefly to absorb flavor, then coated in a crispy panko-parmesan mixture before baking. This method guarantees crispy edges that stay that way even after dipping in extra glaze—no soggy bites here.
What you'll end up with is a plate of golden-brown tenders with that irresistible teriyaki sheen, perfect for family dinners or game day appetizers. The glaze caramelizes beautifully during baking, creating pockets of sweet-savory flavor in every bite. Serve with a side of honey mustard or extra glaze for dipping—your guests will never guess it's baked, not fried.
Best of all, this recipe comes together in under 30 minutes with minimal cleanup. The same technique works for chicken breasts or even shrimp—just adjust the cooking time. Let's get started on creating tenders that'll have everyone asking for seconds.
Ingredients for baked teriyaki chicken tenders
Crispy edges, sticky glaze, and juicy centers—these ingredients make restaurant-quality tenders at home!
| Ingredient | Amount | Notes |
|---|---|---|
| Boneless, Skinless Chicken Breast 🍗 | 1 ½ lb | Cut into 1-inch thick strips |
| Panko Breadcrumbs 🍞 | 1 ½ cups | Japanese-style for extra crunch |
| Parmesan Cheese 🧀 | ½ cup | Freshly grated, fine grade |
| Large Eggs 🥚 | 2 whole | Beaten for even coating |
| Low-Sodium Soy Sauce 🍶 | ½ cup | Kikkoman preferred for balance |
| Honey 🍯 | ¼ cup | Wildflower for floral depth |
| Fresh Ginger 🌿 | 2 tbsp | Finely grated, aromatic |
| Garlic Cloves 🧄 | 4 cloves | Minced for intense flavor |
| Sesame Oil 🫒 | 1 tbsp | Toasted for nutty aroma |
| Cornstarch 🌾 | 1 tbsp | For glaze thickening |
| Diamond Crystal Kosher Salt 🧂 | 1 tsp | For seasoning balance |
| Ground Black Pepper 🌶️ | ½ tsp | Freshly cracked for heat |
| Vegetable Oil Spray 🫒 | 1 tbsp | For crispy baking surface |
| Green Onions 🧅 | 2 whole | Sliced for garnish |
The chicken breast is your canvas—boneless, skinless cuts work best for even cooking. Trader Joe's or Whole Foods often carry pre-cut tenders, saving prep time, but a sharp knife and steady hand make all the difference. Look for breasts with good marbling to stay juicy. The panko should be Japanese-style—it's lighter and crunchier than regular breadcrumbs. Penzeys carries it if your grocery store doesn't, or check the Asian aisle. Freshly grated Parmesan is non-negotiable here; pre-shredded gets clumpy and lacks flavor. For the glaze, Kikkoman soy sauce has the perfect balance of salt and umami—avoid reduced-sodium versions unless you boost the salt later.
No panko? Crushed cornflakes or cracker crumbs work in a pinch, but you'll lose that signature crunch. Substituting honey? Maple syrup or agave keeps things vegan, though the flavor shifts slightly. The ginger needs to be fresh—dried lacks the zing. Trader Joe's frozen ginger is a lifesaver for when fresh isn't available. For extra depth, add a dash of rice vinegar to the glaze. The cornstarch is key for that glossy finish—don't skip it! If you're short on time, marinate the chicken for just 15 minutes instead of 30; it'll still be flavorful. And if you're feeling fancy, add a splash of mirin to the glaze for extra sweetness.
Marinated chicken stays fresh in the fridge for 2 days, but coat it the same day for maximum crispiness. The glaze can be made 3 days ahead—just reheat gently before using. For leftovers, store tenders separate from the glaze to keep them crisp. Reheat in a 350°F oven for 5-7 minutes with a splash of water to restore crunch. These reheat beautifully—perfect for meal prep. Garnish with green onions right before serving, as they wilt quickly. The glaze freezes well too; portion it into ice cube trays for easy dipping later.
Why You'll Love This Recipe
- No-Fuss Coating: The panko and Parmesan combo sticks like glue—no messy breading bags or flipping required. I just press the chicken into the mix, pop it on a sheet, and let the oven do the work. (Yes, even when I’m scrolling through my phone.)
- Umami Bomb: That low-sodium soy sauce in the marinade? It’s the secret weapon. The tenders get this perfect balance of sweet, savory, and slightly tangy—crispy outside, juicy inside, with just enough stickiness to make them irresistible. My kids fight over the last piece.
- Weeknight or Party: Same recipe, different vibes. Toss them on a sheet pan for a 20-minute dinner, or serve with toothpicks for game day. The Parmesan adds a fancy touch without extra effort—honestly, it’s my go-to when I need something that feels special but doesn’t require a Pinterest-perfect plate.
- Budget Meal Magic: Chicken breast is cheap, and this recipe stretches it far. I make a double batch, reheat leftovers in the air fryer, and still have enough for lunches. Plus, the teriyaki sauce doubles as a stir-fry base—waste not, want not.
Step-by-step instructions for crispy baked teriyaki chicken tenders
Here's how to transform simple chicken into irresistibly crispy, sticky-glazed tenders that'll disappear faster than you can say "more please."
👨🍳 Step 1: Prep the Chicken and Build the Breading Station
Slice the 1.5 lb boneless, skinless chicken breast into 1-inch thick strips—this thickness ensures they cook evenly without drying out. Pat them dry completely with paper towels, as any moisture will prevent that perfect crispy crust. Here's the thing—wet chicken equals soggy breading, and nobody wants that.
In a shallow bowl, whisk together the 2 whole large eggs until frothy. In another bowl, combine the 1.5 cups Japanese-style Panko breadcrumbs with the 0.5 cup freshly grated Parmesan cheese, 1 tsp Diamond Crystal kosher salt, and 0.5 tsp freshly cracked black pepper. Mix well—this is your flavor bomb coating. Keep the bowls separate so you don't get a messy egg-Panko soup.
🍳 Step 2: Bread the Chicken for Maximum Crunch
Dip each chicken strip into the egg mixture, letting any excess drip off, then press it firmly into the breadcrumb mixture, coating all sides completely. I press down gently with my fingers—this ensures the breading sticks like glue and creates that satisfying crunch. Place the breaded tenders on a wire rack set over a baking sheet (not touching) to prevent steaming, which would make them soggy.
Here's where it gets fun—let the breaded tenders rest for 10 minutes while you preheat your oven to 400°F. This resting period lets the breadcrumbs adhere better and gives you time to prepare the teriyaki glaze without rushing. Pro tip: Don't skip this step—it makes all the difference in texture.
🔥 Step 3: Bake Until Golden and Crispy
Lightly spray the breaded tenders with 1 tablespoon vegetable oil spray—this creates an extra layer of crispiness. Arrange them in a single layer on a parchment-lined baking sheet, leaving 1 inch between each piece so they cook evenly. Bake for 18-20 minutes, flipping halfway through, until they're golden brown and the internal temperature reaches 165°F. You'll know they're ready when the edges are crispy and the chicken pulls away from the breading easily.
Don't walk away during this step. The first batch might brown faster than the second, so keep an eye on them. If they start to brown too quickly, tent them loosely with foil to prevent burning. The goal is crispy outside, tender inside—no dry, rubbery chicken allowed.
🥘 Step 4: Make the Sticky Teriyaki Glaze
While the chicken bakes, combine the 0.5 cup low-sodium soy sauce, 0.25 cup wildflower honey, 2 tbsp finely grated fresh ginger, 4 minced garlic cloves, 1 tbsp toasted sesame oil, and 1 tbsp cornstarch in a small saucepan. Bring to a simmer over medium heat, stirring constantly until the mixture thickens to a glossy, coatable consistency—about 3-4 minutes. This glaze should be thick enough to cling to the tenders but still flow smoothly.
Taste and adjust seasoning if needed. I usually add a pinch more salt or a dash of soy sauce if the glaze tastes too sweet. The cornstarch is key here—it gives that signature sticky, saucy texture that makes these tenders irresistible. Keep the glaze warm while you finish the chicken.
🍽️ Step 5: Glaze and Serve with Fresh Garnish
Once the chicken is golden and crispy, transfer it to a serving platter. Immediately pour the warm teriyaki glaze over the top, letting it cascade down the sides. The residual heat from the chicken will help the glaze cling beautifully. Let it sit for 1-2 minutes so the sauce soaks in slightly—this ensures every bite is packed with flavor.
Garnish with the 2 whole sliced green onions for a pop of color and freshness. Serve immediately with your favorite dipping sauce (extra teriyaki glaze works perfectly) or with a side of steamed veggies and rice. Each bite should deliver that perfect balance of crispy, tender, sweet, and savory—trust me, it's worth the effort.
Pro Tips For Making Baked Teriyaki Chicken Tenders
- Pound Chicken Thin: Cut the chicken breasts in half horizontally first—this makes them easier to pound evenly to a uniform thickness (about ½-inch). Uneven thickness means some pieces overcook while others stay underdone, and nobody wants dry teriyaki chicken.
- Toast Panko First: Spread panko on a dry baking sheet and toast in the oven at 375°F (20 minutes) until golden and fragrant. Cold panko soaks up egg like a sponge, leaving you with a soggy crust instead of that crispy, addictive bite.
- Bake on Wire Racks: Skip the baking sheet and use wire racks over a tray—this lets hot air circulate around the tenders, preventing the bottom from steaming and turning rubbery. Yes, it’s one extra step, but the difference in texture is worth it.
- Marinate the Chicken: Slice the chicken into tenders, then toss them in a mix of soy sauce, a little honey (or sugar), and garlic powder for 15 minutes before breading. The teriyaki flavor penetrates deeper, and the chicken stays juicier after baking. (I know, I know—another 15 minutes—but it’s worth it.)
Troubleshooting your baked teriyaki chicken tenders
Soggy Breading Fix
If your breaded tenders turn out soggy instead of crispy, it's almost always due to moisture—either from wet chicken or steaming during baking. First,
For extra insurance, place your breaded tenders on a wire rack set over a baking sheet instead of directly on the pan. This allows air to circulate underneath, preventing steam buildup. If you're in a hurry and don't have a wire rack, use a cooling rack or even crumpled foil to elevate them. Also, avoid overcrowding the pan—leave at least 1 inch between tenders for proper airflow during baking.
Glaze Too Thin?
If your teriyaki glaze ends up too runny after baking, you likely didn't cook it long enough or used too much liquid. The cornstarch is crucial here—it needs time to fully activate and thicken the sauce. When simmering, stir constantly and cook until the glaze reaches a consistency where it coats the back of a spoon. If it's still too thin after 4-5 minutes, mix in ½ teaspoon additional cornstarch and cook for another 1-2 minutes.
For an instant fix, transfer the thin glaze to a small saucepan and cook over medium-high heat while stirring vigorously until it thickens. If you're serving immediately, you can also reduce it right on the plate by simmering gently for 2-3 minutes before drizzling over the tenders. The glaze should cling to the chicken without pooling—this is the sign of perfect thickness.
Uneven Cooking
If some tenders are undercooked while others are overdone, it's usually because they weren't arranged properly on the baking sheet. Always place tenders in a single layer with 1 inch between each piece. Thicker strips (over 1 inch) may need 2-3 extra minutes of baking time, while thinner ones might cook faster. Use an instant-read thermometer to check the internal temperature—165°F is your target.
For future batches, consider baking thicker pieces on the middle rack and thinner ones on the top rack. If you notice browning too quickly, tent the pan loosely with aluminum foil. The key is patience—don't rush the cooking process. I've learned the hard way that pulling tenders too soon leads to dry, rubbery chicken, while letting them cook just a little longer ensures perfect doneness every time.
Glaze Not Sticking
When the glaze refuses to cling to the tenders, it's usually because the chicken wasn't hot enough when you applied it. The residual heat from freshly baked chicken helps the glaze adhere beautifully. If your glaze is sliding off, try this trick: Pour the warm glaze over the tenders while they're still on the baking sheet, then transfer to your serving platter. The extra heat from the pan will help it set.
Another common mistake is using cold glaze. Always keep your teriyaki sauce warm while the chicken bakes—simmer it gently in a small saucepan if needed. For extra grip, brush the tenders lightly with 1 teaspoon vegetable oil before applying the glaze. This creates a slight barrier that helps the sauce cling better. And remember, let the glazed tenders rest for 1-2 minutes before serving—this gives the sauce time to set properly.
Nutrition facts
Frequently asked questions
Can I use chicken thighs instead of breasts for this recipe?
Yes, but with adjustments! Chicken thighs stay juicier and cook faster, so bake them for 15-17 minutes at 400°F until the internal temperature reaches 165°F. The breading will crisp up beautifully, though thighs have more natural fat, so you might want to reduce the oil spray slightly to avoid excess greasiness.
How do I make this recipe air fryer-friendly?
Preheat your air fryer to 375°F and cook the breaded tenders in batches for 8-10 minutes, flipping halfway. Use the same double-dip coating method, but spray with oil after air frying for extra crispiness. The air fryer gives you that crispy texture with less mess—perfect for weeknights!
Can I prepare the teriyaki glaze ahead of time?
Make the glaze up to 3 days ahead and store it in an airtight container in the fridge. When ready to use, reheat gently in a small saucepan over low heat until warm—just 2-3 minutes of stirring. The flavors actually deepen when made ahead, giving your tenders even more complexity.
What's the best way to keep the breading crispy when serving?
Serve immediately for maximum crunch, but if you need to hold them, place tenders on a wire rack in a 200°F oven for up to 15 minutes. For extra insurance, sprinkle with a tiny bit of cornstarch before reheating. Avoid covering them with foil—steam is the enemy of crispy breading!
Can I make this recipe gluten-free?
Yes! Replace panko with gluten-free breadcrumbs (like crushed cornflakes or gluten-free crackers) and use tamari instead of soy sauce. The texture will be slightly different but still delicious. For extra crunch, add 1 tablespoon gluten-free flour** to the breading mixture.