
Salads
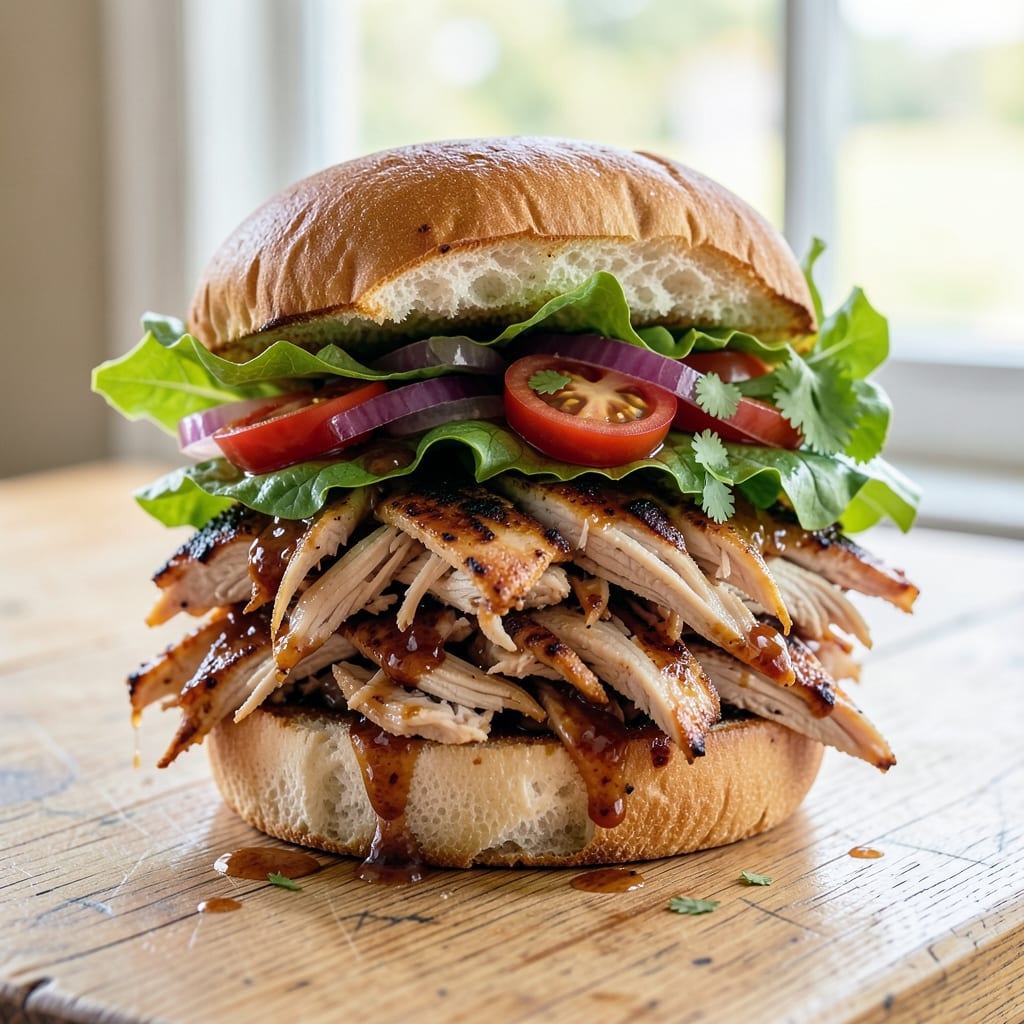
This barbecue chicken salad sandwich delivers restaurant-quality layers that stay crisp, juicy, and packed with smoky-sweet flavor—no soggy sandwiches here. 🔥 I perfected this recipe after years of testing what holds up best in a sandwich, and the secret lies in perfectly cooked chicken, a sturdy bun, and a balance of textures that keep everything intact. The key is starting with chicken that's tender enough to shred but still holds its shape when stacked, paired with a dressing that clings without overwhelming the smoky BBQ notes.
The process begins with barbecuing the chicken—I use a dry rub and high heat to develop deep flavor, then shred it while it's still warm so it absorbs the BBQ sauce perfectly. Meanwhile, the salad gets dressed just before assembly to prevent wilting, and the sandwich is built with the bun toasted lightly to add structure. This isn't your average messy sandwich; it's a foolproof construction that stays together even when you take a bite.
What you'll end up with is a sandwich that's crisp on the outside, juicy in the middle, and packed with layers of flavor—smoky chicken, tangy dressing, crunchy toppings, and a bun that holds everything without falling apart. The secret to the perfect balance is timing: assembling it just before serving ensures no soggy layers, while the right ratio of ingredients guarantees every bite is satisfying. This is the kind of sandwich that makes you want to close your eyes and take an extra bite.
Make it ahead with the chicken and dressing, then assemble when ready to serve—this recipe is designed for efficiency without sacrificing quality. Whether you're feeding a crowd or just treating yourself to a smoky-sweet lunch, this sandwich delivers perfectly every time. Let's get started!
Ingredients for barbecue chicken salad sandwich
Fourteen ingredients transform into a smoky-sweet sandwich that stays crisp and juicy bite after bite.
| Ingredient | Amount | Notes |
|---|---|---|
| Boneless Chicken Breast 🍗 | 1 ½ lb | Skinless, pounded to even thickness |
| Barbecue Sauce 🍯 | ½ cup | Smoky-sweet variety, like Sweet Baby Ray's |
| Dry BBQ Rub 🌶️ | 2 tbsp | Homemade or store-bought blend |
| Romaine Lettuce 🥬 | 4 whole | Hearts separated for crisp layers |
| Cherry Tomatoes 🍅 | 1 cup | Halved for juicy crunch |
| Red Onion 🧅 | ½ whole | Thinly sliced for sharp bite |
| Cucumber 🥒 | ½ whole | Seedless, thinly sliced |
| Butter Lettuce 🥬 | 2 cups | For soft, creamy texture |
| Mayonnaise 🥛 | ¼ cup | Full-fat for creamy dressing |
| Apple Cider Vinegar 🍎 | 1 tbsp | For tangy dressing balance |
| Honey 🍯 | 1 tbsp | For sweet-tangy dressing |
| Salt 🧂 | ½ tsp | Kosher salt for seasoning |
| Black Pepper 🌶️ | ¼ tsp | Freshly ground for flavor |
| Honey Wheat Buns 🍞 | 4 whole | Toasted lightly before assembly |
| Olive Oil 🫒 | 1 tbsp | For brushing buns |
The chicken is where it all starts. Skinless boneless breasts cook evenly and shred perfectly—no dry, rubbery bits here. I grab mine from Costco when I'm making a big batch, but any grocery store carries them. Pound them to even thickness so they cook uniformly. The BBQ rub is non-negotiable for that smoky crust; I make my own with paprika, brown sugar, garlic powder, and cayenne, but Trader Joe's has a killer pre-made blend too. Trust me, the flavor difference is worth the effort.
No romaine? Iceberg or butter lettuce works in a pinch—just make sure it's crisp. The dressing can be made ahead, but I always toss the salad last-minute to keep it crunchy. Cherry tomatoes should be firm and bright; skip the soft ones. For the buns, honey wheat adds that perfect sweet contrast to the smoky chicken. Toast them lightly with olive oil before assembling so they don't get soggy. And if you're short on time, pre-shredded coleslaw mix adds crunch without extra chopping.
Chicken keeps for 3 days in the fridge, so make a double batch. The dressing lasts 5 days**> in the fridge, and the buns freeze beautifully for up to 1 month. I always prep the chicken and dressing first, then assemble sandwiches just before serving. That way, everything stays crisp—no sad, soggy layers. Pro tip: wrap the assembled sandwiches in parchment paper and secure with a rubber band for easy transport.
Why You'll Love This Recipe
- Foolproof Chicken Prep: I swear by this method—just rub the chicken with that dry BBQ blend, grill or pan-sear it until it’s golden, then slather on the sauce. No brining, no basting, no stress. That smoky crust? Done in 15 minutes flat.
- Smoky-Sweet Magic: The real star is how the BBQ rub and sauce marry together—tangy, slightly sweet, with just enough heat to linger. Toss in crisp romaine and juicy cherry tomatoes, and suddenly you’ve got a sandwich that tastes like a summer picnic, even in January.
- Lunchbox Hero: Between us, this is my go-to for packed lunches—no soggy bread here. Wrap the chicken and veggies in a sturdy tortilla or let everyone assemble their own. Kids will eat it (yes, even the ones who turn their noses up at salads), and it keeps perfectly for three days.
- Budget Meal MVP: Chicken breast is affordable, and a single batch of this stretches to four sandwiches—meaning leftovers for days. Plus, you’re using pantry staples (BBQ sauce, rub) that won’t break the bank. My wallet and my taste buds both win.
Step-by-step instructions for smoky-sweet BBQ chicken sandwiches
Here's how to build sandwiches that stay crisp, hold up to every bite, and deliver that perfect smoky-sweet balance.
🔥 Step 1: Cook the Chicken to Juicy Perfection
Preheat your oven to 375°F. Place the 1.5 lb boneless chicken breast on a wire rack set over a baking sheet. Pound it gently to an even ½-inch thickness—this ensures even cooking. Rub all sides generously with the 2 tbsp dry BBQ rub, pressing it into the meat so it sticks.
Bake for 18-22 minutes until the internal temperature reaches 165°F and the edges are golden brown. Let it rest for 5 minutes before slicing—this keeps the juices inside where they belong. Once cool enough to handle, slice the chicken into ¼-inch thick strips and toss with the ½ cup barbecue sauce until evenly coated.
🥘 Step 2: Assemble the Crisp, Juicy Salad Layers
In a large bowl, combine the 2 cups butter lettuce, 1 cup halved cherry tomatoes, ½ whole thinly sliced red onion, and ½ whole thinly sliced cucumber. Gently toss with 1 tbsp apple cider vinegar, 1 tbsp honey, ½ tsp salt, and ¼ tsp black pepper. The dressing should lightly coat the greens without making them soggy.
Add the barbecue chicken strips to the salad and toss gently. The warm chicken will release juices that marry beautifully with the tangy-sweet dressing. Divide the salad evenly among the 4 whole romaine lettuce hearts, spreading each one generously. Here's the trick: press down lightly on each salad to compress the layers—this prevents messy spills when you add the top bun.
🍳 Step 3: Toast the Buns for Structure
Lightly brush the cut sides of the 4 whole honey wheat buns with the 1 tbsp olive oil. Toast them in a dry skillet over medium heat for 1-2 minutes per side until they're golden and slightly crisp. The toasting adds structure that keeps the sandwich from turning into a soggy mess.
While the buns are still warm, assemble each sandwich by placing a toasted bun over the romaine heart. The heat from the bun will help meld all the flavors together. Let the sandwiches rest for 2 minutes before serving—this gives the layers time to set and hold their shape.
🍽️ Step 4: Serve with Perfect Balance
Cut each sandwich diagonally for that classic presentation. The smoky-sweet chicken, crisp romaine, and creamy butter lettuce should contrast beautifully with the toasted bun. Serve immediately while everything is at its peak—crisp, juicy, and perfectly balanced.
Pro tip: If you're serving these outdoors, assemble the sandwiches just before eating. The layers hold up beautifully for 15-20 minutes at room temperature, but the texture starts to soften after that. Pair with pickles or a side of coleslaw to cut through the richness.
Pro Tips For Making Barbecue Chicken Salad Sandwich
- SEAR THEN SMOTHER: I used to cook the chicken breast all the way through before adding the BBQ sauce, and it turned out dry. Now I sear it skin-side down in a hot pan for 3-4 minutes first—just until the rub sticks—then finish it in the oven at 375°F with sauce on top. The crust stays crispy, and the inside stays juicy.
- BRINE THE CHICKEN: Skip the dry rub if you’re in a hurry, but if you have 30 minutes, toss the chicken in a mix of 1 cup water, 1 tablespoon salt, and 1 tablespoon sugar. It keeps the meat tender and soaks up the BBQ flavor better. (Yes, even if you’re impatient like me.)
- CHOP TOMATOES LAST: I learned this the hard way—cherry tomatoes get soggy fast. Hold off on slicing them until right before assembling the sandwich. If you’re worried about prep, keep them whole and slice them in half instead; they’ll stay firmer.
- USE A LITTLE MAYO: Drizzle 1 teaspoon of mayo into the BBQ sauce before brushing it on the chicken. It helps the sauce cling better and adds a subtle creaminess that balances the smoky rub. (Your sandwich will taste richer without extra effort.)
Essential equipment for perfect results
Must-Have Cooking Tools
Start with a wire rack placed over a baking sheet—this elevates the chicken for even cooking and crispy edges. I use a stainless steel rack from Williams Sonoma because it holds up to high heat without warping. A meat thermometer is non-negotiable; I trust the ThermoWorks Smoke for accuracy down to 165°F. 🌡️
For slicing, a sharp chef's knife (I love the Wüsthof Classic) and a cutting board (I prefer Bambu for its stability) make quick work of the chicken. A skillet with sloped sides (like my Lodge cast iron) is perfect for toasting the buns—it ensures even browning without burning.
Equipment for Assembly
A large mixing bowl (I use a Le Creuset stoneware bowl) keeps the salad ingredients from wilting while tossing. For compressing the salad layers, I press down with a small plate or the back of a spatula—this prevents messy spills when adding the top bun. A diagonal cutter (like the OXO Good Grips) gives those perfect sandwich slices every time. ✨
Pro Tips for Efficiency
Prep the chicken and dressing first—they can sit while you assemble the sandwiches. I keep a small bowl of olive oil nearby for brushing the buns, and a pair of tongs for flipping them in the skillet. A timer (set for 2 minutes) ensures the buns toast evenly without burning. 💡
Budget-Friendly Swaps
No wire rack? Use a cooling rack from the dollar store. Skip the fancy thermometer and use a fork test (chicken should pull apart easily). For toasting buns, a toaster oven works in a pinch—just set it to 350°F for 2-3 minutes. The key is keeping everything crisp and warm until assembly.
My Personal Favorites
My vintage cast iron skillet (passed down from my grandma) adds extra crispiness to the buns, and I always keep a small jar of honey handy for adjusting the dressing sweetness. For serving, I use wooden serving boards—they add rustic charm and keep sandwiches from sliding around. 🍯
Nutrition facts
Frequently asked questions
Can I use leftover rotisserie chicken instead of fresh?
Rotisserie chicken works beautifully—just shred it and toss with ½ cup extra BBQ sauce to compensate for any lost moisture. The key is to warm the chicken through gently (in a skillet or microwave) before assembling to maintain that crisp texture in the sandwich. Avoid overcooking, or the chicken will dry out.
How do I keep the sandwich from getting soggy?
Toast the buns lightly with olive oil right before assembly—that's the secret! Also, dress the salad just before building the sandwich, not ahead of time. For extra insurance, press down gently on the salad layers to compress them before adding the top bun. Serve immediately if possible.
What's the best way to store leftovers?
Wrap individual sandwiches tightly in parchment paper and store in an airtight container for 1-2 days. Reheat in a skillet over medium heat for 1-2 minutes per side to restore crispness. The chicken and dressing can be refrigerated separately for 3 days—just reassemble when ready to eat.
Can I grill the chicken instead of baking?
Yes! Grill the chicken over medium-high heat for 6-8 minutes per side until it reaches 165°F. Brush with oil first to prevent sticking, and use a grill basket for even cooking. The smoky grill flavor pairs perfectly with the BBQ sauce—just let it rest 5 minutes before slicing.
What if I don't have honey wheat buns?
Any sturdy bun works—try potato buns or ciabatta rolls for extra texture. Toast them well to prevent sogginess. For a lighter option, use whole wheat English muffins split open. The key is a bun that can hold up to the juicy filling without falling apart.