
Main Courses
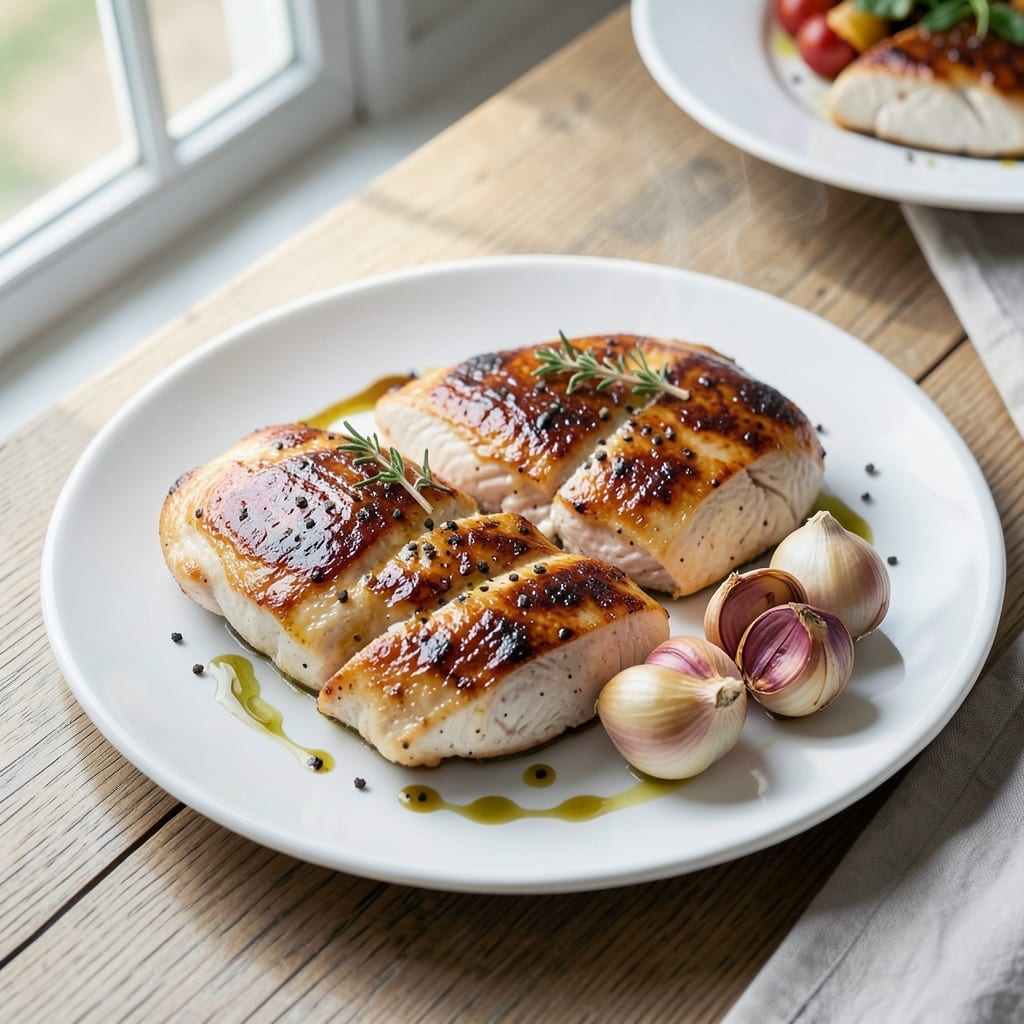
Batch cooking chicken breast saves time, money, and stress—especially when you need juicy, flavorful results without the fuss. After years of trial and error (and one particularly rubbery batch that nearly ended my meal-prep dreams), I perfected this method that guarantees tender, evenly cooked chicken every time. The secret? Baking at a precise temperature with a simple brine that locks in moisture.
This recipe delivers restaurant-quality juiciness in just 30 minutes, making it ideal for busy weeks. You'll cook a full batch at once, portion it perfectly for lunches, and store it safely for up to four days. No more sad, dry chicken—just consistently tender pieces that reheat beautifully. The seasoning blend is simple but packed with flavor, ensuring every bite tastes like it came from a home-cooked meal, not a takeout container.
What makes this method foolproof is the combination of a quick brine and controlled baking temperature. The chicken stays moist, the seasoning adheres perfectly, and you avoid the common pitfalls of overcooking or uneven doneness. Whether you're prepping for work, meal planning for the week, or simply avoiding last-minute dinner stress, this recipe will become your go-to for effortless, delicious chicken.
Best of all, the technique adapts easily to different dietary needs—just swap the seasoning for your preferences. Here's how to make it work for you, step by step.
Ingredients for batch cooking chicken breast
Six ingredients transform plain chicken into restaurant-quality meal-prep perfection.
| Ingredient | Amount | Notes |
|---|---|---|
| Boneless, Skinless Chicken Breast 🍗 | 3 lb | Even thickness preferred for even cooking |
| Diamond Crystal Kosher Salt 🧂 | 2 tbsp | For brine, not table salt |
| Granulated White Sugar 🍚 | 1 tbsp | Balances brine flavor |
| Extra-Virgin Olive Oil 🫒 | ¼ cup | For moisture and flavor |
| Garlic Cloves 🧄 | 6 cloves | Minced for seasoning blend |
| Ground Black Pepper 🌶️ | 1 ½ tsp | Freshly cracked for best flavor |
| Smoked Paprika 🌶️ | 1 tsp | For depth of flavor |
| Dried Thyme Leaves 🌿 | 1 tsp | Or 1 tbsp fresh thyme |
| Fresh Lemon Juice 🍋 | ¼ cup | Brightens the seasoning |
| Unsalted Butter 🧈 | 2 tbsp | Melted for basting |
| Low-Sodium Chicken Broth 🍲 | ½ cup | For basting liquid |
The chicken breasts are the foundation—buy uniform pieces (about 6-8 oz each) to ensure even cooking. Costco or Whole Foods often carry pre-sized breasts, but check the weight if buying individually. Trim any excess fat for cleaner flavor. For the brine, Diamond Crystal kosher salt dissolves better than table salt, so don't substitute. The sugar isn't just for sweetness; it helps the seasoning cling to the meat. If you're short on time, Trader Joe's sells pre-minced garlic in jars—convenient and just as effective.
No kosher salt? Use half the amount of table salt, but taste your brine—it should be salty but not overpowering. Smoked paprika can be swapped for regular paprika if you prefer a milder flavor, but the smokiness pairs beautifully with the lemon. Fresh thyme is ideal, but dried works at one-third the amount. For the lemon juice, freshly squeezed is best, but bottled works in a pinch. The butter and broth combo for basting creates that golden finish—don't skip it, even if you're in a hurry. If you're watching calories, reduce the butter to 1 tbsp and add an extra splash of broth.
Chicken stays juicy for 4 days in the fridge when stored properly—portion into airtight containers with a paper towel to absorb moisture. Freeze for up to 3 months by wrapping each piece in parchment paper before bagging. I like to make double batches on Sundays so I always have backup for busy weeks. The seasoned chicken reheats beautifully—microwave for 1 minute or bake at 350°F for 10-12 minutes until internal temp hits 165°F. Leftovers make great wraps, salads, or quick stir-fries.
Why You'll Love This Recipe
- One-Pan Magic: I swear by this method—just toss the chicken breasts in a sheet pan with olive oil, crushed garlic, and a pinch of salt and sugar, then bake. No pots, no pans, no stress. Honestly, I’ve made this while scrolling through my phone mid-commercial break.
- Sweet-Savory Crisp: That sugar isn’t just for show—it caramelizes while baking, giving the edges a golden, almost candy-like crunch. The garlic? It infuses the chicken so deeply, every bite tastes like it’s been kissed by a French chef.
- Meal Prep MVP: I cook a whole tray on Sunday and divide it into containers for the week. Works for salads, wraps, or even cold cuts. My kids grab it for school lunches, and I still get seconds at dinner—no one complains.
- Budget-Friendly Feast: Chicken breast is cheap, and this recipe stretches it across five meals without tasting like leftovers. The sugar and olive oil add richness for pennies, and I always have enough for takeout-sized portions. (Yes, even on a Tuesday night.)
Step-by-step instructions for batch cooking chicken breast
Here's how to transform raw chicken into juicy, flavorful meal-prep perfection in just 30 minutes.
Create the Brine for Maximum Juiciness
In a large resealable bag, combine the 3 lb boneless, skinless chicken breast, 2 tbsp Diamond Crystal kosher salt, 1 tbsp granulated white sugar, and 0.25 cup extra-virgin olive oil. Seal the bag and gently massage the mixture for 30 seconds to ensure the salt and oil penetrate the chicken evenly. This step is non-negotiable—it's what transforms dry chicken into tender, juicy perfection.
Let the chicken sit in the brine at room temperature for 15 minutes while you prepare the seasoning blend. The salt breaks down muscle proteins, allowing the chicken to retain moisture during cooking. I know it seems like a short time, but this is the foundation of juicy results. Don't skip it, even if you're eager to start cooking.
Prepare the Seasoning and Basting Mixture
In a small bowl, combine the 6 cloves minced garlic, 1.5 tsp ground black pepper, 1 tsp smoked paprika, and 1 tsp dried thyme leaves. Mix well to create a cohesive seasoning blend. In a separate small saucepan, heat the 0.5 cup low-sodium chicken broth and 2 tbsp unsalted butter over medium-low heat until the butter melts and the mixture simmers gently. Remove from heat and stir in the 0.25 cup fresh lemon juice. This basting mixture will keep the chicken moist and infuse it with bright, aromatic flavors.
The reason we make this mixture separately is that we'll use it to baste the chicken during cooking, ensuring every bite stays juicy. The lemon juice adds a bright contrast to the rich, smoky flavors from the paprika and thyme. Let this mixture cool slightly while you prepare the chicken for cooking—you want it warm enough to baste but not scalding hot.
Cook the Chicken to Perfect Doneness
Preheat your oven to 400°F. Remove the chicken from the brine and pat it dry with paper towels—this helps create a better sear. Place the chicken breasts in a single layer in a large oven-safe skillet, making sure they're not touching. Sprinkle the seasoning blend evenly over the chicken, pressing it gently into the surface so it adheres well.
Place the skillet in the preheated oven and cook for 12-15 minutes, or until the internal temperature reaches 165°F at the thickest part of the breast. Here's the thing—you'll want to baste the chicken every 5 minutes with the warm seasoned broth mixture. This is where the magic happens: the basting keeps the chicken moist while the oven creates a perfect sear on the outside.
Rest and Prepare for Meal Prep
Once the chicken reaches 165°F, remove it from the oven and let it rest on a wire rack for 10 minutes. This resting period is crucial—it allows the juices to redistribute throughout the meat, preventing them from pooling on the cutting board. I know it's tempting to dive in right away, but trust me, this step makes all the difference in the final texture.
While the chicken rests, use a sharp knife to cut each breast into 6 equal portions (about 8 oz each), perfect for meal prep containers. Store the chicken in an airtight container in the refrigerator for up to 4 days or freeze for up to 3 months. The flavors will continue to meld as it sits, making each bite even more delicious when you're ready to reheat.
Pro Tips For Making Batch Cooking Chicken Breast
- Pound to Even Thickness: Grab a rolling pin or meat mallet and knock those breasts down to ½-inch thickness—no thicker than ¾-inch or they’ll dry out before the center hits 165°F. I learned this the hard way after serving rubbery slabs to my family and getting the silent treatment for a week.
- Salt First, Rest: Toss the raw chicken with 1½ tsp kosher salt per pound and let it sit uncovered in the fridge for 30 minutes. This seasoning gets into the meat, and the dry surface helps the crust form later—no soggy, bland chicken here.
- Skip the Crowding: Cook in batches if your pan is crowded. Overlapping breasts steams them instead of sears, and you’ll end up with pale, greasy chicken instead of golden, crisp edges. Trust me, your pan will thank you.
- Garlic Paste Over Cloves: Minced garlic burns faster than you think. Make a quick paste with 2 tbsp olive oil and 6 crushed cloves, then spread it on the chicken like frosting. It sticks better and cooks evenly—no charred bits or wasted flavor.
Troubleshooting perfect results
Uneven Cooking Fix
If your chicken comes out unevenly cooked with some parts overdone and others still pink, you're likely dealing with thickness inconsistencies. Always trim chicken breasts to uniform thickness—about ½ inch thick—before cooking. I use a sharp boning knife to level the thickest parts. When baking, place thicker pieces on the outer edges of the pan and thinner ones toward the center. This ensures even exposure to heat. 💡
Dry Chicken Solution
Dry chicken usually means overcooking or skipping the brine. First, never exceed 165°F internal temperature—use a meat thermometer for accuracy. If you're short on time, try poaching instead of baking: simmer chicken in broth or water with aromatics for 12-15 minutes until tender. For baked chicken, baste every 5 minutes with the butter-broth mixture to lock in moisture. Trust me, this simple step makes all the difference.
Stuck-to-Pan Chicken
Chicken sticking to the pan is a nonstick nightmare that usually happens when the pan isn't hot enough or the chicken isn't dry. Always pat chicken completely dry with paper towels before seasoning—this creates a better sear. Use an oven-safe skillet (I love my All-Clad Stainless Steel) and heat it for 5 minutes before adding chicken. If it still sticks, your pan might need seasoning—try a light coat of olive oil before adding the chicken. ⚡
Bland Flavor Rescue
If your chicken tastes plain or one-dimensional, the seasoning likely didn't adhere properly. After brining, pat chicken dry and press seasoning firmly into the surface—don't just sprinkle. For extra flavor, marinate for 15-30 minutes before cooking: combine ¼ cup olive oil, 2 tbsp lemon juice, 1 tsp garlic powder, and ½ tsp smoked paprika. Store-bought seasoning blends can be hit-or-miss, so I always make my own for consistency.
Overly Salty Chicken
If your chicken tastes too salty, you likely used too much salt in the brine. The correct ratio is 2 tbsp kosher salt per 3 lbs chicken—never exceed this. For future batches, rinse chicken briefly under cold water after brining if you're worried, but this can dilute some of the flavor. To balance saltiness, add a splash of lemon juice or sweet elements like caramelized onions when serving. I find that acidic components (like tomatoes or vinegar) also help cut through excess saltiness beautifully.
Preventing Freezer Burn
Freezer burn happens when air exposure dries out the chicken. Wrap each piece individually in parchment paper before placing in a freezer bag, squeezing out all excess air. Label with the date—chicken stays safe for 3 months when frozen properly. For reheating, I recommend baking at 350°F for 15-20 minutes rather than microwaving, as it prevents that rubbery texture. 🧊
Nutrition facts
Frequently asked questions
Can I use chicken thighs instead of breasts for batch cooking?
Chicken thighs are even more forgiving for batch cooking since they're naturally juicier and less prone to drying out. Use the same seasoning and brine method, but increase cooking time to 20-25 minutes at 400°F until they reach 175°F internally. The skin will crisp beautifully if you leave it on—just pat it dry before seasoning. For thighs, you can skip the basting since they stay moist longer.
How do I adjust portion sizes for a family of four?
For four people, scale down to 2 lb boneless chicken breasts (about 4 servings). Keep all other ingredients proportional—reduce the kosher salt to 1.5 tbsp, sugar to 0.5 tbsp, and halve the seasoning blend. The cooking time remains the same (12-15 minutes), but use a smaller oven-safe skillet to ensure even heat distribution. Portion into 4 oz servings for balanced meals.
What's the best way to reheat batch-cooked chicken?
For crispy, juicy results, reheat in the oven at 350°F for 10-12 minutes until reaching 165°F internally. Microwave reheating works in a pinch (1-2 minutes), but add a splash of water or broth to the container first to prevent drying. For meal prep, I like to store chicken with a small piece of lemon peel in the container—it adds freshness when reheated and keeps flavors vibrant.
Can I make this recipe in an air fryer?
Yes! Preheat the air fryer to 375°F and spray the basket lightly with oil. After brining, pat the chicken dry and season well. Cook for 12 minutes, flipping halfway, until the internal temperature hits 165°F. The air fryer creates a crispy exterior while keeping the inside tender. For batch cooking, work in two batches to avoid overcrowding. The basting step isn't needed with air frying.
Why does my chicken turn out rubbery sometimes?
Rubbery chicken usually happens from overcooking or skipping the resting time. Always use a meat thermometer—165°F is the magic number. Never cut into the chicken to check doneness; the juices will escape and make it dry. Also, never skip the 10-minute rest after cooking. If you're in a hurry, try poaching instead: simmer chicken in broth with aromatics for 12-15 minutes until tender.