
Main Courses
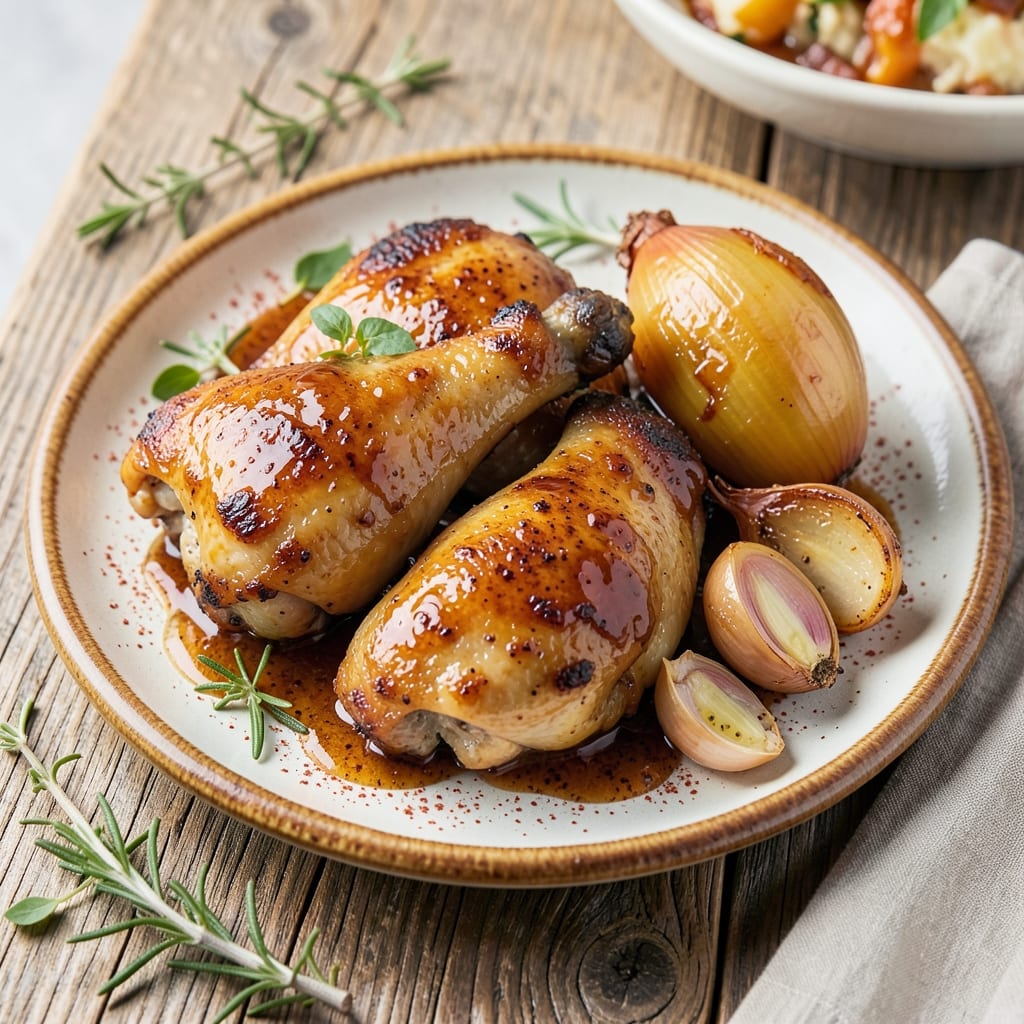
Brown sugar barbecue chicken transforms ordinary chicken into a sticky-sweet masterpiece with a caramelized crust that'll make your taste buds sing. 🔥 I've been perfecting this recipe for years, blending classic BBQ techniques with a modern twist that balances rich sweetness with smoky depth. The secret lies in the marinade—where brown sugar meets tangy vinegar and aromatic spices—creating a glaze that caramelizes beautifully on the grill or in the oven.
What sets this recipe apart is the perfect harmony of flavors: the deep caramel notes from brown sugar, the tangy kick of vinegar, and the smoky warmth of spices. I use a dry rub first to create a flavorful bark on the chicken, then let it marinate overnight so the meat absorbs every layer of flavor. This method ensures tender, juicy chicken with a glaze that's sticky, glossy, and packed with that irresistible caramelized sweetness.
The result is restaurant-quality barbecue chicken that's foolproof to make at home. Whether you're grilling outdoors or cooking in your oven, this recipe delivers perfectly caramelized edges and tender meat every time. The glaze clings to the chicken like it's meant to be there, creating a dish that's as impressive as it is delicious. Serve it with classic sides like cornbread and coleslaw for the full BBQ experience.
This recipe is designed for a family of four, but it scales easily for larger gatherings. The prep takes about 15 minutes, plus overnight marinating, and the cooking time is roughly 45 minutes, depending on your method. The best part? Leftovers reheat beautifully, making this a perfect meal for busy weeknights or weekend gatherings. Let's get started on creating your next BBQ showstopper!
Ingredients for brown sugar barbecue chicken
Sweet, smoky, sticky—this lineup transforms simple chicken into BBQ magic.
| Ingredient | Amount | Notes |
|---|---|---|
| Boneless, Skinless Chicken Thighs 🍗 | 1 ½ lb | Large pieces for even cooking |
| Light Brown Sugar 🍚 | ¾ cup | Packed for maximum caramel |
| Apple Cider Vinegar 🍏 | ½ cup | For tangy balance |
| Yellow Onion 🧅 | 1 whole | Finely chopped for sweetness |
| Garlic Cloves 🧄 | 6 cloves | Minced for aromatic depth |
| Smoked Paprika 🌶️ | 2 tbsp | For smoky richness |
| Ground Black Pepper 🌶️ | 1 tsp | Freshly cracked for bite |
| Ground Cumin 🌿 | 1 tsp | Toasted for warmth |
| Dried Thyme 🌿 | 1 tsp | Or fresh at 3x amount |
| Salt 🧂 | 1 ½ tbsp | Kosher or sea preferred |
| Vegetable Oil 🫒 | 2 tbsp | For high-heat cooking |
| Honey 🍯 | 2 tbsp | For extra caramelization |
| Water 💧 | ½ cup | For thinning glaze |
The chicken thighs are the star here—bone-in, skin-on if you can find them, but boneless works too. I grab mine from Costco when I'm doing a big batch, but any grocery store's fresh chicken section works. Look for plump, firm thighs with a good layer of fat—this ensures juicy meat. The brown sugar? Domino or Muscovado brands melt beautifully, but any light brown sugar will do. If you can't find apple cider vinegar, white vinegar or lemon juice work in a pinch (just add a pinch more sugar to balance).
No smoked paprika? Regular paprika plus a pinch of liquid smoke gets you close. Fresh thyme is ideal, but dried at one-third the amount works fine. The honey is optional but worth it—it adds that extra caramel depth. For the glaze, I like to make it slightly thicker than traditional BBQ sauce so it caramelizes better. If you're grilling, brush it on right before cooking. For oven-baked, brush it on twice—once before and once halfway through. And trust me, don't skip the overnight marinade—it's what makes this recipe sing.
Store any leftover chicken in an airtight container for up to 4 days—it actually tastes better the next day as the flavors meld. The glaze thickens when chilled, so reheat it with a splash of water to loosen it up. I like to freeze portions of the glaze separately for quick BBQ nights later. The dry rub keeps for 2 weeks in a sealed jar, so make extra if you're hosting. This recipe is a weeknight lifesaver—just marinate while you're watching TV, then throw it on the grill or in the oven.
Why You'll Love This Recipe
- One-Pan Magic: I swear by this for nights when I’d rather scroll through my phone than wash a million dishes. Toss the chicken thighs, diced onion, and minced garlic on a sheet pan, drizzle with that sticky-sweet brown sugar glaze, and let the oven do the work—no flipping, no fuss.
- Sweet-Savory Balance: The brown sugar caramelizes into a glossy crust while the apple cider vinegar keeps it bright and tangy. That deep, smoky-sweet flavor? It’s the kind of dish where my husband actually says, "This is my favorite."
- Lunchbox Hero: Between us, this is my go-to for meal prep. Shred the leftovers, pack them in wraps with coleslaw, and boom—you’ve got lunch sorted for three days. (Yes, even on a Tuesday night.)
- Budget-Friendly Feast: Chicken thighs are forgiving and cheap, and a single bag of brown sugar stretches across multiple batches. I’ve fed six people for under $15 with this—no guilt, all flavor.
Step-by-step instructions for brown sugar barbecue chicken
Here's how to create that irresistible sticky-sweet glaze that caramelizes beautifully on the grill.
🍳 Step 1: Build the Flavor-Packed Glaze
In a medium saucepan, combine the 0.75 cup light brown sugar, 0.5 cup apple cider vinegar, 2 tbsp honey, and 0.5 cup water. Stir until the sugar dissolves completely over medium heat. This is where the magic starts—those caramel notes begin developing right away.
Add the finely chopped yellow onion and minced garlic cloves to the pan. Let them cook for 5-6 minutes until softened and fragrant. You'll smell that sweet, tangy aroma filling your kitchen—that's your cue the base is ready. Keep the heat at medium-low to prevent burning while the flavors meld together.
👨🍳 Step 2: Season the Chicken and Create the Rub
In a small bowl, mix the 2 tbsp smoked paprika, 1 tsp ground black pepper, 1 tsp ground cumin, 1 tsp dried thyme, and 1.5 tbsp salt. This dry rub is what gives your chicken that deep, smoky complexity that pairs perfectly with the sweet glaze.
Pat the 1.5 lb boneless, skinless chicken thighs completely dry with paper towels—this is crucial for crispy skin. Rub the mixture all over the chicken, pressing it into the meat so it sticks. Let the seasoned chicken sit at room temperature for 15-20 minutes while you finish the glaze. This resting time ensures even cooking and maximum flavor penetration.
🔥 Step 3: Grill the Chicken to Golden Perfection
Heat your grill to medium-high heat (around 375°F). Place the seasoned chicken thighs on the grill, skin-side down, and cook for 6-7 minutes without moving them. You want that skin to develop a nice golden crust—this is where all those beautiful caramelized flavors start forming.
Flip the chicken and continue grilling for another 6-7 minutes until the internal temperature reaches 165°F. The skin should be crispy and the meat should pull away from the bone easily. Here's the thing—don't rush this step. The chicken needs time to develop that perfect texture and absorb all those smoky, sweet flavors.
🍯 Step 4: Glaze and Caramelize to Sticky Sweetness
Remove the chicken from the grill and transfer it to a plate. Pour the onion-garlic glaze mixture from the saucepan into a small sauce dish. Add 2 tbsp vegetable oil to the grill grates and let it heat up for 1-2 minutes until smoking slightly.
Place the chicken thighs back on the grill, skin-side up, and spoon the glaze generously over each piece. Let it cook for 2-3 minutes until the glaze starts bubbling and caramelizing. Watch closely—this is when the magic happens. The glaze should thicken and develop a beautiful amber color, creating that irresistible sticky-sweet coating.
⏰ Step 5: Rest and Serve with Caramelized Glaze
Transfer the glazed chicken to a cutting board and let it rest for 5 minutes. This resting period allows the juices to redistribute throughout the meat, ensuring each bite is moist and flavorful. During this time, you can spoon any remaining glaze from the grill onto the chicken if desired.
Slice the chicken against the grain for maximum tenderness and serve immediately with the caramelized glaze drizzled over the top. The contrast of crispy skin, tender meat, and that rich, sticky-sweet glaze is what makes this recipe absolutely irresistible. Pair it with some grilled vegetables or crusty bread to soak up all that delicious sauce!
Pro Tips For Making Brown Sugar Barbecue Chicken
- CRUSH THE ONION: Dice that onion fine—think matchstick-sized or smaller. I used to toss in big chunks, and they’d either stay crunchy or turn to mush. Uniform pieces caramelize evenly and blend right into the sauce without fighting for texture.
- SWEAT THE GARLIC: Cook the minced garlic in the onion until it’s just golden, not brown. That’s where the flavor lives, not the burnt bits. If you rush it, you’ll taste bitterness hiding under all that sweet brown sugar.
- BURN THE SUGAR: Let that brown sugar caramelize before adding liquid. Turn the heat to medium-high and let it bubble and darken for 3-4 minutes—this isn’t the time to stir constantly. The deeper color means richer flavor, not just sweetness.
- REST THE THIGHS: Pat those thighs bone-dry with paper towels before seasoning, then let them sit at room temp for 15-20 minutes. Cold meat steams instead of sears, and you’ll end up with sad, gray edges instead of crispy, caramelized crust.
Storing and reheating this recipe
Refrigerator Storage
Store your leftover brown sugar barbecue chicken in an airtight container for up to 4 days—the flavors actually deepen as the glaze continues to meld with the meat. I use glass Pyrex containers because they keep the caramelized glaze from drying out. Let the chicken cool completely before storing to prevent condensation, which can make the glaze watery. 💛
Freezer-Friendly Prep
For longer storage, freeze the chicken for up to 3 months. I recommend using quart-sized freezer bags—lay the chicken flat in the bag, remove excess air, and seal tightly. The glaze will thicken when frozen, so add 1 tablespoon water when reheating. Freeze the glaze separately in ice cube trays for quick BBQ nights later!
Stovetop Reheating
My preferred method is stovetop reheating to maintain that perfect caramelized texture. Place the chicken in a skillet over medium heat with 1 tablespoon water or chicken broth, cover, and heat for 5-6 minutes. Uncover and cook another 2 minutes to crisp the glaze. Add a splash more liquid if needed—just enough to loosen the glaze without making it runny. 🔥
Oven Refresh
For a hands-off approach, preheat your oven to 350°F and place the chicken on a baking sheet. Cover loosely with foil and heat for 10-12 minutes. Remove the foil for the last 2 minutes to let the glaze caramelize again. This method works well for larger batches and keeps the skin crispy.
Microwave Shortcut
When you're in a hurry, use the microwave on 50% power for 1-2 minutes, stirring halfway. Add 1 teaspoon water to prevent drying. The glaze won't caramelize as beautifully, but it'll still taste delicious—perfect for quick lunches. For best results, transfer to a skillet for the last 30 seconds to crisp the edges.
Glaze Revival
If your leftover glaze has thickened too much, thin it with 1 tablespoon water or apple cider vinegar and warm gently in a saucepan. For extra richness, add 1 teaspoon honey and ½ teaspoon smoked paprika to restore that perfect balance of sweet and smoky flavors. This works great for drizzling over sandwiches or tacos later in the week! ✨
Nutrition facts
Frequently asked questions
Can I use chicken breasts instead of thighs?
Chicken breasts work but require extra care to stay juicy. Use bone-in, skin-on breasts for better moisture retention, and reduce cooking time to 5-6 minutes per side at 350°F. The glaze will still caramelize beautifully, but breasts have less fat, so baste them frequently with extra glaze during cooking.
How do I adjust the sweetness level?
For less sweetness, reduce brown sugar to ½ cup and add 1 tbsp Dijon mustard to the glaze for tang. For extra caramel depth, increase sugar to 1 cup and add 1 tbsp molasses. Remember: the vinegar balances sweetness, so adjust it proportionally if changing sugar amounts.
What's the best way to cook this without a grill?
Your oven is perfect! Preheat to 400°F and bake the chicken on a wire rack over a baking sheet for 20-25 minutes, basting with glaze every 5 minutes. For a smoky flavor, place a metal tray with ½ cup apple wood chips on the lower rack while baking. The result will be tender chicken with crispy, caramelized edges!
Why did my glaze turn too runny?
This usually happens if you didn't reduce the glaze enough or added too much liquid. Simmer your glaze uncovered for 5-7 minutes to thicken it properly. If it's already too thin, remove the chicken and reduce the glaze alone over medium-high heat until syrupy. For future batches, use 3 tbsp water instead of ½ cup in the recipe.
Can I make this recipe ahead of time?
Marinate the chicken 2 days ahead for even deeper flavor. For a full make-ahead meal, cook the chicken 1 day ahead, store it in the fridge, then reheat using the stovetop method. The glaze will actually taste better the next day as the flavors meld. Just add a quick broil for 2 minutes before serving to refresh the caramelization.