
Sauces & Condiments
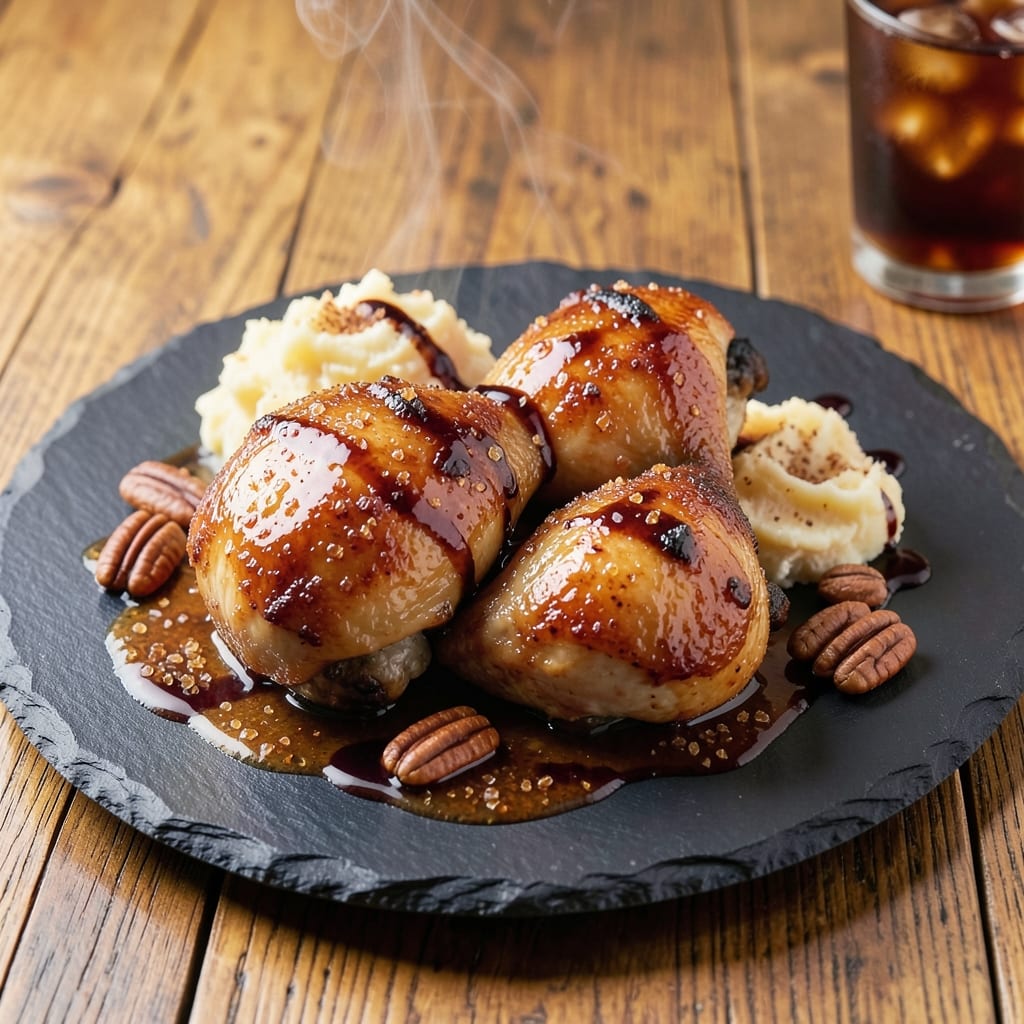
This brown sugar glazed chicken recipe delivers a sticky caramel crust that balances sweetness with savory depth, transforming ordinary chicken into a showstopper. 🌟 The secret lies in marinating the chicken overnight, then basting it with a rich brown sugar glaze that caramelizes beautifully during roasting. This method ensures the glaze stays sweet without becoming cloying, creating a perfect harmony of flavors that will have everyone asking for seconds.
What sets this recipe apart is the two-step process that guarantees tender, juicy chicken with a glossy, caramelized exterior. The marinade tenderizes the meat while infusing it with flavor, and the glaze adds a glossy finish that's both visually stunning and irresistibly sweet. Whether you're serving it for a holiday dinner or a weeknight family meal, this dish delivers restaurant-quality results with minimal effort.
The glaze itself is simple yet transformative—just brown sugar, butter, and a touch of mustard to cut through the sweetness. As the chicken roasts, the glaze caramelizes into a sticky, amber crust that clings perfectly to the meat, creating a texture that's both crisp and tender. The aroma alone will fill your kitchen with warmth and anticipation, making this dish a crowd-pleaser every time.
Pair it with classic sides like mashed potatoes or roasted vegetables to round out the meal, or serve it over a bed of greens for a lighter option. The glaze works equally well on thighs, drumsticks, or even chicken breasts, giving you flexibility for any occasion. Ready to master this technique? Let's get started.
Ingredients for brown sugar glazed chicken
Simple yet transformative ingredients create a restaurant-quality caramel crust on juicy chicken thighs.
| Ingredient | Amount | Notes |
|---|---|---|
| Chicken Thighs 🍗 | 1 ½ lb | Bone-in, skin-on preferred |
| Brown Sugar 🍚 | 1 cup | Packed, light or dark |
| Unsalted Butter 🧈 | ½ cup | Cold, cubed for glaze |
| Dijon Mustard 🍯 | 1 tbsp | For balancing sweetness |
| Garlic Cloves 🧄 | 4 cloves | Minced for marinade |
| Olive Oil 🫒 | ¼ cup | For marinade base |
| Soy Sauce 🥢 | 2 tbsp | For umami depth |
| Salt 🧂 | 1 ½ tsp | Kosher or sea salt |
| Ground Black Pepper 🌶️ | ½ tsp | Freshly ground preferred |
| Honey 🍯 | 1 tbsp | For marinade sweetness |
| Fresh Rosemary 🌿 | ¼ cup | Chopped for marinade |
| Fresh Thyme 🌿 | ¼ cup | Chopped for marinade |
| Apple Cider Vinegar 🍎 | 1 tbsp | For tangy balance |
The chicken thighs are non-negotiable for this recipe—bone-in, skin-on pieces stay juicy while the skin crisps beautifully. Costco or butcher shops often sell them pre-cut, but if buying whole, trim the skin and pat dry thoroughly. The brown sugar should be packed into the measuring cup for maximum sweetness—Domino or C&H brands work perfectly. For the butter, grab the unsalted kind (like Land O'Lakes) and cut it into cubes so it melts smoothly into the glaze. The Dijon mustard adds that essential tang—Maille is my go-to, but any quality brand will do.
No Dijon mustard? Yellow mustard at half the amount works in a pinch, though the flavor won't be as refined. Substituting honey for maple syrup (same quantity) keeps things vegan-friendly if needed. Fresh rosemary and thyme are ideal, but dried at one-third the amount gets you close. The apple cider vinegar can be swapped for white vinegar if that's what you have—just use the same quantity. For the soy sauce, Kikkoman is reliable, but any light soy will work. Pro tip: Measure the soy sauce after adding it to the marinade—it reduces slightly when mixed with other liquids.
Marinate the chicken overnight for maximum flavor penetration, then refrigerate uncovered for the last 30 minutes to dry the surface slightly—this helps the glaze stick better. The glaze itself keeps well in the fridge for 1 week if stored in an airtight container. For leftovers, reheat in a 350°F oven for 15-20 minutes with a splash of water to restore moisture. The caramelized crust reheats beautifully, though it won't be as glossy as fresh—just part of the charm.
Why You'll Love This Recipe
- Here’s what sold me: the brown sugar and Dijon create this perfect push-and-pull of sweet and tangy that cuts through the richness of the butter. The garlic? It’s the secret—just a few cloves, but they melt into the glaze like a warm hug.
- One-Pan Magic: I swear by this recipe when I’m too tired to wash dishes. Toss the thighs in a skillet with butter and garlic, let them brown, then glaze with brown sugar and mustard—no flipping pans, no stress. That sticky, caramelized crust? Worth every second.
- Sweet-Savory Balance: Here’s what sold me: the brown sugar and Dijon create this perfect push-and-pull of sweet and tangy that cuts through the richness of the butter. The garlic? It’s the secret—just a few cloves, but they melt into the glaze like a warm hug.
- Weeknight to Dinner Party: Between us, this is my go-to when I need to feed a crowd without breaking a sweat. Double the batch, serve with rice or roasted veggies, and suddenly you’ve got a dish that feels fancy but takes 30 minutes. (Yes, even on a Tuesday night.)
Step-by-step instructions for brown sugar glazed chicken
Here's how to create a perfectly balanced caramel glaze with tender, juicy chicken thighs.
👨🍳 Step 1: Prepare the Marinade and Coat the Chicken
In a large bowl, combine the 0.25 cup olive oil, 1 tbsp Dijon mustard, 1 tbsp honey, 1 tbsp apple cider vinegar, 2 tbsp soy sauce, 1.5 tsp salt, and 0.5 tsp ground black pepper. Whisk until fully emulsified—this creates a smooth base for the marinade.
Add the 4 cloves minced garlic, 0.25 cup chopped fresh rosemary, and 0.25 cup chopped fresh thyme. Mix well to distribute the herbs evenly. Place the 1.5 lb chicken thighs in a resealable plastic bag and pour the marinade over them. Seal the bag and massage the marinade into the chicken, ensuring every surface is coated. Refrigerate for at least 4 hours or overnight for maximum flavor penetration.
🔥 Step 2: Sear the Chicken for Maximum Flavor
Preheat your oven to 425°F. Remove the chicken from the marinade (reserve the marinade for basting) and pat dry with paper towels. This step is crucial—dry chicken sears better and develops that coveted caramelized crust.
Heat a large oven-safe skillet over medium-high heat. Add the chicken thighs skin-side down and sear for 4-5 minutes until the skin is golden brown and crispy. Flip the thighs and sear the other side for another 3-4 minutes. The skin should be deeply browned with some spots of black—this is where all the flavor develops.
🥘 Step 3: Create the Glaze and Baste the Chicken
While the chicken sears, prepare the glaze by combining the 1 cup packed brown sugar and 0.5 cup cold cubed unsalted butter in a small bowl. Once the chicken is seared, remove the skillet from heat and carefully stir in the brown sugar mixture until melted and smooth. The residual heat from the pan will help the sugar dissolve quickly.
Return the skillet to the oven and pour about ¼ cup of the reserved marinade over the chicken. Baste the thighs with the marinade every 10 minutes for 30 minutes, spooning the glaze over the top. This basting creates that signature sticky caramel crust while keeping the meat moist. The glaze should thicken slightly but remain glossy and pourable.
⏰ Step 4: Finish with a Caramelized Crust
After 30 minutes, increase the oven temperature to 450°F and continue basting the chicken every 5 minutes for another 15-20 minutes. The glaze should darken to a deep amber color and form a thick, sticky crust. You'll know it's ready when the chicken reaches an internal temperature of 165°F and the glaze is fully caramelized.
For the final touch, transfer the skillet to the stovetop over medium heat and let the glaze reduce for 1-2 minutes until it reaches your desired consistency—either thick and syrupy or thin and pourable. Serve immediately with the caramelized glaze pooled on top of the chicken.
Pro Tips For Making Brown Sugar Glazed Chicken
- CRACK THE BROWN SUGAR FIRST: I learned this the hard way—mixing raw brown sugar into cold butter just makes a gritty paste. Toast the sugar in a dry pan over medium heat for 2-3 minutes until it smells caramel-like. This dissolves it into the butter instantly when you add liquid, giving you a smoother glaze every time.
- SEAR THIGHS SKIN-SIDE DOWN: High heat. Seriously, crank it up. The skin needs to hit 375°F (190°C) for 8-10 minutes until it’s deep golden, not just pale. If you rush this, your glaze will cling like syrup instead of crisping into a sticky, caramelized crust—where all the flavor lives.
- STOP WHEN JUICES RUN CLEAR: That’s right, pull the chicken at 155°F (68°C) internal temp, even if it feels undercooked. The residual heat will finish cooking it while you baste. Overcooking turns thighs dry, and no amount of glaze will save them. A meat thermometer is worth its weight in this recipe.
- USE A SPLASH OF WATER: Sounds weird, but it works: After searing, deglaze the pan with 2 tablespoons water before adding butter and sugar. The steam helps lift browned bits into your glaze, giving it that restaurant-quality depth. Skip this, and you’re missing out on 30% of the flavor.
Make-ahead tips for leftovers
Marinade Prep Ahead
Prepare the marinade up to 3 days in advance and store it in an airtight container in the fridge. The flavors deepen over time, especially the herbs and vinegar. I like to make a double batch so I can use half for this recipe and save the rest for another use—maybe a quick stir-fry or salad dressing. Just
Chicken Prep Timeline
Marinate the chicken thighs overnight for the best results, but even 4 hours will work in a pinch. If you're short on time, try this trick: Place the chicken in the marinade for 2 hours, then refrigerate uncovered for the last 30 minutes to dry the surface slightly. This helps the glaze stick better during cooking. Trust me, this small step makes a huge difference in texture. ⏰
Glaze Prep Shortcut
Make the brown sugar glaze a day ahead and store it in a small jar in the fridge. When ready to cook, simply reheat it gently in the microwave or on the stovetop until smooth. This saves time on cooking day and ensures you won’t be scrambling to mix ingredients last minute. Just stir in the cold butter cubes at the last second to keep the glaze from solidifying. 🍚
Make-Ahead Cooking
Cook the chicken one day ahead if you're planning a big meal or potluck. Let it cool completely, then store it in an airtight container with any leftover glaze. Reheat in a 350°F oven for 15-20 minutes with a splash of water to restore moisture. The glaze will be less glossy but still delicious—just part of the charm of make-ahead meals. The chicken reheats beautifully and tastes just as good the next day. ❄️
Glaze Storage Tips
Any leftover glaze can be stored in an airtight container in the fridge for up to 1 week. To use it again, simply reheat it gently and brush it over roasted vegetables, pork chops, or even toasted bread for a sweet-savory treat. I’ve even used it as a drizzle for ice cream—don’t judge! Just remember, the texture will be thinner after storage, so adjust as needed. 💫
Freezer-Friendly Option
For long-term storage, freeze the cooked chicken (without glaze) in a single layer on a tray before transferring to a freezer bag. This prevents sticking and makes it easy to reheat individual portions. When ready to serve, thaw overnight in the fridge, then reheat in the oven with a fresh batch of glaze. The chicken stays juicy, and the glaze adds that restaurant-quality finish. Perfect for meal prep! ❄️
Nutrition facts
Frequently asked questions
Can I use chicken breasts instead of thighs?
Yes, but with adjustments! Chicken breasts cook faster and can dry out, so use bone-in, skin-on breasts (about 1 lb for 4 servings) and reduce oven time to 20-25 minutes total. Brine them for 30 minutes first (1 cup water + 1 tbsp salt) to keep them juicy. The glaze works beautifully, but breasts won't develop the same crispy skin as thighs.
How do I fix a glaze that's too runny?
Simply reduce it! After basting, transfer the pan to the stovetop over medium heat and let it simmer for 2-3 minutes until slightly thickened. For extra thickness, stir in 1 tsp cornstarch mixed with 1 tbsp water until glossy. The glaze should coat the back of a spoon but remain pourable.
What's the best way to serve this dish?
Pair it with creamy mashed potatoes or roasted Brussels sprouts to balance the sweetness. For a lighter option, serve over quinoa or wild rice with a simple arugula salad. The glaze also works wonderfully drizzled over homemade biscuits or cornbread for a Southern-style meal.
Can I grill this instead of oven-roasting?
Follow the same marinade and glaze steps, then grill over medium-high heat for 6-8 minutes per side, basting every 2 minutes. For extra flavor, add ½ cup apple wood chips to your smoker box. Finish by broiling for 2-3 minutes in the oven to caramelize the glaze fully.
Why did my glaze turn too dark/burnt?
This happens when the oven gets too hot or the glaze sits too long uncovered. Keep the oven at 425°F and baste frequently to prevent burning. For extra insurance, tent the skillet with foil during the last 10 minutes of cooking. The glaze should be amber, not black—if it burns, simply scrape off the burnt bits before serving.