
Main Courses
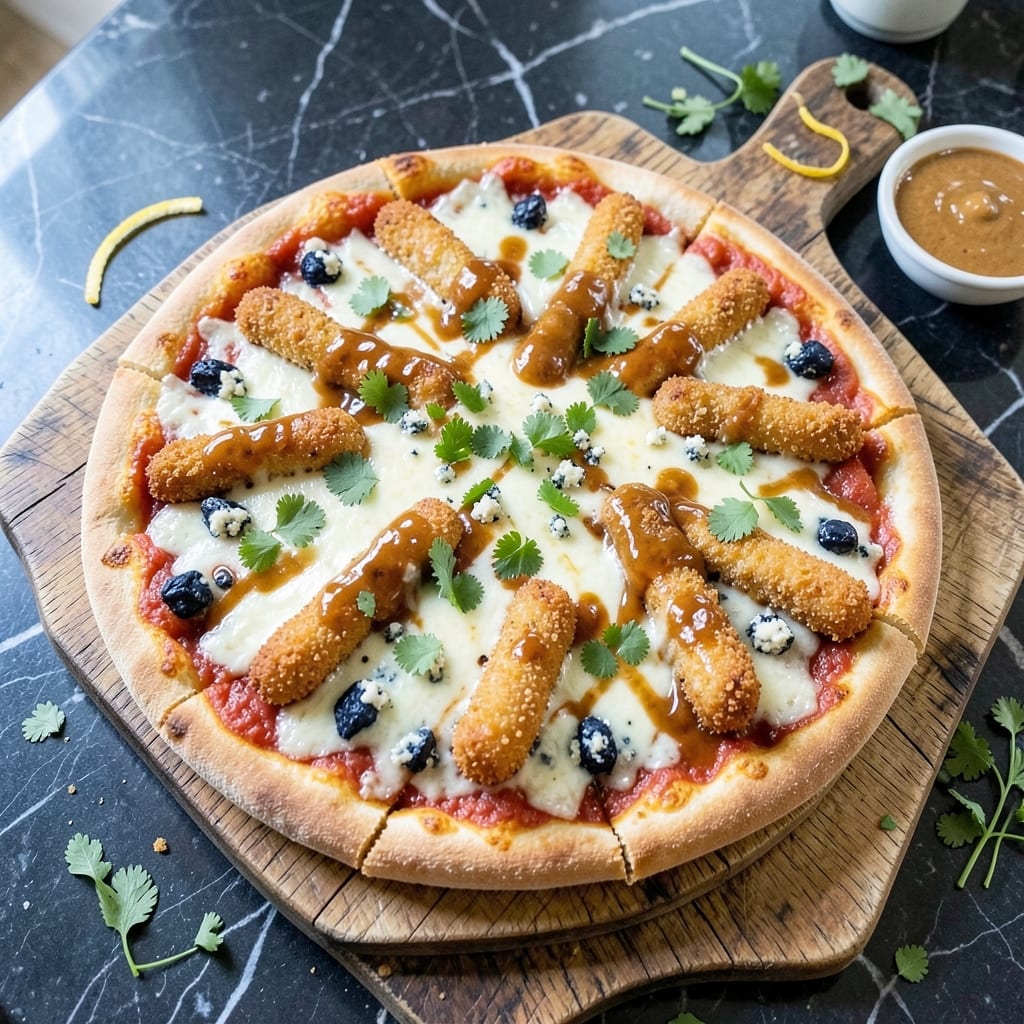
This buffalo chicken finger pizza recipe transforms game-day appetizers into a full meal with crispy crust and a spicy-cooling topping twist. 🔥 The secret lies in perfectly breaded, oven-baked chicken fingers that stay tender inside while developing a golden, shatteringly crisp exterior—no deep-frying mess required. I developed this after realizing how much my team loved the combination of buffalo heat and creamy ranch, but wanted something heartier than just wings.
The pizza base starts with a crispy crust that holds up to the bold flavors, topped with tangy buffalo sauce and melted cheese. What sets this apart is the strategic balance of heat—cooling toppings like shredded lettuce, celery, and blue cheese crumbles cut through the spice while adding freshness. The chicken fingers are baked at a precise 400°F for just 12 minutes, ensuring they stay juicy while achieving that coveted crunch.
By the time it comes out of the oven, you'll have a pizza that delivers restaurant-quality satisfaction with every bite: crispy crust, tender chicken, creamy cooling elements, and that signature buffalo kick. The assembly process is straightforward but requires attention to timing to maintain texture—hot chicken on slightly warm pizza ensures perfect melding of flavors without sogginess.
Perfect for game day gatherings, busy weeknights when you crave comfort food, or impressing guests with a creative twist on classic flavors. The recipe scales easily for crowds, and leftovers reheat beautifully. Let's make this crowd-pleasing masterpiece!
Ingredients for buffalo chicken finger pizza
Game-day flavors meet crispy perfection—just 16 ingredients for a pizza that wows.
| Ingredient | Amount | Notes |
|---|---|---|
| Boneless, Skinless Chicken Breast 🍗 | 1 ½ lb | Pounded to even thickness |
| All-Purpose Flour 🌾 | 1 ½ cups | For breading chicken fingers |
| Panko Breadcrumbs 🍞 | 1 cup | Plus 2 tbsp for extra crunch |
| Large Eggs 🥚 | 2 whole | Beaten for egg wash |
| Shredded Mozzarella Cheese 🧀 | 2 cups | Part-skim or whole milk |
| Blue Cheese Crumbles 🧀 | ½ cup | For cooling contrast |
| Buffalo Sauce 🍅 | 1 cup | Store-bought or homemade |
| Fresh Celery 🥬 | 1 cup | Thinly sliced for crunch |
| Romaine Lettuce 🥬 | 1 cup | Shredded for freshness |
| Ranch Dressing 🥛 | ½ cup | For dipping or topping |
| Pizza Dough 🍕 | 1 pre-made ball | Store-bought or homemade |
| Olive Oil 🫒 | 2 tbsp | For dough brushing |
| Garlic Powder 🧄 | 1 tsp | For seasoning |
| Onion Powder 🧅 | 1 tsp | For seasoning |
| Salt 🧂 | 1 tsp | Kosher or sea salt |
| Black Pepper 🌶️ | ½ tsp | Freshly ground preferred |
The chicken breast is your foundation—pound it to ¼-inch thickness for even cooking. Trader Joe's sells pre-cut chicken strips if you're short on time, but buying whole breasts saves money. Look for plump, firm fillets with no gray edges. Panko breadcrumbs are non-negotiable here—they create that signature shatteringly crisp texture. Costco sells them in bulk for half the price of grocery stores, and they keep for months in the pantry. For the pizza dough, pre-made is your friend—most grocery stores carry it in the refrigerated section, and you can even find it in the freezer aisle at Walmart or Target.
No panko? Regular breadcrumbs plus 1 tbsp cornstarch works in a pinch—the starch adds extra crispiness. Short on ranch? Mix mayo with a splash of buttermilk and dried dill—it's 90% of the flavor. The buffalo sauce can be store-bought (I like Frank's RedHot for consistency), but homemade is easier than you think—just hot sauce, melted butter, and a pinch of garlic powder. For the cooling toppings, pre-shredded lettuce and celery from the salad bar save time, but fresh has better crunch. Blue cheese crumbles? Buy the block and crumble yourself—pre-crumbled gets clumpy when melted.
Pizza dough keeps in the fridge for 3 days or freezes for 3 months—thaw overnight in the fridge. The breaded chicken fingers can be prepped ahead and refrigerated for 24 hours before baking. For assembly, keep the pizza dough at room temp for 30 minutes before stretching—it's less likely to tear. Leftovers? Store in airtight containers and reheat at 350°F for 10 minutes—the crust stays crispy this way. Double the dough and sauce for a crowd—this recipe easily scales to feed 8 with minimal extra effort.
Why You'll Love This Recipe
- Crispy in Minutes: I swear, the panko crust on these chicken fingers turns golden in 12 minutes flat—no waiting around. The secret? Tossing them in the egg wash twice before breading means that crunch stays perfect every time.
- Two Flavors, Zero Guilt: That tangy buffalo sauce meets the creamy mozzarella in a way that’s actually satisfying. Honestly, I’ll take this over sad desk lunches any day—it’s got heat, it’s got cheesy pull, and it’s got that addictive breading.
- Game for Game Day: Between us, this is my go-to for tailgates or lazy Sundays because it feeds a crowd without the fuss. Just bake, slice, and watch everyone grab seconds—no fancy plating needed.
- Budget-Friendly Leftovers: Chicken breast and flour stretch further than you’d think, and the leftovers? Even better cold the next day. I’ll pack these in my lunchbox or reheat them for a 5-minute dinner—no takeout required.
Step-by-step instructions for buffalo chicken finger pizza
Here's how to create a crispy, spicy-sweet pizza with juicy chicken fingers and cooling toppings.
👨🍳 Step 1: Prepare the Chicken Fingers
Start by pounding the 1.5 lb boneless, skinless chicken breast between two sheets of plastic wrap to an even ½-inch thickness. This ensures even cooking and prevents dryness. Season both sides generously with 1 tsp garlic powder, 1 tsp onion powder, 1 tsp salt, and ½ tsp black pepper. I like to press the spices into the meat so they adhere well.
Set up three shallow bowls: one with 1.5 cups all-purpose flour, one with 1 cup panko breadcrumbs (plus the extra 2 tbsp for extra crunch), and one with the 2 beaten large eggs. Dredge each chicken piece in flour, shaking off excess, then dip in egg wash, and finally coat thoroughly in panko. Place on a wire rack and refrigerate for 15 minutes—this helps the breading adhere better.
🔥 Step 2: Cook the Chicken Fingers
Preheat your oven to 425°F for the pizza, but start by cooking the chicken fingers in a skillet over medium heat with 1 tbsp olive oil. Cook for 3-4 minutes per side until golden brown and internal temperature reaches 165°F. Transfer to a paper towel-lined plate to drain excess oil. The chicken should be crispy outside with juicy, tender meat inside.
While the chicken cooks, roll out the 1 pre-made ball pizza dough on a floured surface to about ¼-inch thickness and transfer to a parchment-lined baking sheet. Brush the dough with the remaining 1 tbsp olive oil and sprinkle lightly with ½ tsp salt and ¼ tsp black pepper. Bake the crust for 8-10 minutes until the edges start to turn golden—this pre-baking prevents a soggy base.
🥘 Step 3: Assemble the Pizza Toppings
Spread ½ cup buffalo sauce evenly over the pre-baked crust. Sprinkle 2 cups shredded mozzarella cheese over the sauce, then arrange the cooked chicken fingers in a single layer. Here's the twist: scatter ½ cup blue cheese crumbles over the chicken for that perfect cooling contrast to the spicy buffalo.
Add the remaining toppings: 1 cup thinly sliced fresh celery and 1 cup shredded romaine lettuce for freshness. Drizzle with ½ cup ranch dressing and sprinkle with any remaining breadcrumbs for extra crunch. The blue cheese and ranch will balance the heat while keeping the pizza creamy and satisfying.
🔥 Step 4: Bake to Perfection
Return the pizza to the oven and bake for 12-15 minutes until the cheese is fully melted and bubbly, and the crust is deep golden brown. You'll know it's ready when the edges are crispy and the cheese has turned a beautiful golden hue. The chicken fingers should be heated through but still juicy—don't overbake or they'll dry out.
Let the pizza rest for 5 minutes before slicing. This resting time allows the cheese to set slightly and makes for cleaner cuts. Serve immediately with extra ranch dressing on the side for dipping—every bite delivers crispy crust, spicy-sweet chicken, and cooling blue cheese in perfect harmony.
Pro Tips For Making Buffalo Chicken Finger Pizza
- BRINE THE CHICKEN: Toss those boneless breasts in a mix of ¼ cup salt per 4 cups cold water for 30 minutes before breading. I learned this the hard way—dry, rubbery chicken fingers ruin the whole pizza. The salt keeps them juicy even after baking, and the breading sticks like glue.
- DOUBLE-DIP THE BREADING: Mix ½ cup all-purpose flour with 1 tsp paprika and 1 tsp garlic powder, then coat the chicken. Dip again in a beaten egg wash, then press into panko mixed with 1 tsp dried parsley. The extra layer makes the crust crispier and the flavor richer—no sad, flimsy fingers here.
- BAKED NOT FRIED: Bake the chicken fingers at 425°F (220°C) for 12–15 minutes on a wire rack over a baking sheet, flipping halfway. Yes, it’s not fried, but they stay crispy and the oven handles the heat for the pizza sauce and cheese. Skip the deep fryer—this is easier and just as good.
- SAUCE FIRST, CHEESE LAST: Spread your buffalo sauce before adding the chicken fingers, then top with mozzarella. The cheese melts into the sauce, creating a creamy, tangy blanket instead of a dry, cheesy mess. Trust me, this is the thing that matters most for that restaurant-style finish.
Essential equipment for great buffalo chicken finger pizza
Pizza Crust Essentials
For that perfect crispy yet chewy crust, I swear by a commercial-grade pizza stone—I use the Ooni Pizza Oven Stone for its even heat distribution. If you're cooking at home without a pizza oven, a cast iron skillet (like my Lodge 12-inch) works wonders. Preheat it alongside your oven for 30 minutes at 425°F to mimic that professional crisp. For extra flavor, I brush the dough with olive oil and sprinkle garlic powder before baking—it adds depth without overpowering the buffalo flavors. 🍕
Chicken Prep Tools
Your breading station is where magic happens, so invest in a wire cooling rack (I use the OXO Good Grips) to keep breaded chicken pieces elevated while they set. A sharp boning knife is essential for trimming chicken breasts evenly—my go-to is the Victorinox Fibrox. For pounding, plastic wrap and a rolling pin (or even a heavy pan) works, but I’ve seen pros use a meat mallet for precision. Don’t skip the meat thermometer—I use the Thermoworks Smoke to ensure 165°F internal temp every time. 🌡️
Sauce & Topping Prep
Buffalo sauce gets thick and clumpy when reheated, so I always make a small batch fresh—just hot sauce, melted butter, and a pinch of garlic powder. A small saucepan (like my All-Clad Stainless Steel) keeps it from sticking. For cooling toppings, a mandoline slicer (I love the Benriner) turns celery into paper-thin strips in seconds. Store-bought blue cheese crumbles work, but I prefer crumbling a block myself for texture—I use a microplane for the job. Keep ranch and blue cheese in small bowls for easy access during assembly. 🥬
Baking & Assembly Helpers
A pizza peel (like the Ooni Peel) makes transferring dough effortless, but a parchment-lined baking sheet works in a pinch. For extra crisp, I broil the pizza for the final 1-2 minutes—just watch it like a hawk to avoid burning. A pizza cutter (I use the OXO Good Grips) ensures clean slices, but a sharp chef’s knife works too. Pro tip: Keep your buffalo sauce and ranch dressing** in small squeeze bottles for even distribution. The right tools make all the difference when balancing heat and texture. ✨
Nutrition facts
Frequently asked questions
Can I make this pizza ahead of time?
Prep the chicken fingers and bread them up to 24 hours ahead—they keep well in the fridge. Assemble the pizza on a parchment-lined tray (without baking) and refrigerate for up to 4 hours. When ready to bake, add 5-7 extra minutes to the baking time to account for the cold start. For the freshest toppings, add celery and lettuce right before serving.
How do I adjust the heat level?
Start with ½ cup buffalo sauce and taste before spreading—add more if you love heat. For cooling power, double the blue cheese crumbles (1 cup) or drizzle extra ranch. For a milder version, mix buffalo sauce with 2 tbsp ranch dressing before applying. The key is balance: spicy chicken, creamy cheese, and crisp toppings work together.
Can I use frozen chicken fingers instead?
Yes, but with adjustments! Use 2 cups frozen breaded chicken fingers (like Tyson or Applegate brands) and bake them first at 400°F for 18-20 minutes until crispy. Toss in buffalo sauce while still hot, then use as directed. The texture will be slightly different (less juicy), but it works in a pinch for a quick meal.
What if I don’t have panko?
No problem! Use 1 cup regular breadcrumbs mixed with 2 tbsp cornstarch for extra crispiness. For even better texture, pulse 1 cup crushed cornflakes in a food processor and mix with the breadcrumbs. The cornstarch helps create that signature crunch—just don't skip it!
How do I make this vegetarian?
Swap the chicken for 1.5 cups crispy cauliflower florets (tossed in the same breading) or 12 vegan chicken nuggets (like Gardein). For protein, add 1 cup chickpeas (roasted with olive oil and spices) or ½ cup vegan cheese. Keep the buffalo sauce and cooling toppings—they still balance the flavors perfectly!