
Main Courses
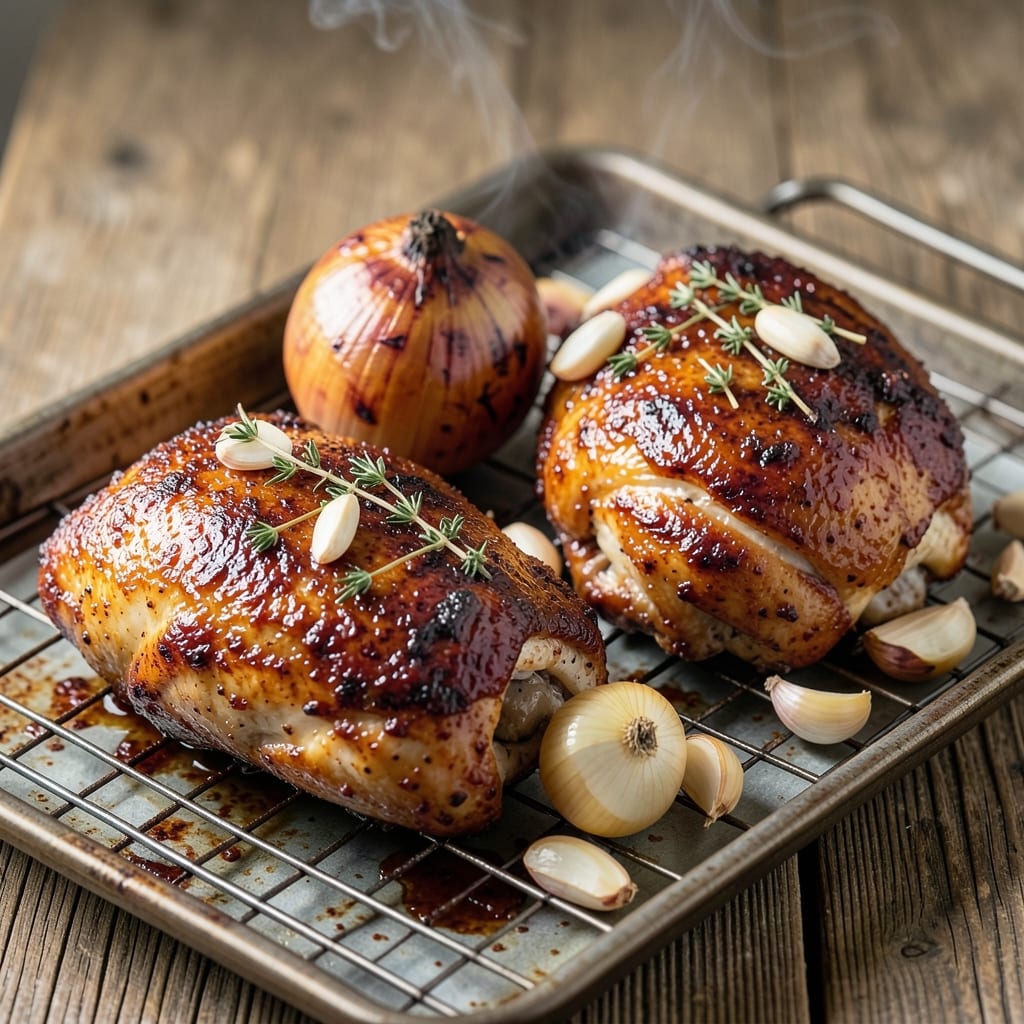
This baked barbecue chicken quarters recipe delivers the perfect balance of smoky crispy skin and juicy meat—no smoker required. After years of perfecting my technique at The Smoky Pig, I've simplified the process while keeping that authentic Southeast flavor. The key? A dry rub that caramelizes beautifully in the oven, creating a bark that rivals traditional pit cooking.
Unlike slow-smoked methods, this approach uses high heat to render fat and develop flavor quickly—30 minutes from start to finish. You'll start with bone-in quarters, which stay incredibly tender while the skin develops that coveted crisp texture. The dry rub isn't just seasoning; it's the foundation for that deep, smoky flavor profile that makes this dish irresistible.
What you'll end up with is chicken that's crispy enough to stand up to a fork yet juicy enough to make every bite worth it. The bark will be rich and caramelized, while the meat inside remains tender and flavorful. This is the kind of dish that transforms a simple weeknight meal into something special—without requiring hours at the grill.
Serve with classic sides like coleslaw or cornbread, or take it to a tailgate for a crowd-pleasing centerpiece. The beauty of this method is its versatility—whether you're feeding a family or a group of hungry friends, the results are consistently impressive. Let's get cooking!
Ingredients for baked barbecue chicken quarters
Pantry staples meet smoky magic for chicken that's crispy outside, juicy inside.
| Ingredient | Amount | Notes |
|---|---|---|
| Bone-In Chicken Quarters 🍗 | 2 lb | Skin-on, cut into quarters |
| Yellow Onion 🧅 | 1 whole | Large, thinly sliced |
| Garlic Cloves 🧄 | 6 cloves | Fresh, minced finely |
| Smoked Paprika 🌶️ | 2 tbsp | High quality for smokiness |
| Ground Cumin 🌿 | 1 tbsp | Freshly toasted preferred |
| Dried Thyme 🍃 | 1 tsp | Or 1 tbsp fresh thyme |
| Dried Oregano 🍃 | 1 tsp | Mexican oregano preferred |
| Ground Black Pepper 🌶️ | 1 tsp | Freshly cracked preferred |
| Kosher Salt 🧂 | 1 ½ tbsp | Diamond Crystal preferred |
| Brown Sugar 🍚 | 2 tbsp | Light or dark preferred |
| Apple Cider Vinegar 🍎 | 2 tbsp | For tangy depth |
| Olive Oil 🫒 | 2 tbsp | Extra-virgin for richness |
| Honey 🍯 | 1 tbsp | Wildflower preferred |
| Barbecue Sauce 🍅 | ½ cup | Store-bought or homemade |
The chicken quarters are non-negotiable here—bone-in with skin keeps everything tender while creating that perfect crisp. I always grab free-range from Whole Foods or the butcher counter at Kroger—the flavor difference is noticeable. If you're cutting them yourself, aim for even-sized pieces so they cook uniformly. The skin should be intact; any tears will prevent that perfect bark. For a shortcut, many grocery stores sell pre-cut quarters in the deli section, but check the quality—some have been sitting too long.
No smoked paprika? Regular paprika plus a pinch of liquid smoke works in a pinch, though it's not quite the same. The cumin can be toasted in a dry pan for 30 seconds to deepen its flavor—worth the extra minute. Fresh thyme is ideal, but dried at one-third the amount gets you close. That said, if you've got dried thyme that's been sitting for months, toss it. The brown sugar adds caramelization, but if you're watching sugar, swap for 1 tbsp molasses. For the barbecue sauce, I prefer Sweet Baby Ray's for its balance, but any good store-bought brand works—just avoid the watery, overly sweet varieties. Homemade? Start with tomato paste, apple cider vinegar, and a touch of liquid smoke.
Prep the dry rub ahead and store it in an airtight container for up to 2 weeks—it's perfect for quick weeknight meals. The chicken itself keeps best in the fridge for 2 days before cooking, but if you're prepping ahead, you can pat it dry and refrigerate uncovered for 1 hour before applying the rub to help it crisp better. Leftovers? These reheat beautifully—350°F for 15 minutes until crispy again. I always make a double batch because the leftovers are even better the next day—trust me on that.
Why You'll Love This Recipe
- One-Pan Magic: I swear by this recipe—just toss the chicken, onions, and garlic on a sheet pan, sprinkle that smoky paprika and cumin, and forget about it. No pots, no pans, no stress. The oven does all the work while I sip my coffee and pretend I’m not cooking.
- Smoky Depth Bomb: That combo of smoked paprika and cumin? It’s like a slow-smoked BBQ flavor without the hours. The chicken gets tender, the edges crisp just right, and the garlic-onion base caramelizes into a sticky, savory glaze—no sauce needed.
- Tailgate Ready: Between us, this is my go-to for game days, potlucks, or when my college kid calls asking for “real food.” The quarters stay juicy and hold up perfectly, and honestly? No one cares if it’s not fancy—just delicious.
- Budget Win: Bone-in quarters stretch further than breasts, and the spices cost pennies. I make a double batch, save half for lunches, and still have leftovers that taste better reheated than most takeout. My wallet and my taste buds thank me.
Step-by-step instructions for baked barbecue chicken quarters
Here's how to achieve that perfect balance of smoky crispy skin and juicy meat every time.
Prepare and Season the Chicken Thoroughly
Pat the 2 lb bone-in chicken quarters completely dry using paper towels—this is crucial for crispy skin. I like to press firmly to remove all moisture from the skin and cavities. Place them skin-side up on a wire rack set over a baking sheet.
In a small bowl, combine the 2 tbsp smoked paprika, 1 tbsp ground cumin, 1 tsp dried thyme, 1 tsp dried oregano, 1 tsp ground black pepper, and 1.5 tbsp kosher salt. Rub this mixture all over the chicken, including underneath the skin and inside any cavities. The spices should adhere well to create that deep, smoky flavor profile we're after. Let the seasoned chicken rest uncovered at room temperature for 30 minutes while you preheat the oven.
Create the Flavorful Glaze and Pre-Bake for Crispiness
Preheat your oven to 425°F with the rack positioned in the middle position. In a small saucepan, combine 2 tbsp olive oil, 2 tbsp apple cider vinegar, 2 tbsp brown sugar, 1 tbsp honey, and 0.5 cup barbecue sauce. Bring to a gentle simmer over medium heat for 3-4 minutes until slightly thickened—this will create our glossy finish.
Transfer the chicken to a parchment-lined baking sheet and bake uncovered for 25 minutes. This initial high-heat phase will render the fat and get the skin nicely crisped before we add the sauce. You'll know it's ready when the skin is golden brown and starting to crisp up—don't walk away during this time as it happens quickly.
Add the Glaze and Finish with Juicy Perfection
Remove the chicken from the oven and carefully brush the thickened glaze mixture all over the skin, getting it under the skin if possible. Return to the oven and bake for an additional 20-25 minutes until the internal temperature reaches 165°F in the thickest part of the meat. The skin should be deep mahogany brown with crispy edges.
Here's the thing—this final bake time can vary slightly depending on your oven. I check the temperature at the 20-minute mark, then every 5 minutes after that. The chicken is done when it reaches 165°F AND the juices run clear when you pierce the thickest part with a meat thermometer. This ensures both safety and perfect juiciness.
Rest and Serve with Maximum Flavor
Transfer the chicken quarters to a cutting board and let them rest for 10 minutes before serving. This resting period allows the juices to redistribute throughout the meat, preventing them from running out when you cut into the chicken. The skin will stay crispy while the meat becomes even more tender.
Slice each quarter between the bone and meat, then separate at the joints for easy serving. The result should be chicken with beautifully crispy, caramelized skin that gives way to incredibly juicy, flavorful meat underneath. Serve with the remaining glaze drizzled on top and any pan juices spooned over for extra moisture. The combination of smoky spices, sweet glaze, and tender meat makes this dish truly special.
Pro Tips For Making Baked Barbecue Chicken Quarters
- Trim the Fat First: Bone-in quarters have more fat than you’d expect—scrape away the thick patches under the skin and around the joint before seasoning. I learned this the hard way when my first batch rendered into a greasy mess instead of crispy edges.
- Roast Onions Separately: Slice the yellow onion into even rings and roast them at 400°F (200°C) for 15–20 minutes before adding the chicken. They’ll caramelize into sweet, jammy bits that stick to the meat like glue—way better than tossing them in raw.
- Don’t Overcrowd the Pan: If your sheet pan is packed tight, the chicken will steam instead of brown. Leave at least 1 inch of space between quarters—yes, even if it means two batches. Crowding turns crispy skin into sad, soggy paper.
- Smash the Garlic: Skip mincing—peel the cloves, wrap each in a sheet of foil, and smash them flat with the side of your knife. The released oils infuse the chicken faster, and you won’t end up with raw garlic chunks in your sauce. (Trust me, you’ll taste the difference.)
Make-ahead tips for leftovers
Prep Ahead for Crispy Success
Start your dry rub mix 24 hours ahead and store it in an airtight container—this gives the spices time to meld. I like to toast the cumin and black pepper in a dry skillet for 30 seconds before mixing, which deepens their flavor. For the chicken, pat it dry and refrigerate uncovered on a wire rack for 1 hour before applying the rub. This dries the skin further, ensuring maximum crispiness when baked. 💪
Overnight Marinating Trick
Marinate the chicken in the glaze mixture overnight in the fridge for restaurant-quality flavor. Combine all glaze ingredients (except barbecue sauce) in a resealable bag, add the chicken, and refrigerate. In the morning, bake at 400°F for 35 minutes—the slow start renders fat while the high heat finishes the crisp. Just brush with sauce in the last 10 minutes to keep it glossy.
Freezer-Friendly Prep
Fully seasoned, unbaked chicken quarters freeze beautifully for up to 3 months. Wrap each piece individually in parchment paper, then place in a freezer bag with all the glaze ingredients. When ready to cook, bake straight from frozen at 425°F for 50 minutes, brushing with sauce at the 30-minute mark. The extra time compensates for the cold start while keeping the skin crisp.
Batch Cooking for Crowds
Double the recipe and bake two trays at once for gatherings. Use a commercial-grade half-sheet pan (like those from Restaurant Depot) to fit more pieces. Space quarters 1 inch apart to prevent steaming. For even cooking, rotate trays halfway through the bake. I always make 4 extra quarters—they disappear fast at tailgates!
Reheating Leftovers
Reheat leftovers in a 400°F oven for 15 minutes to restore crispiness. Place chicken on a wire rack over a baking sheet to avoid soggy skin. For quick meals, broil for 3-5 minutes on high, watching closely to prevent burning. Store cooked chicken in an airtight container with a paper towel to absorb moisture—this keeps it crisp for up to 4 days. 🔥
Nutrition facts
Frequently asked questions
Why do you recommend bone-in chicken quarters for this recipe?
The bones act as a natural heat sink, keeping the meat incredibly tender while the skin crisps perfectly. Bone-in pieces also stay juicier during baking since they retain moisture better than boneless cuts. Plus, the flavor infusion from the bones enhances the overall taste - something you'd miss with boneless chicken.
Can I use regular paprika instead of smoked paprika?
You can substitute, but you'll lose some of that authentic smoky depth. For best results, use 1 tbsp regular paprika plus ½ tsp liquid smoke** to mimic the smokiness. The flavor won't be identical, but it'll still taste delicious. For true barbecue flavor, smoked paprika is worth the small investment.
How do I know when the chicken is fully cooked?
Use a meat thermometer to check the thickest part of the meat - it should reach 165°F. The juices should run clear when pierced, and the skin should be deep mahogany brown with crispy edges. Never rely on color alone, as some ovens may cook unevenly. If you don't have a thermometer, cut into the thickest part to check for doneness.
What's the best way to reheat these leftovers without losing crispiness?
Place leftovers on a wire rack over a baking sheet and reheat at 400°F for 15 minutes. This method restores crispiness by allowing hot air to circulate around all sides. For quick meals, broil for 3-5 minutes on high, watching closely to prevent burning. Store cooked chicken in an airtight container with a paper towel to absorb moisture and maintain crispness.
Can I make this recipe in an air fryer instead of the oven?
Preheat your air fryer to 375°F and cook for 18-20 minutes, spraying with oil halfway through. The skin will crisp beautifully, though you may need to brush with sauce more frequently. For best results, use a wire rack insert to prevent steaming. Air fryers work particularly well for smaller batches or when you need faster cooking times.