
Main Courses
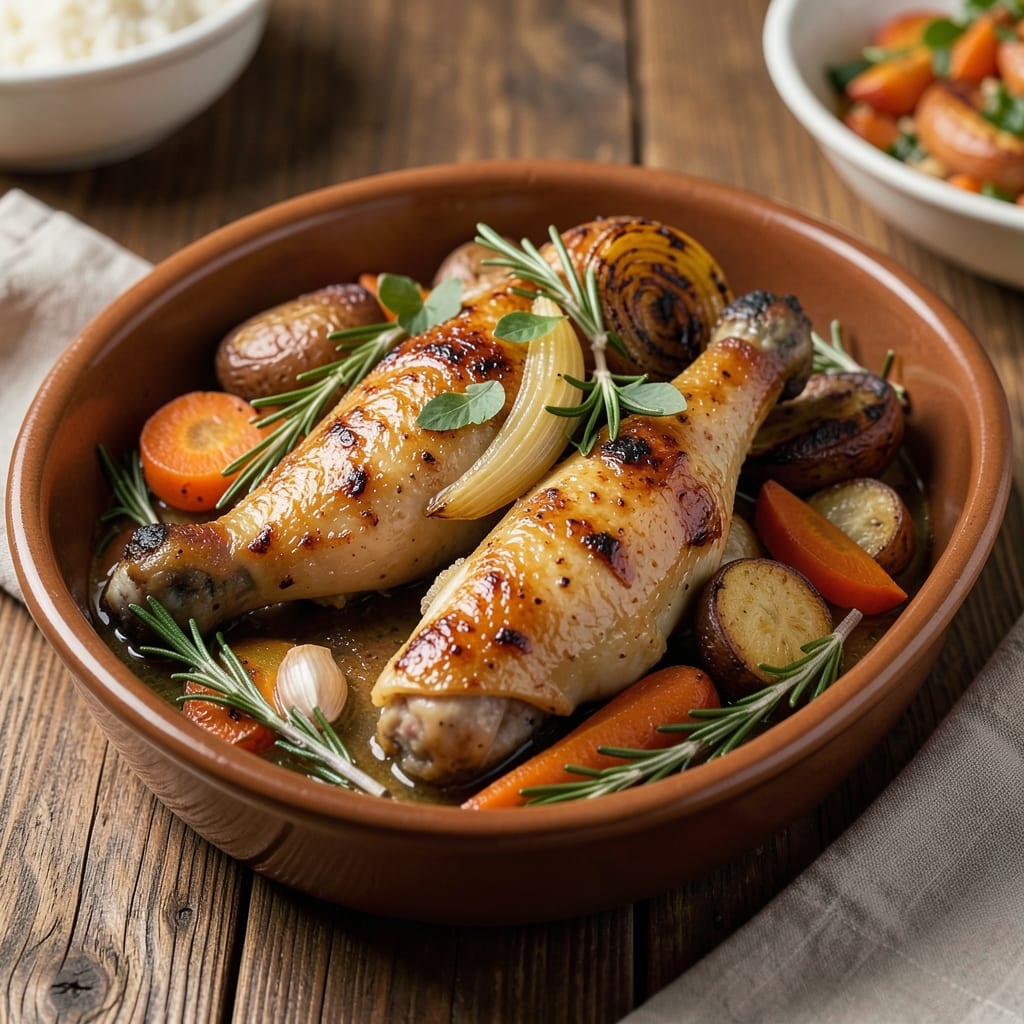
This juicy baked chicken legs recipe delivers restaurant-quality skin-on bites and perfectly roasted vegetables in one simple tray. 🔥 I developed this method after years of perfecting whole-hog roasting techniques that transform tough cuts into melt-in-your-mouth tenderness. The secret lies in high-heat baking with aromatic herbs that infuse the meat while caramelizing the skin to crispy perfection.
What makes this recipe stand out is its balance—tender, golden chicken thighs paired with crisp-tender vegetables that absorb the same savory flavors. No fancy equipment needed; just a sturdy baking sheet and a 400°F oven. The vegetables roast alongside the chicken, creating a harmonious one-pan meal that's foolproof for weeknights or dinner parties alike.
By the time you pull this tray from the oven, you'll have succulent chicken with crackling skin and vegetables that are perfectly caramelized at the edges. The aroma alone will have everyone gathering around the table. This is the kind of meal that feels special without requiring hours of prep or multiple dishes to clean.
Serve with a drizzle of pan juices and fresh herbs for an elegant touch, or pair with crusty bread to soak up every last bit. The technique scales easily—whether you're feeding a family or hosting a crowd. Let's get started on this crowd-pleasing masterpiece.
Ingredients for baked chicken legs with vegetables
Pantry staples and fresh herbs transform simple chicken legs into restaurant-worthy bites with crispy skin and caramelized veggies.
| Ingredient | Amount | Notes |
|---|---|---|
| Chicken Legs 🍗 | 1 ½ lb | Bone-in, skin-on, similar size |
| Baby Potatoes 🥔 | 1 ½ lb | Halved, unpeeled |
| Carrots 🥕 | 1 lb | Baby or whole, cut into chunks |
| Yellow Onion 🧅 | 1 whole | Cut into wedges |
| Garlic Cloves 🧄 | 4 cloves | Smashed, not minced |
| Fresh Rosemary 🌿 | ¼ cup | Chopped, stems removed |
| Fresh Thyme 🌿 | 0.15 cup | Leaves only, finely chopped |
| Extra-Virgin Olive Oil 🫒 | ¼ cup | For crispy skin |
| Kosher Salt 🧂 | 1 ½ tbsp | Diamond Crystal preferred |
| Ground Black Pepper 🌶️ | 1 tsp | Freshly cracked |
| Smoked Paprika 🌶️ | 1 tsp | For smoky depth |
| Honey 🍯 | 1 tbsp | Wildflower preferred |
The chicken legs are the star—bone-in, skin-on cuts make all the difference for juicy meat and crispy skin. Grab free-range or organic from the grocery store meat section if you can (the flavor is worth it), but standard supermarket legs work too. For the veggies, baby potatoes and carrots cut down on prep time—just halve the potatoes and chop the carrots into even chunks. The yellow onion adds sweetness as it caramelizes, so don't skip it. I always grab fresh rosemary and thyme from the grocery store's produce section (they're usually sold in small bunches near the herbs), but dried works in a pinch if you're in a hurry.
No fresh rosemary? Dried at one-third the amount works fine—just crush the stems first for extra flavor. Short on honey? Maple syrup does the trick, though it might darken the skin slightly. The olive oil is non-negotiable for crispy chicken—use something fruity and peppery, not that bland vegetable oil. For the smoked paprika, grab a small jar from Trader Joe's or the spice aisle; it keeps for months. If you're prepping ahead, pat the chicken dry with paper towels before seasoning—this helps the skin crisp up beautifully.
This dish reheats like a dream—toss leftovers in the oven at 350°F for 10 minutes to revive the crispiness. Store in the fridge for up to 4 days or freeze for 3 months (the skin stays crispy if you reheat properly). I always make a double batch—one for dinner, one for lunches the next week. The veggies actually taste better the second day as the flavors meld together, so don't hesitate to save leftovers. Keep the pan juices in a jar in the fridge too—they're perfect for drizzling over rice or toast.
Why You'll Love This Recipe
- One-Pan Magic: I swear by this for lazy nights—just toss everything on a sheet pan (chicken, potatoes, carrots, onion), drizzle with olive oil, and let the oven do the work. No pots, no pans, no stress.
- Crispy-Gold Perfection: The chicken legs get that irresistible crispy skin while staying juicy inside, and the carrots caramelize into sweet, tender bites. Honestly, the smell alone makes my kitchen feel like a restaurant.
- Meal Prep MVP: Between us, this is my go-to for lunches all week. The leftovers stay flavorful, and I can reheat them straight from the fridge—no sad, dry chicken here.
- Budget-Friendly Feast: Chicken legs are affordable, and the veggies stretch the meal without breaking the bank. Plus, it feeds four for under $15, and my kids still beg for seconds. (Yes, even on a Tuesday night.)
Step-by-step instructions for baked chicken legs with vegetables
Here's how to nail perfectly crispy skin and tender meat with caramelized veggies in one pan.
🔥 Step 1: Prep the Chicken and Preheat the Oven
Start by patting the 1.5 lb chicken legs completely dry with paper towels—this is non-negotiable for crispy skin. I like to do this over the sink so I can shake off any excess moisture. Place them skin-side up on a wire rack set inside a rimmed baking sheet.
Preheat your oven to 425°F with the rack positioned in the middle position. This high heat is key for getting that golden, crackling skin we're after. While it's heating, mix together 1.5 tbsp kosher salt, 1 tsp ground black pepper, 1 tsp smoked paprika, and 1 tbsp honey in a small bowl. The honey will help caramelize the skin while adding subtle sweetness.
👨🍳 Step 2: Season and Sear the Chicken
Rub the seasoning mixture all over the chicken legs, pressing it into the skin and making sure to get into any crevices. Let them sit at room temperature for 15 minutes while you prep the vegetables—this helps them cook more evenly. Meanwhile, in a small bowl, combine 0.25 cup chopped fresh rosemary, 0.15 cup chopped fresh thyme, and 0.25 cup extra-virgin olive oil. Stir well to create a fragrant herb oil.
Pour half of the herb oil over the chicken legs, making sure it coats them evenly. Then, place the baking sheet in the preheated oven for 10 minutes. This initial sear will get the skin beautifully crispy before we add the vegetables. Don't peek during this time—opening the oven too soon will let out precious heat.
🥘 Step 3: Add Vegetables and Toss
While the chicken is searing, cut the 1.5 lb baby potatoes in half (leave the skins on for texture), chop the 1 lb carrots into 1-inch chunks, and slice the 1 whole yellow onion into wedges. Peel and smash the 4 garlic cloves with the flat side of your knife—this releases their flavor without making them into a paste.
After the initial 10 minutes, remove the chicken from the oven and arrange the potatoes, carrots, onions, and garlic cloves around them on the baking sheet. Drizzle the remaining herb oil over everything, then toss gently to coat. The vegetables should be in a single layer—don't overcrowd the pan, or they won't get properly crispy.
🔥 Step 4: Bake Until Golden and Tender
Return the baking sheet to the oven and bake for 40-45 minutes, until the chicken skin is deep golden brown and crispy, and the vegetables are tender when pierced with a fork. The potatoes should be fork-tender with slightly crispy edges, and the carrots should be soft but still holding their shape.
Here's the thing—your oven might run hot, so start checking at the 35-minute mark. The chicken is done when the internal temperature reaches 165°F in the thickest part of the thigh. If the skin starts browning too quickly before the chicken is done, tent it loosely with foil for the last 10 minutes of cooking.
⏰ Step 5: Rest and Serve
Once everything is perfectly cooked, transfer the chicken legs and vegetables to a serving platter. Let them rest for 5 minutes before serving—this allows the juices to redistribute in the chicken, ensuring every bite is moist and flavorful. The vegetables will stay hot during this time, and their flavors will meld beautifully.
Serve the crispy chicken legs with the caramelized vegetables directly from the baking sheet. The contrast of the juicy, skin-on chicken with the sweet, tender vegetables is what makes this dish so special. Don't forget to save any leftover herb oil—it's perfect for drizzling over salads or roasted greens later!
Pro Tips For Making Baked Chicken Legs With Vegetables
- SEAR CHICKEN FIRST: I learned this the hard way—skipping the sear means bland, pale chicken. Pat the legs dry, then hit them with a hot pan for 3-4 minutes per side until golden before baking. The Maillard reaction kicks in, giving you flavor that oven-roasting alone can’t match. (Yes, even if you’re impatient like me.)
- CUT POTATOES UNIFORM: Baby potatoes? Great. But if they’re lumpy, they’ll cook unevenly. Halve any larger ones and cut them into rough 1-inch chunks—consistent size means they crisp at the same time. No one likes mushy potatoes while the chicken’s still raw.
- DON’T OVERCROWD THE PAN: After burning three batches, I finally figured out: chicken legs need space to breathe. Arrange them skin-side up with a little room between each, or they’ll steam instead of crisp. Same goes for the veggies—toss them in a single layer if the pan’s crowded.
- ROAST ONIANS LAST: My grandmother swore by this, and she was right: onions burn fast. Toss them with oil and salt, but add them to the pan only in the final 15 minutes. By then, the chicken’s halfway done, and the onions get caramelized without turning to charcoal. (Your future self will thank you.)
Common mistakes when making your baked chicken legs with vegetables
Overcrowding the Pan
This is my biggest pet peeve—packing the baking sheet too tightly. When you overcrowd the chicken legs or vegetables, they steam instead of roast, resulting in soggy skin and mushy veggies. I always arrange the chicken legs with ½ inch of space between them and spread the vegetables in a single layer. If you're using a half-sheet pan (13x18 inches), you should have room for 4-6 chicken legs with vegetables around them. 🥔
Skipping the Resting Time
I can't tell you how many times I've seen people cut into chicken legs immediately after pulling them from the oven. This is a huge mistake—the juices need 5 minutes to redistribute. When you slice too soon, all that flavor runs out, leaving you with dry meat. Trust me, those 5 minutes make all the difference. Let the chicken rest on the baking sheet or a cutting board before serving.
Using Wet Chicken
Moisture is the enemy of crispy chicken skin. If you don't pat the chicken legs completely dry before seasoning, you'll end up with sad, limp skin instead of that perfect golden crust. I always use two layers of paper towels and press firmly. For extra insurance, I'll even let them air-dry on a wire rack for 10 minutes before seasoning. The dryness is what creates that magical Maillard reaction we're after. 🍗
Peeking Too Often
Every time you open that oven door, you lose precious heat and moisture. I see people checking on their chicken every 5 minutes, and it ruins the crispy skin. Resist the urge! Let the chicken cook undisturbed for at least 20 minutes before checking. If you're really worried, use an oven thermometer to monitor your oven's actual temperature—many home ovens run 25-50°F hotter than they're set to.
Uneven Vegetable Sizes
When your vegetables are different sizes, they won't cook evenly. The small pieces will burn while the larger chunks stay undercooked. I always cut everything to similar sizes—1-inch chunks for carrots, halved baby potatoes, and even onion wedges. This ensures everything finishes at the same time. Pro tip: If you're using larger vegetables like whole carrots, cut them into 1.5-inch pieces so they don't take forever to cook.
Ignoring the Pan Juices
Those beautiful pan juices are flavor gold! I've seen people just toss them in the trash, and that's criminal. The juices from the chicken and vegetables are packed with flavor. After serving, pour them into a small saucepan and reduce by half over medium heat. This makes an incredible drizzle for the chicken or a quick pan sauce. You can even use it as a base for gravy. Don't waste this liquid treasure—it's the secret to making your dish taste even more restaurant-quality. 💛
Nutrition facts
Frequently asked questions
Can I use bone-in, skin-off chicken thighs instead of legs?
Yes, but the cooking time will differ slightly. Bone-in, skin-off thighs typically cook about 10-15 minutes faster than legs. Use a meat thermometer to check for 165°F in the thickest part. The crispy skin technique won't apply, but you'll still get tender meat and caramelized vegetables.
What if my oven runs hotter than 425°F?
Most home ovens run 25-50°F hotter than set temperatures. If your chicken browns too quickly, tent it loosely with foil for the last 10 minutes of cooking. For better accuracy, use an oven thermometer. If your oven is extremely hot, reduce the temperature to 400°F and add 5-10 minutes to the cooking time.
How do I make this dish gluten-free?
This recipe is naturally gluten-free! Just ensure your smoked paprika and other spices are certified gluten-free if you're highly sensitive. The potatoes, carrots, and onions are all gluten-free vegetables. For extra flavor, serve with a side of roasted gluten-free bread or a fresh salad.
Can I substitute other vegetables?
Swap the carrots for bell peppers or zucchini, or use asparagus instead. For heartier sides, try parsnips or sweet potatoes. Just cut them to similar sizes so they cook evenly. The key is to keep the vegetable pieces 1-inch or less for consistent doneness.
Why did my chicken skin turn out pale instead of crispy?
Pale skin usually means moisture wasn't removed properly or the oven wasn't hot enough. Double-check that you patted the chicken thoroughly dry with paper towels before seasoning. Also, ensure your oven reaches 425°F—some ovens need 15-20 minutes to fully preheat. For extra crispiness, broil for 2-3 minutes** at the end (watch closely!).