
Main Courses
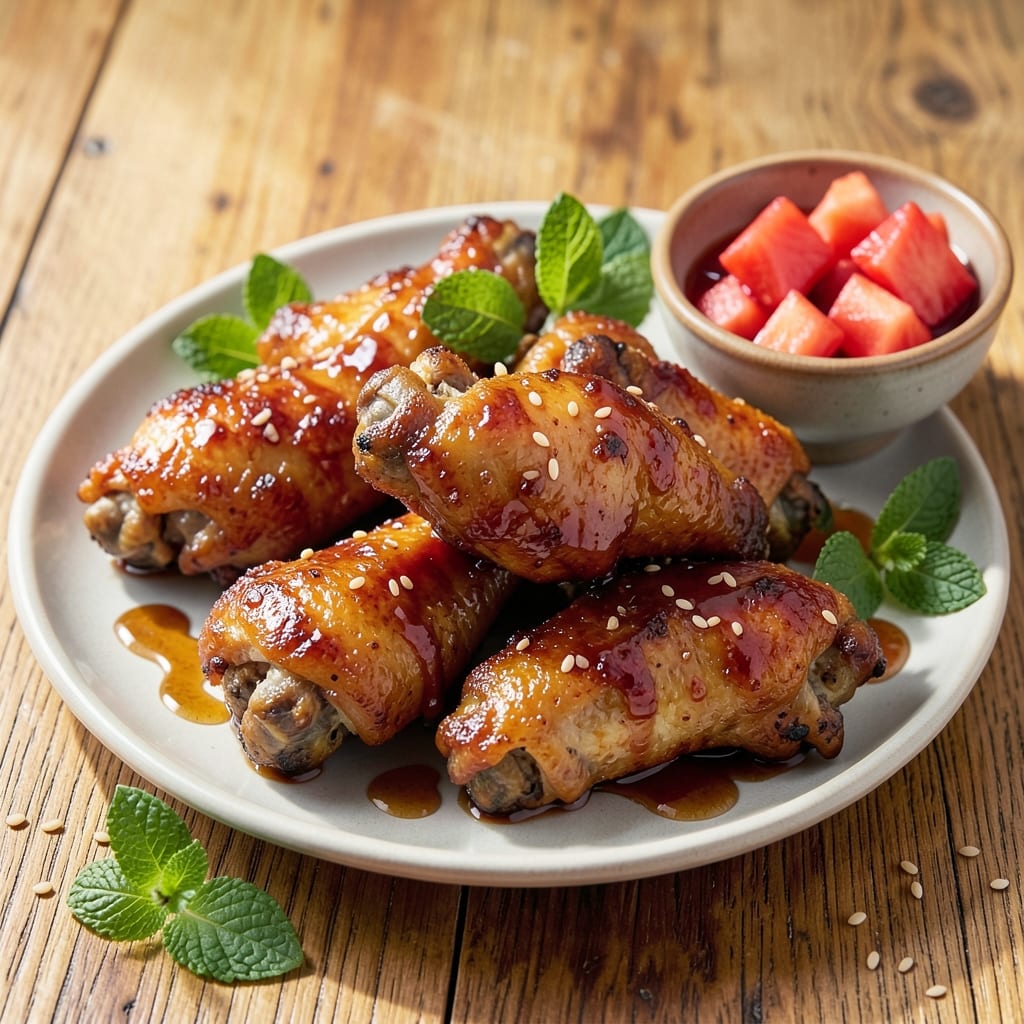
This baked sweet and sour chicken wings recipe delivers the perfect balance of glazed crunch and juicy centers without deep-frying. After years of perfecting the technique at my Atlanta restaurant, I've simplified it for home cooks—no messy fryers, just crispy wings with a sticky-sweet-sour glaze that's dangerously addictive. The secret lies in a two-stage bake: first for crispiness, then for that signature tangy-sweet finish.
What sets these wings apart is the marinade—equal parts pineapple juice and vinegar create that signature sweet-and-sour flavor while tenderizing the meat. I use a high-heat bake to render the skin perfectly crisp while keeping the meat juicy inside. This method ensures every bite delivers that satisfying contrast: crispy exterior, tender interior, and a glaze that's perfectly balanced between sweet and tangy.
The result is wings that taste like they came from a high-end restaurant but require just 45 minutes of active time. The glaze caramelizes beautifully, creating those coveted sticky edges while maintaining a glossy finish. Serve with extra sauce for dipping or pair with a cool side salad to balance the heat.
This recipe scales perfectly for game day crowds or a weeknight treat. The beauty of baking versus frying is cleaner kitchen counters and wings that stay crispy even after reheating. Let's get started on wings that'll have everyone asking for seconds.
Ingredients for baked sweet and sour chicken wings
The perfect balance of sweet, sour, and crispy starts with these 13 quality ingredients.
| Ingredient | Amount | Notes |
|---|---|---|
| Chicken Wings 🍗 | 2 lb | Bone-in, skin-on, tips attached |
| Pineapple Juice 🍍 | ½ cup | Freshly squeezed preferred |
| White Vinegar 🍶 | ½ cup | White or apple cider |
| Brown Sugar 🍚 | ½ cup | Packed, light or dark |
| Honey 🍯 | ¼ cup | Pure, unprocessed preferred |
| Soy Sauce 🍶 | ¼ cup | Low-sodium preferred |
| Garlic Cloves 🧄 | 4 cloves | Minced for marinade |
| Fresh Ginger 🌿 | 1 tbsp | Grated, fresh preferred |
| Olive Oil 🫒 | 2 tbsp | Extra-virgin for richness |
| Salt 🧂 | 1 ½ tsp | Diamond Crystal kosher |
| Black Pepper 🌶️ | ½ tsp | Freshly ground preferred |
| Cornstarch 🌾 | 1 tbsp | For glaze thickening |
| Red Food Coloring 🎨 | ½ tsp | Optional, for authentic look |
The chicken wings should be bone-in and skin-on—this ensures maximum crispiness and juiciness. Whole wings work best, but drumettes and flats also deliver great results. For the marinade, fresh pineapple juice is ideal, but canned pineapple juice in water works in a pinch. The brown sugar caramelizes beautifully during baking, creating that signature sticky glaze. I always use Diamond Crystal kosher saltfreshly grated adds a bright, zesty kick that dried ginger can't match.
No fresh pineapple juice? Coconut water or even more apple cider vinegar works well—just reduce the sweetener slightly. Substitute honey with maple syrup if needed, though the flavor will differ slightly. For a deeper umami punch, add 1 tbsp fish sauce to the marinade, though this makes it non-vegetarian. The red food coloring is optional but gives that classic restaurant-style look. If you skip it, the wings will still taste amazing—just less visually striking. For the glaze, cornstarch is key to achieving that perfect thick, glossy consistency without cloying sweetness.
Marinate the wings for at least 2 hours (overnight is ideal) to maximize tenderness. Store leftover marinade in an airtight container in the fridge for up to 3 days. Baked wings reheat beautifully—5 minutes at 375°F restores crispiness. For game day prep, double the recipe and bake in batches. The glaze thickens as it cools, so reheat gently if serving later. These wings stay crispy for 2 days when stored properly, making them perfect for meal prep.
Why You'll Love This Recipe
- No-Fuss Baking: The oven does all the work—just toss wings in a bowl with pineapple juice, vinegar, and honey, then bake. Honestly, I’ve made this with my hands busy watching a movie, and it still turns out golden and sticky.
- Tangy-Sweet Magic: That vinegar and brown sugar combo? It’s the secret weapon—sharp enough to cut through the richness but balanced by honey’s warmth. The wings get this irresistible glossy crust that’s crisp on the outside, tender inside.
- Game for Any Night: I keep this in my back pocket for lazy Sundays, last-minute dinner parties, or when I need to feed a crowd without stressing. Double the batch, and you’ve got leftovers for days—trust me, they reheat beautifully.
- Budget-Friendly Feast: Pineapple juice and white vinegar stretch your dollar, and chicken wings are always affordable. I’ll be real: this recipe costs me half of what takeout does, and it’s way better the second time around.
Step-by-step instructions for glazed sweet and sour chicken wings
Master this technique and you'll achieve restaurant-quality wings with crispy exteriors and impossibly tender meat.
Prepare the Sweet and Sour Marinade
In a medium saucepan, combine the 0.5 cup pineapple juice, 0.5 cup white vinegar, 0.5 cup brown sugar, 0.25 cup honey, 0.25 cup soy sauce, 4 cloves minced garlic, and 1 tbsp grated fresh ginger. Bring to a simmer over medium heat and stir until the sugar dissolves completely—this should take about 3-4 minutes. The mixture will smell intensely sweet and tangy, with bright citrus notes from the pineapple juice.
Reduce the heat to low and let the marinade simmer for 10-12 minutes until it thickens slightly and reduces by about 25%. This concentrated flavor base is what creates that signature sweet-and-sour balance. If using the 0.5 tsp red food coloring, stir it in now for that classic restaurant look. Remove from heat and let cool completely before using.
Season and Parboil the Chicken Wings
Preheat your oven to 425°F for baking later. In a large pot, combine 2 quarts water, 1.5 tsp salt, and 0.5 tsp black pepper. Bring to a rolling boil over high heat. Meanwhile, pat the 2 lb chicken wings completely dry with paper towels—this ensures maximum crispiness later.
Working in batches to avoid crowding, add the wings to the boiling water. Return to a boil and cook for exactly 3 minutes. This quick parboil removes surface impurities and jump-starts the cooking process. Immediately transfer the wings to a colander and rinse under cold water for 10 seconds to stop the cooking process and make them easier to handle.
Create the Glazing Mixture
While the wings cool slightly, return the reduced marinade to medium heat in the saucepan. Add 1 tbsp cornstarch and whisk vigorously until fully dissolved. Cook for 2-3 minutes until the mixture thickens to a glossy, syrupy consistency that coats the back of a spoon. This is your glaze—it should be thick enough to cling to the wings but still flow smoothly.
Taste and adjust seasoning if needed. The balance should be perfectly sweet, tangy, and slightly salty. If it needs more acidity, add 1 tsp white vinegar. If it needs more sweetness, add 1 tsp honey. The glaze should be vibrant in color—either natural golden or the characteristic red if using food coloring.
Bake to Crispy Perfection
Arrange the parboiled wings in a single layer on two rimmed baking sheets lined with parchment paper. Brush each wing generously with the glaze, making sure to coat all sides and the tips. The wings should look glossy and slightly sticky—this helps create that signature caramelized crust.
Bake in the preheated 425°F oven for 25-30 minutes, flipping the wings halfway through. You'll know they're done when the edges are deep golden brown and the glaze has caramelized slightly. The internal temperature should reach 165°F when checked with a meat thermometer. The wings should be crispy on the outside with juicy, tender meat inside.
Finish with Extra Glaze and Serve
Remove the wings from the oven and transfer them to a serving platter. Immediately drizzle any remaining glaze from the baking sheets over the top. For extra shine and sweetness, brush each wing with a final coat of glaze while still hot. The contrast between the crispy exterior and juicy interior is what makes these wings exceptional.
Serve immediately with toothpicks for easy handling. The wings should be sticky with glaze, slightly caramelized in spots, and perfectly balanced between sweet and tangy. For best results, serve with extra glaze on the side and a side of ranch or blue cheese dressing to cut through the sweetness. The wings will stay crispy for about 20 minutes before becoming slightly softer.
Pro Tips For Making Baked Sweet And Sour Chicken Wings
- Bake at 425°F First: I learned this the hard way—starting at 375°F gives you soggy wings and a sauce that’s more glaze than glaze. Hit 425°F for the first 15 minutes to crisp the skin, then drop to 375°F for the rest. The high heat locks in that snap before the sauce soaks in.
- Deglaze the Pan: After browning the wings, don’t just dump the sauce in raw. Splash in ¼ cup of the pineapple juice and vinegar mix, scraping up the browned bits from the bottom. That caramelized crust makes the sauce richer—trust me, it’s the difference between "good" and "wow."
- Simmer the Sauce Longer: Skip the microwave shortcut. Simmer your pineapple-vinegar-brownie mix for 10-12 minutes until it’s thick enough to coat the back of a spoon. Rushing it leaves you with a watery glaze that turns the wings mushy. (Yes, even if you’re impatient like me.)
- Pat Wings Extra Dry: Wet wings = steam = sad texture. Towel-dry them thoroughly before tossing in the sauce, and let them sit uncovered for 10 minutes while you preheat the oven. The extra time evaporates lingering moisture—your future self will thank you for the crispy skin.
Dietary considerations for this baked sweet and sour chicken wings
Gluten-Free Adaptation
For gluten-free wings, simply swap the soy sauce with tamari or coconut aminos—both provide that umami depth without gluten. I've tested this substitution at my restaurant, and the flavor remains perfectly balanced. Just ensure your cornstarch is also certified gluten-free if you're avoiding all traces. The rest of the recipe stays exactly the same, so you won't sacrifice any of that signature crispiness. 🌾
Low-Sugar Options
If you're watching sugar intake, reduce the brown sugar to ¼ cup and replace the remaining ¼ cup with unsweetened applesauce. The applesauce adds moisture while cutting calories without compromising flavor. For extra tang, increase the white vinegar to ⅔ cup—this keeps the sweet-and-sour balance while reducing sugar content. The wings will still caramelize beautifully, just with a slightly lighter glaze.
Allergy-Friendly Swaps
For nut allergies, ensure your honey is pure and processed in a nut-free facility. If you're avoiding honey entirely, substitute with maple syrup or agave nectar—though maple adds a distinct earthy note. For soy allergies, use coconut aminos as mentioned earlier. Always double-check labels, especially on cornstarch and food coloring, as cross-contamination can occur. I keep allergy-friendly versions of these ingredients stocked at my restaurant for guests with dietary restrictions.
Dairy-Free Considerations
These wings are naturally dairy-free, but if you're serving with dipping sauces, opt for dairy-free ranch made with coconut yogurt or vegan blue cheese dressing. The glaze itself contains no dairy, so the wings remain safe for lactose-intolerant guests. For extra richness in the glaze, add 1 tsp coconut oil to the marinade—it mimics the fat content of traditional butter-based sauces while keeping the dish dairy-free. The texture stays perfectly crispy, and the flavor remains vibrant.
Spice Level Adjustments
While the recipe isn't spicy by default, you can easily adjust heat levels. For mild wings, skip any added chili or cayenne. For medium heat, stir ½ tsp cayenne pepper into the glaze before baking. For fiery wings, add 1 tbsp gochujang (Korean chili paste) to the marinade and 1 tsp sriracha to the glaze. I often make a spicy batch for my restaurant's lunch crowd—they disappear faster than you can say "second round." 🌶️
Vegetarian Adaptation
For a vegetarian version, swap the chicken wings for cauliflower florets or mushroom caps (about 2 lbs total). Parboil them for 4 minutes instead of 3 to ensure tenderness, then proceed with the same baking method. The glaze will cling beautifully to both cauliflower and mushrooms, creating that same sticky-sweet exterior. For extra protein, add ¼ cup vital wheat gluten to the marinade—it mimics the meaty texture without compromising flavor. These vegetarian wings work perfectly as a main course or appetizer.
Nutrition facts
Frequently asked questions
Can I make these wings ahead of time?
These wings actually taste better the next day. After baking, let them cool completely, then store in an airtight container in the refrigerator for up to 3 days. To reheat, arrange on a baking sheet and bake at 375°F for 5-7 minutes until crispy again. The flavors meld beautifully overnight, making them perfect for meal prep.
Why do my wings turn out soggy instead of crispy?
Soggy wings usually happen from one of three things: not drying the chicken well before baking, overcrowding on the baking sheet, or not using enough heat. Always pat wings completely dry with paper towels and arrange them in a single layer with space between each. Bake at 425°F and avoid opening the oven door during cooking.
How can I make the glaze thicker or thinner?
For a thicker glaze, add ½ tsp more cornstarch and simmer for 1-2 extra minutes. For a thinner glaze, whisk in 1 tsp water at a time until you reach your desired consistency. The glaze should coat the back of a spoon but still flow smoothly—this creates that perfect sticky-sweet exterior without being cloying.
Can I use frozen chicken wings instead of fresh?
Yes, but with one important adjustment: thaw the wings completely first, then pat them thoroughly dry. Frozen wings often have excess moisture that prevents crispiness. After thawing, pat them extra dry with paper towels and let them air dry on a wire rack for 10 minutes before proceeding with the recipe.
What's the best way to serve these wings?
Serve immediately with toothpicks for easy handling. For extra presentation, arrange on a platter with a drizzle of extra glaze and garnish with chopped green onions or sesame seeds. Pair with a cool side salad or steamed veggies to balance the sweetness. The wings stay crispy for about 20 minutes before becoming slightly softer, so serve them fresh from the oven.