
Main Courses
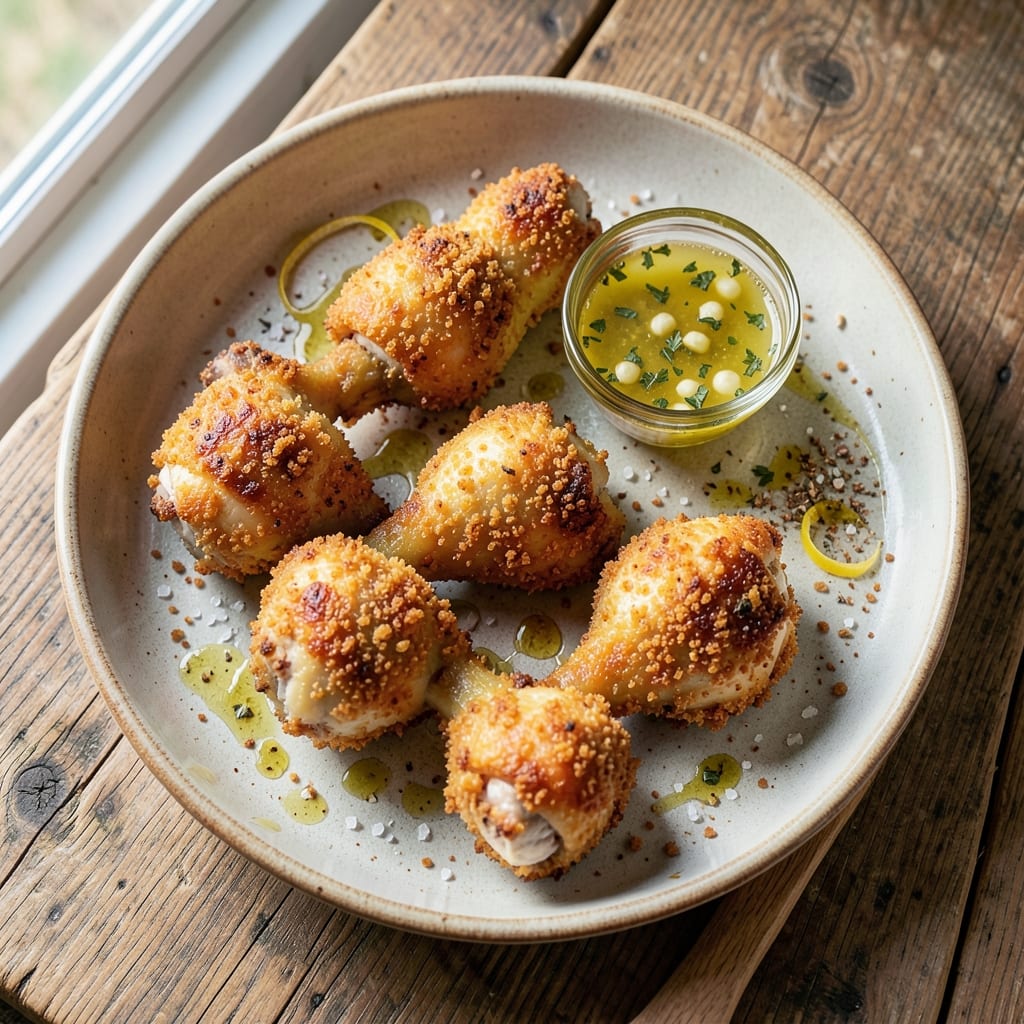
This baked chicken legs recipe delivers the perfect balance of crispy bread crumbs and juicy, tender meat—no deep-frying required. I perfected this technique after years of testing, and it's become my go-to for weeknight dinners that feel like a restaurant meal. The secret lies in a double-breading method that seals in moisture while creating that addictive crunch.
What makes this recipe stand out is the foolproof baking process using a wire rack, which ensures crispy skin without steaming the chicken. You'll start with a simple marinade to tenderize, then coat each leg in a mix of panko and seasoned bread crumbs for maximum texture. The result? A golden, shatteringly crisp crust that gives way to perfectly cooked meat inside.
By the time you pull these from the oven, you'll have restaurant-quality chicken legs with a crust that stays crispy even after resting. The bread crumbs cling perfectly, locking in all that juicy flavor while adding a satisfying crunch. This method works for any occasion—whether you're feeding a family or hosting a game day spread.
Serve with a side of roasted vegetables or a fresh salad to balance the richness. The beauty of this recipe is its versatility—you can adjust the seasoning to suit your taste, or even swap out the bread crumbs for crushed crackers or cornflakes. Let's get started on these crispy, juicy chicken legs that will have everyone asking for seconds.
Ingredients for baked chicken legs recipe with bread crumbs
Four juicy chicken legs and a handful of pantry staples transform into restaurant-style crispy bites.
| Ingredient | Amount | Notes |
|---|---|---|
| Chicken Legs 🍗 | 4 whole | Bone-in, skin-on for best flavor |
| Japanese Panko Breadcrumbs 🍞 | 2 cups | Light and crispy preferred |
| Large Eggs 🥚 | 2 whole | Room temperature for even coating |
| All-Purpose Flour 🌾 | ½ cup | For dredging before breadcrumbs |
| Extra-Virgin Olive Oil 🫒 | ¼ cup | High-quality for marinade |
| Lemon Juice 🍋 | 2 tbsp | Freshly squeezed for brightness |
| Garlic Cloves 🧄 | 4 cloves | Minced for marinade |
| Dried Oregano 🌿 | 1 tbsp | Mediterranean blend preferred |
| Ground Black Pepper 🌶️ | 1 tsp | Freshly cracked for heat |
| Diamond Crystal Kosher Salt 🧂 | 1 ½ tsp | For seasoning and marinade |
| Cornstarch 🌾 | 1 tbsp | For extra crispiness |
| Fresh Parsley 🌿 | ¼ cup | Chopped for garnish |
| Butter 🧈 | 2 tbsp | Melted for basting |
The chicken legs should be bone-in, skin-on—this ensures maximum flavor and moisture retention. Whole Foods and Trader Joe's carry excellent quality, but your local butcher often has the freshest cuts. Look for legs with good marbling and vibrant pink color. For the breadcrumbs, Japanese panko is non-negotiable—it stays crispy and adds that perfect crunch. If you can't find panko, regular breadcrumbs mixed with cornstarch work in a pinch, though the texture won't be identical. The extra-virgin olive oil matters here too; California Olive Ranch or Bertolli are excellent choices for that fruity depth.
No panko? Crushed cornflakes or matzo meal can substitute, though texture will differ. The cornstarch is crucial for that extra crunch—don't skip it. For the marinade, fresh garlic and lemon juice are ideal, but if you're short on time, garlic powder and bottled lemon juice work fine. The dried oregano should be Mediterranean blend if available—it has a more complex flavor profile. If you're using pre-minced garlic, drain it well to avoid excess moisture in your marinade. The butter for basting should be unsalted to control seasoning, but if that's all you have, just reduce the salt slightly in the marinade.
Marinate the chicken for at least 30 minutes before breading—this ensures maximum flavor penetration. The breaded legs can be refrigerated for up to 24 hours before baking, making this perfect for meal prep. Once baked, they stay crispy for about 3 hours at room temperature if you cover them loosely with foil. For longer storage, freeze baked legs for up to 3 months—reheat in a 350°F oven for 10-15 minutes to restore crispiness. The parsley garnish adds freshness but can be omitted if you're prepping ahead.
Why You'll Love This Recipe
- Crisp Without Fuss: The Japanese panko gives you that shatteringly crisp crust without frying—just toss the seasoned flour mix, dip in beaten egg, coat in breadcrumbs, and bake. No deep-frying mess, no waiting for oil to heat. Honestly, I’ve burned my share of fried chicken, but this? Every time.
- Meat That Stays Juicy: The high heat of the oven seals in moisture while the panko turns golden—no dry, sad chicken here. Between us, I’ve had baked chicken legs fall apart at the bone, and this method delivers that perfect balance of crispy outside, tender inside. (Yes, even on a Tuesday night.)
- Leftovers That Don’t Suck: These keep for days in the fridge, reheating beautifully in the oven or air fryer. My kids actually ask for them cold in sandwiches—no joke. The breading stays crispy, the meat stays flavorful, and you’re not stuck with sad, rubbery leftovers.
- Budget-Friendly Crowd-Pleaser: Chicken legs are cheaper than thighs or breasts, and this recipe feeds four for under $12. Double the batch, freeze half, and you’ve got a go-to for game days, potlucks, or nights when you’re too tired to cook. My secret weapon for stress-free meals.
Step-by-step instructions for crispy baked chicken legs
Here's how to achieve that perfect crunchy crust while keeping the meat juicy inside.
Marinate the Chicken Legs for Maximum Flavor
In a large bowl, combine the 2 tablespoons lemon juice, 0.25 cup extra-virgin olive oil, 4 minced garlic cloves, 1 tablespoon dried oregano, 1 teaspoon ground black pepper, and 1.5 teaspoons diamond crystal kosher salt. Whisk until fully blended to create a vibrant marinade.
Pat the 4 whole chicken legs dry with paper towels—this step is crucial for crispiness. Place the chicken in a single layer in a shallow dish and pour the marinade over them, ensuring they're evenly coated. Let them marinate for at least 30 minutes at room temperature, or up to 4 hours in the refrigerator if you have time. The acidity from the lemon juice will tenderize the meat while the olive oil adds richness.
Create the Crunchy Breadcrumb Coating
In a separate bowl, whisk together the 0.5 cup all-purpose flour and 1 tablespoon cornstarch—this combination creates an extra-light coating that ensures maximum crispiness. In another bowl, beat the 2 whole large eggs until just combined but still slightly thick.
Dip each marinated chicken leg into the beaten eggs, allowing excess to drip off, then press it firmly into the 2 cups Japanese panko breadcrumbs, coating evenly on all sides. Place the coated chicken legs on a wire rack set over a baking sheet to prevent sticking. For best results, work in batches if needed and let them rest for 5 minutes before baking—this helps the coating adhere better and creates an even crisper crust.
Bake Until Golden and Juicy
Preheat your oven to 400°F and position a rack in the middle position. Bake the chicken legs for 45 minutes, flipping them halfway through at the 22-minute mark to ensure even browning. The skin should turn a beautiful golden brown, and the internal temperature should reach 165°F when checked with a meat thermometer.
During the last 10 minutes of baking, melt the 2 tablespoons butter in a small saucepan over low heat, then brush it generously over the chicken legs. This basting step adds extra flavor and helps create a glossy, crispy finish. Keep an eye on them—they're done when the skin is deeply golden and crispy, and the meat pulls away from the bone easily.
Rest and Garnish for Perfect Presentation
Transfer the baked chicken legs to a cutting board and let them rest for 5 minutes before serving. This resting period allows the juices to redistribute, ensuring each bite is moist and flavorful. While they rest, garnish with the 0.25 cup chopped fresh parsley for a pop of color and freshness.
Serve immediately with your favorite sides—crispy roasted vegetables, a fresh salad, or warm crusty bread. The result should be perfectly crispy skin that gives way to juicy, tender meat with a burst of Mediterranean flavors from the marinade. Enjoy your restaurant-quality baked chicken legs!
Pro Tips For Making Baked Chicken Legs Recipe With Bread Crumbs
- Pat the legs dry: I learned this the hard way—wet skin means soggy crust. After trimming excess fat, grab paper towels and really press down on those thighs and drumsticks. The extra 30 seconds now keeps your panko from turning into a sad, gluey mess later.
- Use room-temperature eggs: Cold eggs make your breading clump like wet sand. Crack them into a bowl 10 minutes before dredging and give them a quick whisk. This isn’t the prettiest method, but it’s the thing that actually keeps the panko from sliding off mid-bake.
- Bake in two batches: Crowding the tray steams the chicken instead of browning it. Even if you’re impatient (I know, I know), arrange them skin-side up with at least an inch between legs. The second batch will crisp just as well—promise.
- Spritz with olive oil before baking: That extra-virgin olive oil isn’t just for the pan. After breading, lightly brush the chicken with a tiny bit of oil before hitting the oven. It’s the shortcut that makes the crust golden and crispy instead of dull and limp—no extra effort, just better results.
Pro cooking tips for perfect results
Wire Rack Secret
Skip the baking sheet and use a wire rack over a baking tray—this lets hot air circulate underneath, creating that perfect crispy crust instead of steaming the chicken. I swear by this method, especially for breaded proteins. Just make sure your rack fits snugly in your pan to avoid wobbling. 🔥
Double-Breading Magic
For an extra-crispy result, dip each leg in flour mixed with 1 tbsp cornstarch, then egg, then breadcrumbs—repeat the breadcrumb step. This double-coating locks in moisture while maximizing crunch. I learned this trick from my college roommate who worked at a Southern diner.
Oven Thermometer Check
Ovens run hot or cold—always verify yours with an oven thermometer. My Thermoworks Oven Thermometer shows my oven actually hits 425°F when set to 400°F. Adjust your baking time if needed; these legs need that precise heat for perfect doneness.
Butter Basting Boost
In the last 10 minutes of baking, brush the legs with melted unsalted butter—this adds flavor and helps create that golden finish. I use European-style butter (like Plugrá) for its higher fat content and richer taste. Just don't overdo it or the breading will get soggy.
Resting Prevents Dryness
Never skip the 5-minute rest before serving. This lets juices redistribute, keeping the meat tender. I've seen cooks rush this step and end up with dry chicken—don't be that person! Cover loosely with foil if serving family-style while you finish sides.
Reheating Crispy Legs
To revive crispiness later, pop baked legs in a 375°F oven for 8-10 minutes on a wire rack. For microwave reheating, cover with a damp paper towel and heat in 30-second bursts, flipping between each. The breadcrumbs stay crispier this way than in a covered dish. 💡
Nutrition facts
Frequently asked questions
Can I use regular breadcrumbs instead of panko?
Regular breadcrumbs will work, but they won't be as crispy. For best results, mix 1 cup regular breadcrumbs with 1 tablespoon cornstarch to help absorb moisture and create crunch. Panko stays light and airy, while regular crumbs can get denser. If you're short on time, this combo is a great substitute!
How do I keep the breading from falling off?
Pat the chicken legs completely dry before marinating—moisture is the enemy of good adhesion. After dipping in egg, press the breadcrumbs firmly onto the chicken, making sure every inch is covered. Let them rest for 5 minutes before baking, which helps the coating set. A wire rack also prevents steam buildup that can loosen breading.
Can I bake these chicken legs ahead of time?
Prepare the breaded legs up to 24 hours ahead and refrigerate uncovered on a wire rack. Bake straight from the fridge, adding 10-15 extra minutes to the cooking time. For make-ahead convenience, freeze unbaked legs for up to 1 month—thaw overnight in the fridge before baking as directed.
What's the best way to reheat leftover chicken legs?
For crispy results, place leftovers on a wire rack in a 375°F oven for 8-10 minutes. Microwave reheating works too: cover with a damp paper towel and heat in 30-second bursts, flipping between each. Avoid covering completely—this traps steam and makes breading soggy. The wire rack method gives you that satisfying crunch!
Why did my chicken legs turn out dry?
Most likely, you skipped the resting period or cut into them too soon. Let baked legs rest for 5-10 minutes before serving—this allows juices to redistribute. Also check your internal temperature: they're done at 165°F. If you're still having issues, try marinating for 4 hours instead of 30 minutes for extra tenderness.