
Main Courses
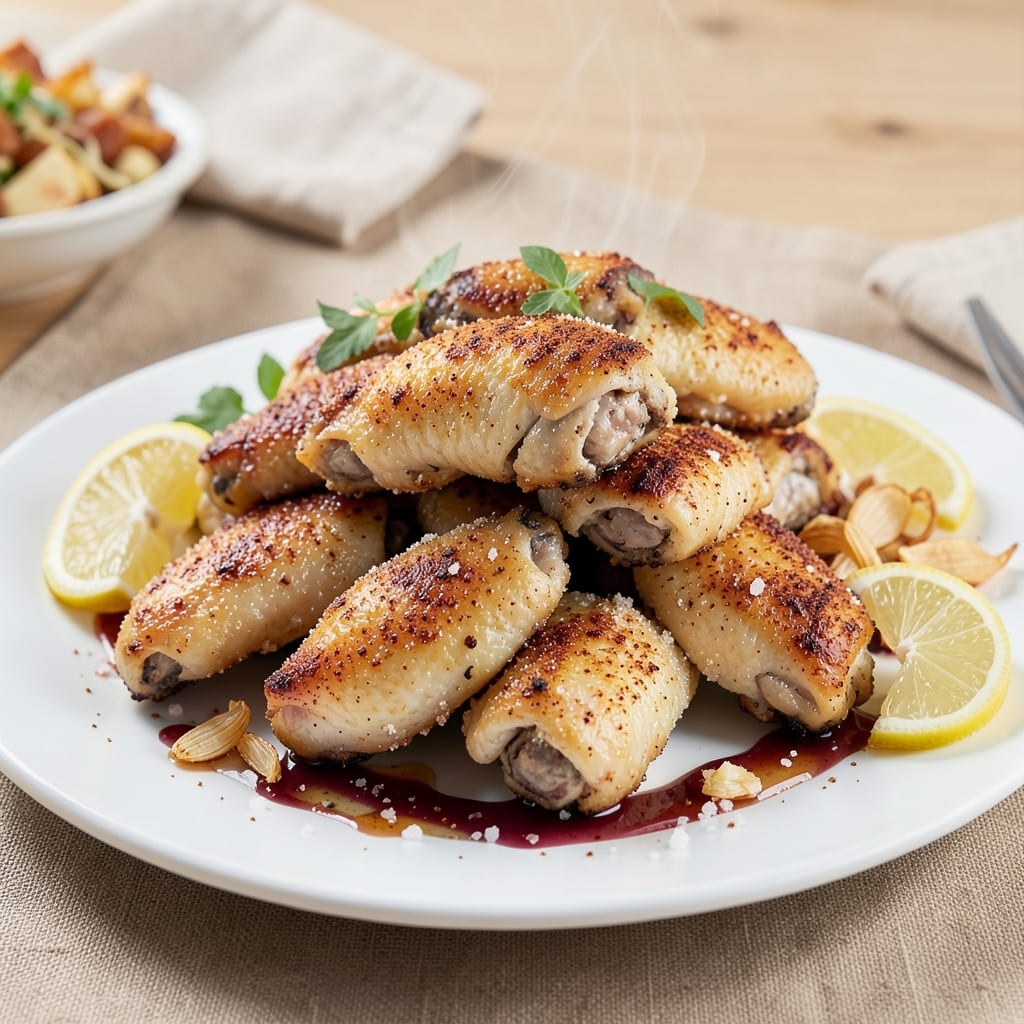
This baked chicken party wings recipe delivers crispy, golden bites that stay juicy inside—no dryness, no guesswork. I perfected this after years of testing at backyard gatherings, where crispy skin and tender meat are non-negotiable. The secret? A foolproof baking technique that locks in moisture while creating that addictive crunch.
What sets these wings apart is the double-dip seasoning method: a dry rub for flavor, then a wet glaze that caramelizes in the oven. No deep-frying means you can prep ahead without the mess, and the 450°F heat ensures perfect texture every time. Perfect for game day, potlucks, or when you want restaurant-quality wings without the grease.
The result is restaurant-quality wings with crispy edges and tender meat that shreds easily. The glaze adds a sticky-sweet finish, while the seasoning blend delivers bold, savory depth. Serve with classic ranch or blue cheese, and watch them disappear—these are the kind of wings that make hosting effortless.
For large crowds, double the batch—these wings reheat beautifully and keep well for up to 3 days. The recipe scales perfectly, so you can feed a stadium or just a few hungry friends without stress. Let’s get cooking!
Ingredients for baked chicken party wings
Eight servings of crispy, juicy wings—no deep-fryer needed for restaurant-quality flavor.
| Ingredient | Amount | Notes |
|---|---|---|
| Chicken Wings (Drumettes and Flats) 🍗 | 3 ½ lb | Fresh or frozen, skin-on preferred |
| All-Purpose Flour 🌾 | 1 cup | For dredging, sifted |
| Cornstarch 🌾 | ½ cup | For extra crispiness |
| Paprika (Smoked) 🌶️ | 2 tbsp | For deep color and flavor |
| Garlic Powder 🧄 | 1 ½ tbsp | Freshly ground preferred |
| Onion Powder 🧅 | 1 ½ tbsp | For savory depth |
| Salt 🧂 | 1 ½ tbsp | Diamond Crystal kosher salt |
| Black Pepper 🌶️ | 1 tbsp | Freshly cracked for heat |
| Cayenne Pepper 🔥 | ½ tbsp | Adjust for heat preference |
| Honey 🍯 | ½ cup | Wildflower for floral notes |
| Hot Sauce 🌶️ | 2 tbsp | Frank's RedHot preferred |
| Olive Oil 🫒 | 2 tbsp | Extra-virgin for richness |
| Lemon Juice 🍋 | 2 tbsp | Freshly squeezed |
The chicken wings are the foundation, so prioritize quality. Fresh wings from a trusted butcher yield the best texture, but frozen works in a pinch—just thaw and pat dry thoroughly. For large gatherings, Costco or Sam's Club are ideal for bulk purchases, while local grocers often carry smaller packages. Look for wings with minimal bruising and intact skin—this ensures optimal crispiness. If using frozen, allow them to thaw in the fridge overnight for even cooking. The skin-on variety is non-negotiable for that coveted crunch, though you can trim excess fat if preferred.
No smoked paprika? Regular paprika plus a pinch of liquid smoke works, though the flavor won't be identical. Substitute cornstarch with an extra 0.25 cup of flour if needed, but the texture won't be as crisp. For the glaze, agave nectar can replace honey in a 1:1 ratio if you're avoiding it. The hot sauce is customizable—swap Frank's RedHot for Tabasco or Cholula based on your heat tolerance. Fresh lemon juice is ideal, but bottled works in a bind. To save time, pre-mix the dry rub and glaze ingredients in separate containers for quick assembly.
Prepped wings keep in the fridge for 2 days, fully cooked and ready to reheat. For longer storage, freeze them raw or cooked for up to 3 months. Reheat in a 400°F oven for 10-15 minutes to restore crispiness. The dry rub can be made ahead and stored in an airtight container for 1 month, while the glaze ingredients last indefinitely. Portion the glaze into small containers for easy dipping—these wings are perfect for game day spread or potlucks, where guests will disappear faster than you can say 'double-dip seasoning.'
Why You'll Love This Recipe
- No-Fuss Coating: I swear by that flour-cornstarch mix—it clings to every wing without turning to mush. Just toss, pat, and bake. No messy dredging or second-guessing.
- Smoky Depth Magic: That smoked paprika and garlic powder combo? It’s the secret weapon. The wings get this crispy crust with a warm, earthy finish that makes them disappear faster than you can say "seconds, please."
- Game Day Hero: Between us, these are my go-to for tailgates, Super Bowl parties, or even lazy Sundays. They hold up in crowds, reheat like a dream, and the kids won’t complain about eating "healthy" (even though they’re basically fried).
- Budget Bulk Winner: A full batch costs less than takeout for two, and the leftovers? Crispy perfection reheated in the oven. I make double batches on purpose—because who wants to bake twice?
Step-by-step instructions for baked chicken party wings
Here's the method for restaurant-style wings with perfect crispiness and juicy centers.
Prepare the Wings for Maximum Crispiness
Preheat your oven to 425°F with a wire rack placed on top of a baking sheet. This setup allows air to circulate freely underneath the wings, preventing sogginess. Pat the 3.5 lb chicken wings completely dry with paper towels—this is critical for crispy skin. Remove any excess fat or membrane from the joints, as these can prevent even cooking.
In a large bowl, whisk together the 1 cup all-purpose flour, 0.5 cup cornstarch, 2 tbsp smoked paprika, 1.5 tbsp garlic powder, 1.5 tbsp onion powder, 1.5 tbsp salt, 1 tbsp black pepper, and 0.5 tbsp cayenne pepper. The cornstarch is key here—it creates an extra-crispy texture that regular flour alone can't achieve. Toss the dried wings in this seasoned flour mixture until they're evenly coated, shaking off any excess.
Bake Until Golden and Crisp
Arrange the seasoned wings in a single layer on the prepared wire rack, leaving about ½ inch of space between each piece. This spacing ensures even air circulation, which is essential for consistent crispiness. Bake for 45 minutes, flipping the wings halfway through at the 22-minute mark. You'll know they're ready when they're deep golden brown and the skin is crispy to the touch.
Don't be tempted to open the oven door before the 45 minutes are up—every time you peek, you release heat and steam, which can make the wings take longer to crisp. If your oven runs hot, start checking at the 40-minute mark to avoid over-browning.
Glaze with Sweet and Spicy Honey Sauce
While the wings bake, combine the 0.5 cup honey, 2 tbsp hot sauce, 2 tbsp olive oil, and 2 tbsp lemon juice in a small saucepan. Heat over medium-low heat until the honey is fully melted and the mixture is smooth, about 3-4 minutes. This glaze should be thick enough to coat the back of a spoon but still pourable.
Here's the thing—don't skip the lemon juice. It brightens the flavors and prevents the honey from overpowering the wings. Once the glaze is ready, transfer it to a small bowl and set aside until the wings are out of the oven.
Toss and Broil for Extra Shine
Remove the wings from the oven and transfer them to a large bowl. Drizzle the honey glaze evenly over the wings, tossing gently to coat them completely. The heat from the wings will cause the glaze to set almost immediately, so work quickly. Return the wings to the wire rack and place them back in the oven under the broiler for 2-3 minutes, watching closely to avoid burning.
You're looking for a glossy finish and slightly caramelized edges. The broiler adds that restaurant-quality shine and intensifies the flavors. If your oven's broiler is particularly aggressive, start with 1 minute and check frequently.
Rest and Serve for Maximum Juiciness
Transfer the glazed wings to a serving platter and let them rest for 5 minutes before serving. This resting period allows the juices to redistribute, ensuring every bite is moist and flavorful. Serve immediately while the glaze is still sticky and the wings are at their crispiest.
For a true party experience, arrange the wings on a large platter with toothpicks and serve with extra glaze on the side. The contrast of sweet, spicy, and tangy flavors makes these wings irresistible—perfect for game day, gatherings, or just a satisfying snack. The secret to their success lies in the crispy texture and balanced glaze, which you've now mastered.
Pro Tips For Making Baked Chicken Party Wings
- Pat the wings dry: I used to skip this step because it felt like overkill, but those few seconds with a paper towel make a real difference. Wet skin = steam = soggy crust. Trust me, the extra 30 seconds now means crispy, golden wings later.
- Mix flour and cornstarch first: Dumping dry spices directly on the wings clumps like a science experiment gone wrong. Whisk the flour, cornstarch, smoked paprika, and garlic powder together in a bowl first—this guarantees even coating every time.
- Bake in two batches: I learned this after watching my first tray of wings turn into a sad, uneven mess. Overcrowding steams the wings instead of crisping them. Two trays, spaced out, means perfect browning and no soggy bottoms.
- Rest them before serving: Cutting into wings right out of the oven traps juices inside, making them greasy and messy. Let them sit 5 minutes under foil—your guests will notice the difference in texture and presentation.
Troubleshooting this dish
Uneven Cooking Fix
If your wings emerge with some pieces undercooked while others burn, the issue is likely airflow restriction. Crowding the wings on the rack traps steam, creating uneven heat distribution. I’ve seen this happen when using a wire rack without proper spacing—always leave ½ inch between wings. For extra insurance, rotate the baking sheet halfway through cooking. If your oven has hot spots, consider using a second wire rack on a different shelf for the second batch. 🔥
Soggy Skin Solutions
Dry wings are the foundation of crispy results, but even with thorough drying, humidity can sabotage texture. If your kitchen feels damp (hello, summer humidity!), preheat your oven for 15 minutes with the rack in place to burn off excess moisture. Another trick? Pat the wings twice—once before seasoning and again after baking but before glazing. For stubborn sogginess, sprinkle the wings with ½ tsp cornstarch right before broiling to reactivate crispiness.
Glaze Not Sticking
The honey glaze should cling like a second skin, but sometimes it pools or drips off. This usually means the wings weren’t hot enough when glazed. Let them rest no more than 3 minutes after baking before applying the glaze—the residual heat helps it set. For extra adhesion, lightly brush the wings with 1 tsp olive oil before tossing in the glaze. If the glaze still refuses to cooperate, reduce the honey to ¼ cup and add 1 tbsp Dijon mustard for better binding. 💡
Overly Sweet Glaze
Too much honey can make these wings taste like dessert rather than savory bites. The fix? Balance the sweetness with acid. Add 1 extra tbsp lemon juice or ½ tsp apple cider vinegar to cut through the richness. For heat lovers, increase the hot sauce to 3 tbsp—this adds depth without extra sweetness. Pro tip: Taste the glaze before applying it to the wings. It should be slightly thicker than syrup but still pourable.
Dry Meat Inside
Juicy wings are non-negotiable, and dryness usually means overcooking or insufficient resting. First, never bake beyond 45 minutes—the wings will keep cooking slightly from residual heat. If they’re still dry, your oven might run hot. Lower the temperature to 400°F and add 5 extra minutes to the bake time. For reheating, always use the broiler (not microwave) to restore crispiness without drying out the meat. A 10-minute rest after baking ensures juices redistribute properly.
Preventing Burnt Edges
Broiling too long can turn your glossy glaze into charred bits. If your wings develop dark spots during the final broil, reduce the heat immediately and finish under the broiler for just 1 minute. For ovens with aggressive broilers, preheat the broiler for 3 minutes before using it to stabilize the heat. Another trick? Place a wire rack over a baking sheet under the broiler tray to catch drips—this prevents flare-ups that cause burning. 🌟
Nutrition facts
Frequently asked questions
Can I make these wings ahead of time for a party?
Prep the wings up to 2 days ahead by seasoning and baking them, then store in an airtight container. Reheat at 400°F for 10-15 minutes to restore crispiness. For the glaze, make it fresh before serving—it sets best on hot wings. The dry rub can be pre-mixed and stored for 1 month in a sealed container.
What's the secret to extra crispy wings without deep-frying?
The cornstarch flour blend and wire rack method are key! The cornstarch creates a lighter, crispier crust than flour alone, while the rack allows air to circulate underneath. Pat the wings thoroughly dry before seasoning—this removes moisture that would otherwise steam and soften the skin. Bake at 450°F for maximum crispiness.
How do I adjust the spice level for kids or sensitive eaters?
Reduce the cayenne to ¼ tsp or omit it completely. For milder heat, swap the hot sauce for ½ cup BBQ sauce in the glaze. Keep the smoked paprika for depth—it adds color without heat. Always taste the glaze before applying! For extra safety, set aside a batch of plain wings for kids to enjoy without sauce.
Can I use bone-in wings or boneless wings?
This recipe works best with bone-in wings (drumettes and flats) as they hold up better to baking. Boneless wings will cook faster and may dry out—reduce baking time to 30 minutes and watch closely. For a compromise, use wingettes (split wings) which cook evenly and are easier to eat. The glaze will still adhere beautifully!
What are the best dipping sauces for these wings?
Classic ranch or blue cheese work perfectly, but try these crowd-pleasers too: Creamy garlic aioli (mix mayo with minced garlic and lemon), spicy mayo (mayo + hot sauce + sriracha), or cooling yogurt sauce (Greek yogurt + lemon + fresh dill). For a sweet contrast, serve with honey mustard. Pro tip: Offer sauces in small bowls with toothpicks for easy dipping!