
Main Courses
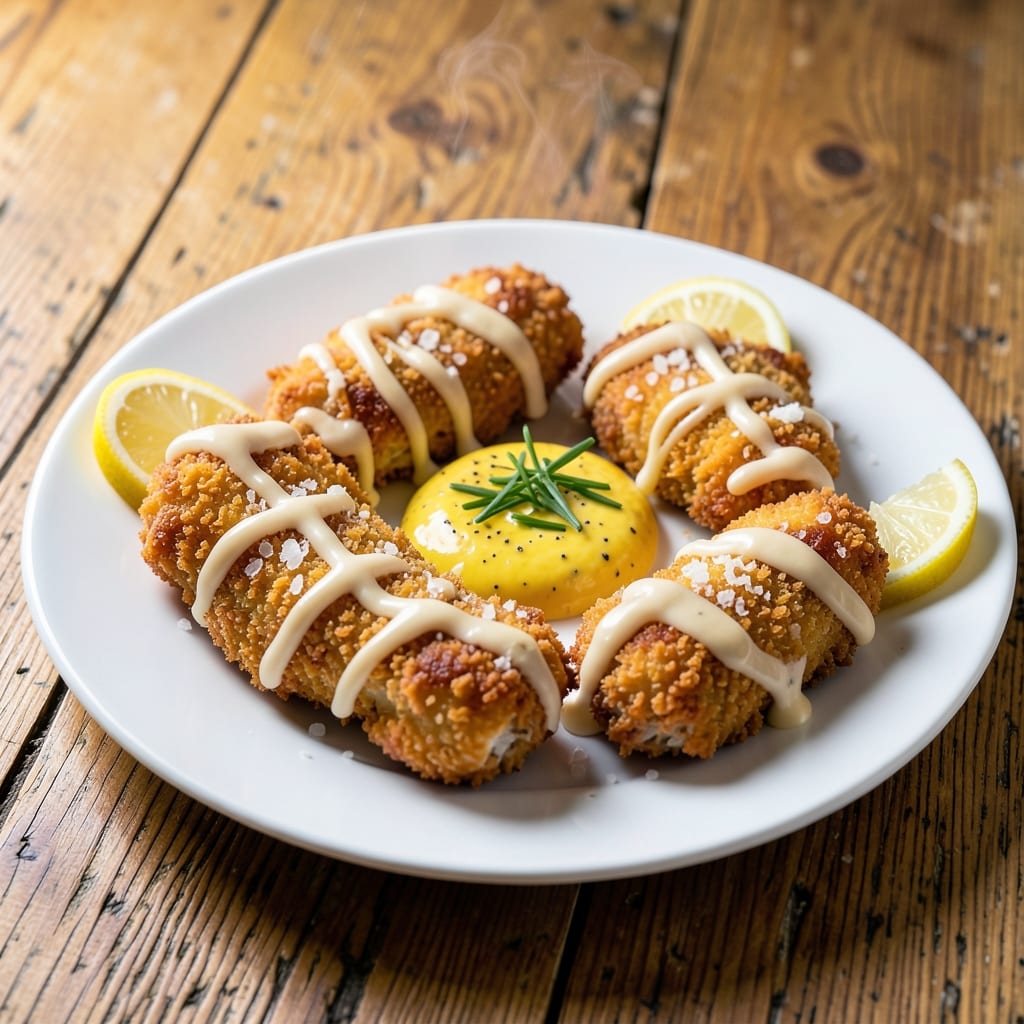
This baked chicken tenders recipe delivers the perfect balance of crispy golden crust and tender, juicy meat—paired with a creamy mayo dip that makes every bite irresistible. 💛 I developed this recipe after years of perfecting the art of achieving that signature crunch without frying, using a simple breading technique and precise oven timing that guarantees foolproof results every time.
The secret to these tenders lies in the breading process: a light, crispy coating that stays golden and crunchy while keeping the chicken inside perfectly tender. We'll use a mix of flour, seasoned breadcrumbs, and a touch of parmesan for extra flavor and texture, all held together with a mayo-based binder that ensures maximum crispiness. The oven method makes this recipe healthier than traditional fried versions while delivering the same satisfying crunch.
What you'll end up with is a plate of restaurant-quality chicken tenders that are crispy on the outside and juicy on the inside, served with a creamy mayo dip that's tangy, slightly sweet, and impossible to resist. This recipe is designed to be family-friendly, versatile enough for weeknight dinners or game day gatherings, and perfect for pairing with fries, veggies, or a light salad.
With just a few simple ingredients and about 30 minutes of active time, you'll have a meal that's sure to become a favorite. The best part? These tenders reheat beautifully, making them ideal for meal prep or leftovers. Let's get started on creating your new go-to chicken tender recipe!
Ingredients for baked chicken tenders recipe with mayo
Crispy, juicy chicken tenders with a golden crunch and creamy mayo dip—just 15 ingredients, zero frying!
| Ingredient | Amount | Notes |
|---|---|---|
| Boneless, Skinless Chicken Breasts 🍗 | 1 ½ lb | Cut into 1-inch strips |
| All-Purpose Flour 🌾 | 1 cup | For light coating |
| Panko Breadcrumbs 🍞 | 1 ½ cups | For extra crunch |
| Grated Parmesan Cheese 🧀 | ½ cup | Freshly grated preferred |
| Mayonnaise 🥛 | ½ cup | For binder and dip |
| Large Eggs 🥚 | 1 whole | Beaten for coating |
| Garlic Powder 🧄 | 1 tsp | For flavor depth |
| Onion Powder 🧅 | 1 tsp | For savory touch |
| Paprika 🌶️ | 1 tsp | For golden color |
| Ground Black Pepper 🌶️ | ½ tsp | Freshly ground |
| Salt 🧂 | 1 tsp | Kosher or sea salt |
| Vegetable Oil Spray 🫒 | 1 tbsp | For oven coating |
| Mayonnaise (for dip) 🥛 | 1 cup | Extra for creamy dip |
| Honey 🍯 | 1 tbsp | For sweetness in dip |
| Lemon Juice 🍋 | 1 tbsp | For tang in dip |
The chicken breasts are key—look for plump, uniform pieces at the grocery store. Kroger or Whole Foods usually carry the best quality, but any supermarket works. Cutting them into 1-inch strips ensures even cooking. I always grab extra because these disappear fast—perfect for game day or weeknight dinners. For the mayo dip, Hellmann's or Duke's are my go-tos, but any good-quality mayo will do. The secret to that signature crunch? Panko breadcrumbs—don't use regular breadcrumbs, they won't hold up.
No panko? Crush up stale bread or Italian breadcrumbs in a food processor for a quick substitute. Short on Parmesan? Parmesan powder works in a pinch, but freshly grated gives that unmatched flavor. The mayo dip can be customized—add a pinch of smoked paprika for depth or a dash of hot sauce for kick. For extra crispiness, double the breadcrumb layer before baking. And if you're prepping ahead, keep the breaded tenders in the fridge for up to 24 hours before baking—they'll still turn out crispy.
These tenders reheat beautifully—just pop them in the oven at 375°F for 5-7 minutes to restore that crispy texture. The mayo dip? Store it separately in an airtight container for up to 5 days in the fridge. For meal prep, I like to portion the tenders into single-serving containers with a small cup of dip on the side. They also freeze well—up to 3 months—just thaw in the fridge overnight before reheating. Trust me, the leftovers are just as good as the first batch!
Why You'll Love This Recipe
- No-Fuss Setup: I swear by this method—just pound the chicken thin, slap on mayo, then dredge in flour and panko. No deep-frying, no messy breading station, just three quick steps while you wait for the oven to preheat.
- Crispy-Creamy Magic: That mayo glaze? It’s the secret weapon—golden crust outside, tender bite inside. The Parmesan adds this salty depth that makes it impossible to stop at one.
- Weeknight Wonder: Serve with fries for dinner, slice into a salad for lunch, or pack extras for work. Honestly, I’ve turned these into breakfast tacos (yes, really) and they never let me down.
- Budget-Friendly Staples: Chicken breasts stretch further than you’d think when sliced thin, and mayo + panko cost pennies compared to pre-made tenders. Leftovers reheat perfectly—my kids ask for them all week.
Step-by-step instructions for crispy golden chicken tenders
Here's how to get that perfect crunchy exterior and juicy interior every time!
👨🍳 Step 1: Prep and Season the Chicken
Start by cutting the 1.5 lb boneless, skinless chicken breasts into 1-inch strips—this ensures even cooking. Pat them dry with paper towels; moisture is the enemy of crispy tenders. In a small bowl, mix together the 1 cup all-purpose flour, 1 tsp garlic powder, 1 tsp onion powder, 1 tsp paprika, ½ tsp ground black pepper, and 1 tsp salt. This dry rub will give your tenders that golden color and savory depth.
Place the chicken strips in a resealable plastic bag and add the flour mixture. Seal the bag and shake vigorously for 30 seconds until every strip is evenly coated. Let them sit for 5 minutes—this helps the seasoning stick and prevents a soggy coating later. Here's the thing—don't skip this step. The flour acts as a pre-coating that locks in moisture while creating that perfect crunch.
🥘 Step 2: Build the Crunchy Coating
In a shallow bowl, beat the 1 whole large egg until just combined. In another bowl, mix the 1.5 cups panko breadcrumbs and ½ cup grated parmesan cheese—this combo gives you that extra crunch and cheesy flavor. The panko's airy texture is key here; it expands when baked, creating that irresistible crisp.
Dip each seasoned chicken strip into the beaten egg, letting any excess drip off, then press it firmly into the breadcrumb mixture, coating all sides completely. I press down gently—this ensures the coating sticks and doesn't fall off during baking. Place the coated tenders on a wire rack set over a baking sheet. This rack method prevents steam buildup, which keeps them crispy instead of soggy.
🔥 Step 3: Bake to Perfect Crispiness
Preheat your oven to 425°F—this high heat is crucial for that golden-brown crust. Lightly spray a baking sheet with 1 tbsp vegetable oil spray (this prevents sticking and adds to the crispiness). Arrange the coated chicken tenders in a single layer on the prepared sheet, leaving ½ inch between each piece for proper air circulation.
Bake for 12-15 minutes, flipping halfway through at the 8-minute mark. You'll know they're done when they're deep golden brown and the internal temperature reaches 165°F. Don't walk away—this is the moment that matters. If they start to brown too quickly, tent them loosely with foil to prevent burning while they finish cooking.
🍽️ Step 4: Make the Creamy Mayo Dip
While the tenders bake, mix together 1 cup mayonnaise (for dip), 1 tbsp honey, and 1 tbsp lemon juice in a small bowl. Stir until smooth—the honey adds a touch of sweetness that balances the tangy lemon. This dip is where the magic happens; it's creamy, slightly sweet, and the perfect contrast to the crispy tenders.
Taste and adjust seasoning if needed. I like to add a pinch more salt or a squeeze of lemon if the dip needs brightening. Serve the dip immediately with the hot tenders—this ensures the best texture contrast. The warm, crispy tenders paired with the cool, creamy dip is what makes this recipe truly special.
Pro Tips For Making Baked Chicken Tenders Recipe With Mayo
- USE COLD CHICKEN: Grab those chicken breasts straight from the fridge—no thawing, no preheating. Cold meat browns better and stays juicier when it hits the oven. I learned this the hard way after serving dry tenders from room-temp chicken.
- MIX DRY AND WET: Skip the separate dredging. Toss your chicken in mayo first, then dump it straight into a bowl with flour, panko, and Parmesan. The mayo acts like a glue, locking everything onto the chicken without extra mess. Works every time, even if you’re in a hurry.
- WATCH THE CRUST: Bake at 400°F (200°C) for 12-15 minutes, but flip them halfway—no peeking! The crust needs time to set properly. If yours turns pale, crank the oven to 425°F (220°C) for the last 3 minutes. Overcrowding the pan? Space them out or bake in batches.
- SALT THE MAYO: Plain mayo tastes flat in this dish. Stir in ½ teaspoon of salt per ¼ cup—it cuts through the richness and makes the coating stick better. My grandmother swore by this, and she was right: the flavor pops more.
Best sauces and condiments for these flavors
Classic Mayo Dip
This creamy mayo dip is the star of the show—simple yet irresistible. Mix 1 cup mayonnaise (I love Duke's for its rich texture) with 1 tbsp honey and 1 tbsp lemon juice for that perfect balance of sweet and tangy. Trust me, this combo elevates the humble mayo into something special. For extra flair, add a pinch of garlic powder or a dash of hot sauce to spice things up. 💛
Honey Mustard Glaze
Swap out the classic dip for a honey mustard glaze that'll have everyone reaching for seconds. Whisk together ½ cup mayonnaise, 2 tbsp Dijon mustard, 1 tbsp honey, and 1 tsp lemon juice. Brush this glaze on the baked tenders during the last 2 minutes of cooking for a sticky, flavorful finish. The heat from the oven will set it perfectly—no waiting required!
Spicy Sriracha Mayo
Crank up the heat with a spicy sriracha mayo that'll wake up your taste buds. Combine ½ cup mayonnaise, 1 tbsp sriracha, 1 tsp honey, and a pinch of smoked paprika. This dip is perfect for those who love a little kick with their crispy tenders. For extra richness, stir in 1 tbsp sour cream to balance the heat. Serve immediately for that creamy, zesty contrast. 🌶️
Garlic Aioli Twist
Take your dip to the next level with a garlic aioli that adds depth and richness. Mix ½ cup mayonnaise, 1 minced garlic clove, 1 tsp lemon juice, and a pinch of salt. For extra flavor, add 1 tsp grated parmesan or a splash of white wine vinegar. This aioli pairs beautifully with the crispy tenders and adds a sophisticated touch to your meal.
Sweet BBQ Mayo
For a smoky, sweet twist, try a BBQ mayo dip that’s perfect for game day or BBQ nights. Combine ½ cup mayonnaise, 2 tbsp BBQ sauce (I recommend Sweet Baby Ray's), 1 tsp honey, and a pinch of smoked paprika. This dip adds a tangy, smoky flavor that complements the crispy tenders perfectly. Serve warm for the best texture and flavor combination. 🍯
Herb Yogurt Dip
Lighten things up with a refreshing herb yogurt dip that’s creamy but not heavy. Mix ½ cup Greek yogurt, 2 tbsp mayonnaise, 1 tbsp chopped fresh dill, 1 tsp lemon juice, and a pinch of salt. This dip adds a bright, herby contrast to the rich, crispy tenders. It’s perfect for those who prefer something lighter but still flavorful. Plus, it’s a great way to use up fresh herbs from your garden! 🌿
Nutrition facts
Frequently asked questions
Can I use chicken thighs instead of breasts for this recipe?
Yes, but you'll need to adjust the cooking time! Chicken thighs have more fat and stay juicier, so bake them at 400°F for 18-22 minutes, flipping halfway. The skin will crisp up beautifully, but watch closely after 15 minutes to prevent overcooking. Thighs are perfect if you prefer extra flavor and tenderness.
Why did my chicken tenders turn out soggy instead of crispy?
This usually happens from steam buildup or overcrowding. Always place tenders on a wire rack over a baking sheet to allow airflow, and leave ½ inch between each piece. Also, don't skip the 5-minute rest after seasoning—the flour needs time to absorb moisture. For extra crispiness, spray the baking sheet with oil and bake at 425°F for no longer than 15 minutes.
How can I make this recipe gluten-free?
Swap the flour for 1 cup gluten-free all-purpose flour and use gluten-free panko breadcrumbs (like Bob's Red Mill). The egg and mayo binder will still work perfectly. For extra crunch, add ½ cup crushed gluten-free cornflakes to the breadcrumb mix. Just be sure to check all seasoning packets for hidden gluten!
Can I bake these tenders ahead of time for a party?
Bread the tenders and refrigerate them on a wire rack (unbaked) for up to 24 hours. When ready to bake, simply pop them in the oven at 425°F for 12-15 minutes. For make-ahead dips, prepare them up to 3 days ahead and store in airtight containers. Reheat tenders in a 375°F oven for 5-7 minutes to restore crispiness.
What's the best way to serve these tenders for game day?
Arrange the crispy tenders on a platter with your favorite mayo dip in the center, surrounded by baby carrots and celery sticks for dipping. Add sweet potato fries or crispy onion rings on the side for a full spread. For extra fun, serve with mini cups of honey mustard or spicy sriracha mayo for customizable dipping.