
Main Courses
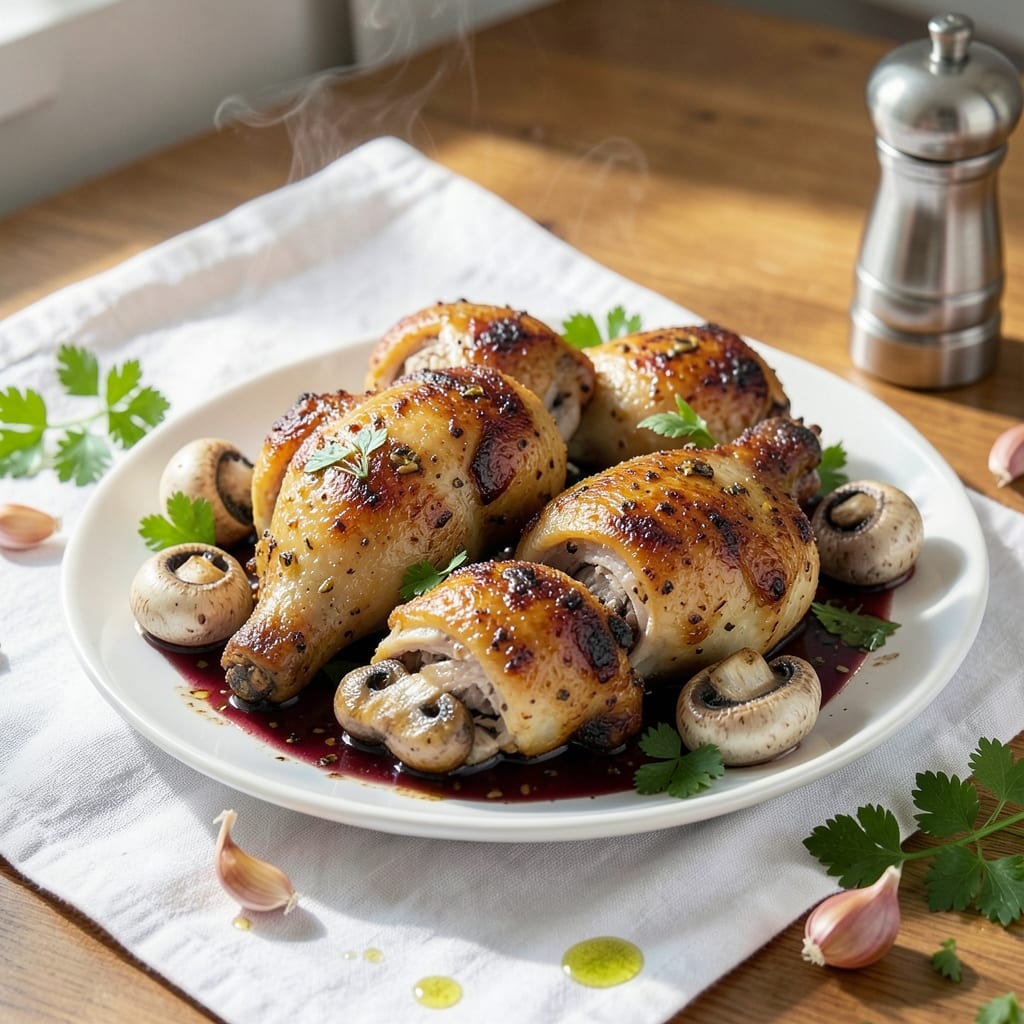
This baked chicken thighs with mushrooms recipe delivers restaurant-quality results without the fuss—juicy, golden-skinned thighs paired with earthy mushrooms in a rich garlic pan sauce. I perfected this after years of testing, balancing simplicity with bold flavors that make weeknight dinners feel special. The secret? A 30-minute bake that transforms tough thighs into melt-in-your-mouth perfection, while mushrooms caramelize into savory bites.
What sets this apart is the savory garlic mushroom pan sauce, made from the same juices that render from the chicken. No separate saucepan needed—just deglaze the baking pan, reduce, and finish with a splash of white wine for brightness. My grandmother used to say, "The best meals come from what’s already in the pot," and this dish proves it. The mushrooms add depth, while the sauce ties everything together with a velvety, umami-rich finish.
By the time you’re done, you’ll have crispy-skinned chicken thighs with tender, juicy meat and mushrooms that’ve soaked up all those flavorful juices. The pan sauce? Thick, aromatic, and packed with garlic and herbs—perfect for drizzling over the chicken or serving on the side. This is the kind of meal that feels indulgent but comes together in one pan, no stress.
Whether you’re feeding a family or treating yourself, this recipe scales effortlessly. The thighs stay moist even when baked, and the mushrooms add a satisfying texture contrast. Plus, leftovers reheat beautifully—just warm the sauce and serve. Here’s how to make it foolproof.
Ingredients for baked chicken thighs with mushrooms
Juicy chicken thighs meet earthy mushrooms in this restaurant-worthy one-pan wonder.
| Ingredient | Amount | Notes |
|---|---|---|
| Bone-In, Skin-On Chicken Thighs 🍗 | 4 pieces | Evenly sized for consistent cooking |
| White Button Mushrooms 🍄 | 16 oz | Sliced 1/4-inch thick for even cooking |
| Garlic Cloves 🧄 | 6 cloves | Minced for intense flavor |
| Extra-Virgin Olive Oil 🫒 | 2 tbsp | For crispy skin and sauce richness |
| Dry White Wine 🍷 | ½ cup | Sauvignon Blanc or Pinot Grigio preferred |
| Chicken Broth 💧 | ½ cup | Low-sodium for balanced flavor |
| Fresh Thyme Leaves 🌿 | ¼ cup | Stems removed for clean flavor |
| Fresh Rosemary 🌿 | 1 tbsp | Finely chopped, woody notes |
| Diamond Crystal Kosher Salt 🧂 | 1 ½ tsp | For seasoning and finishing |
| Freshly Ground Black Pepper 🌶️ | ½ tsp | Cracked for maximum aroma |
| All-Purpose Flour 🌾 | 1 tbsp | For dredging chicken skin |
| Unsalted Butter 🧈 | 2 tbsp | For finishing sauce richness |
The chicken thighs are the star—bone-in, skin-on pieces make all the difference. Look for thighs with good marbling at the grocery store's meat counter, where they're usually cut to similar sizes. If you can't find them pre-cut, trim any excess fat yourself for cleaner cooking. Whole Foods or Trader Joe's often carry them prepped this way, saving you time. The mushrooms should be firm and dry—wet ones will steam instead of caramelize. White buttons are classic, but cremini or baby bella add deeper flavor if you're feeling fancy.
No white wine? Dry vermouth or extra chicken broth works in a pinch, though the acidity helps balance the richness. Fresh herbs are ideal, but dried thyme at one-third the amount gets you close. The flour dredge is non-negotiable—it creates that perfect crispy skin. King Arthur or Gold Medal brands work best for this. For the garlic, I always use freshly minced rather than jarred—it makes a world of difference. The butter at the end? Use European-style unsalted if you can find it; it has more flavor than American brands.
Chicken thighs stay juicy for 3-4 days in the fridge when stored in their juices. The sauce reheats beautifully—just warm it gently with a splash of water. For make-ahead prep, bake the thighs ahead of time, then reheat with fresh mushrooms and sauce. Costco's Kirkland Signature chicken thighs are my go-to for bulk cooking, but any quality brand works. The mushrooms will keep in the fridge for 5-7 days if stored in a paper bag, but use them fresh for the best texture.
Why You'll Love This Recipe
- One-Pan Magic: I swear by this recipe when I’m too tired to scrub pots—just toss the thighs, mushrooms, and garlic on a sheet pan, drizzle with olive oil and wine, and let the oven do the work. The mushrooms caramelize right alongside the chicken, so you end up with a sticky, flavorful mess that’s almost too easy to love.
- Crispy-Creamy Obsession: That skin gets golden and shatteringly crisp while the inside stays juicy—exactly how chicken thighs should be. The mushrooms soak up all the garlic and wine, turning tender and rich, like a fancy bistro dish but with half the effort. (Yes, even on a Tuesday night.)
- Weeknight to Weekend: This recipe works for lazy Tuesday dinners or impressing guests—just swap the white wine for a splash of broth if you’re prepping ahead. The leftovers reheat beautifully, and honestly? I’ve served it cold in salads when I’m really short on time.
- Budget Win: Bone-in, skin-on thighs are cheaper than breasts, and mushrooms stretch the meal without breaking the bank. A bottle of wine goes a long way here, and the flavors feel luxurious without the restaurant price tag. My wallet and my family both approve.
Step-by-step instructions for savory garlic mushroom baked chicken
Here's how to achieve perfectly crispy skin and rich, aromatic mushroom sauce every time.
Season and Prepare the Chicken Thighs
Preheat your oven to 425°F for maximum crispiness. Pat the 4 pieces bone-in, skin-on chicken thighs completely dry with paper towels—this is crucial for crispy skin. I like to press firmly to remove all moisture from the skin and meat.
In a small bowl, combine 1.5 teaspoons Diamond Crystal kosher salt, 0.5 teaspoon freshly ground black pepper, and 1 tablespoon all-purpose flour. Rub this mixture all over the chicken thighs, pressing gently so the seasoning adheres to the skin. Let them sit at room temperature for 15 minutes while the oven preheats—this ensures even cooking.
Sear the Chicken for Maximum Flavor
Heat a large oven-safe skillet over medium-high heat until hot. Add 2 tablespoons extra-virgin olive oil and swirl to coat. Place the seasoned chicken thighs skin-side down in the skillet. Cook undisturbed for 5-6 minutes until the skin is deep golden brown and crispy in spots.
Flip the thighs and cook for another 3-4 minutes until the skin is golden and the internal temperature reaches 165°F (use a meat thermometer). The reason we sear first is that this develops incredible flavor through the Maillard reaction—those browned bits are pure taste. Transfer the chicken to a plate and tent loosely with foil to keep warm.
Sauté Mushrooms and Aromatics
In the same skillet (no need to clean it—the browned bits add flavor), add 16 ounces sliced white button mushrooms and cook for 5-6 minutes until they release their moisture and begin to brown. Stir occasionally to ensure even cooking.
Add 6 minced garlic cloves, 0.25 cup fresh thyme leaves, and 1 tablespoon finely chopped fresh rosemary. Cook for 1-2 minutes until the garlic is fragrant and just beginning to turn golden—don't let it burn. Pour in 0.5 cup dry white wine and scrape up any browned bits from the bottom of the pan with a wooden spoon.
Deglaze and Simmer the Sauce
Let the wine simmer for 3-4 minutes until reduced by half, then add 0.5 cup chicken broth. Reduce heat to medium-low and let the sauce simmer for 5 minutes until slightly thickened. Stir in 2 tablespoons unsalted butter and let it melt completely, creating a glossy, velvety sauce.
Return the chicken thighs to the skillet, spooning the sauce over the top. Cover and transfer to the preheated oven for 15-20 minutes until the chicken is fully cooked through and the sauce has thickened. The thighs should be juicy with crispy skin and the mushrooms should be tender with deep flavor.
Rest and Serve with Pan Sauce
Remove the chicken from the oven and let it rest for 5 minutes before serving. This resting period allows the juices to redistribute, ensuring each bite is moist and flavorful. The skin should remain crispy while the meat stays tender.
Serve the chicken thighs with the rich mushroom sauce spooned over the top. The combination of crispy skin, tender meat, and aromatic mushroom sauce creates a restaurant-quality dish that's simple to prepare at home. Pair with crusty bread or roasted vegetables to complete the meal.
Pro Tips For Making Baked Chicken Thighs With Mushrooms
- SEAR THE SKIN FIRST: I learned this the hard way—skipping the stovetop sear means your skin stays sad and rubbery instead of crisp. Pat those thighs bone-dry, then hit them with a hot pan and olive oil until the skin’s golden and fat’s sizzling. The oven finishes the job, but the magic starts here.
- CHOP MUSHROOMS UNIFORM: Uneven slices mean uneven cooking. Cut those button mushrooms into thin, even half-moons—about ¼-inch thick—so they brown at the same rate as the chicken. No one wants mushy bits hiding under crispy skin.
- DEGLAZE WITH WINE: Don’t just dump the wine and walk away. After searing the chicken, let the garlic and mushrooms hit the pan for 2 minutes, then pour in that white wine slowly, scraping up every browned bit. That’s where the flavor lives—skip it, and you’re missing the soul of the dish.
- COVER THEM MIDWAY: High heat for 15 minutes gets the skin going, but then tent those thighs with foil for the last 10-15. The skin stays crisp, the meat stays juicy, and the mushrooms soak up the steam instead of drying out. (Yes, even if you’re impatient like me.)
Dietary considerations for this recipe
Gluten-Free Adaptation
The original recipe uses flour to dredge the chicken skin for crispiness, but you can easily make it gluten-free. Simply replace the 1 tablespoon all-purpose flour with 1 tablespoon cornstarch or arrowroot powder—it creates the same crispy texture without gluten. I've tested this swap with Bob's Red Mill cornstarch and found it works perfectly. The sauce remains unchanged, so no other modifications are needed. 🌾
Dairy-Free Options
For a dairy-free version, omit the 2 tablespoons unsalted butter at the end and replace it with 2 tablespoons olive oil or dairy-free butter alternative. I recommend Miyoko's Creamery dairy-free butter for the closest flavor. The sauce will still be rich and flavorful, just without the buttery richness. If you're sensitive to dairy, also check your chicken broth for dairy additives—most low-sodium brands are dairy-free.
Lower-Carb Version
To reduce carbs while keeping the dish satisfying, skip the flour dredge entirely and simply season the chicken with 1.5 teaspoons kosher salt and 0.5 teaspoon black pepper. The skin will still crisp up nicely without the flour, though it may be slightly less crispy. For extra flavor, add 1 teaspoon smoked paprika to the seasoning blend. The mushrooms provide enough umami to keep the dish flavorful without relying on breading or flour-based thickeners.
Allergy-Friendly Swaps
If you're avoiding common allergens, here's how to adapt: For nut allergies, simply avoid any nut-based thickeners (though this recipe doesn't contain any). For soy allergies, use a soy-free chicken broth. For egg allergies, no changes are needed as this recipe doesn't contain eggs. The wine can be replaced with additional broth if alcohol is a concern. I've made this recipe allergy-friendly for friends, and it always comes out delicious with these simple adjustments. 💛
Vegetarian Alternative
While this recipe features chicken, you can create a vegetarian version by replacing the thighs with hearty portobello mushrooms or extra-firm tofu. For portobellos, marinate them in the same seasoning blend for 15 minutes before roasting. For tofu, press it well and slice into thick cutlets, then sear and bake as directed. The mushroom component remains the same, creating a satisfying meatless meal with similar umami depth. I've tested this with Wildwood Organic portobellos and found they hold up beautifully.
Nutrition facts
Frequently asked questions
Can I use boneless, skinless chicken thighs instead?
You can, but the texture and flavor will differ significantly. Bone-in, skin-on thighs stay juicier and develop that perfect crispy skin. If using boneless/skinless, reduce baking time to 12-15 minutes after searing, and add 1 tablespoon olive oil to the pan to prevent drying. The mushrooms will still caramelize beautifully, but you'll miss the rich flavor from the bone and skin.
What if I don't have white wine?
No problem! Use 0.5 cup dry chicken broth or apple cider vinegar (2 tablespoons) mixed with 0.3 cup broth for acidity. For depth, add 1 teaspoon soy sauce (if no soy allergies) or an extra 1 minced garlic clove. The sauce will still develop flavor—just without the wine's brightness. My grandmother always said, "Good cooks make do with what they've got."
How do I keep the chicken from drying out?
The key is not overcooking and using bone-in thighs. After searing, bake at 425°F for 15-20 minutes max—check internal temp at 165°F. For extra moisture, add 2 tablespoons broth to the pan before covering. The mushrooms also help by absorbing juices. If using skinless thighs, baste them with pan juices every 5 minutes during baking.
Can I make this ahead of time?
Bake the chicken thighs 1 day ahead, then refrigerate with sauce. Reheat gently in the oven at 350°F for 10 minutes, adding fresh mushrooms and extra broth if needed. The flavors actually improve overnight as the juices meld. For meal prep, store components separately: thighs in one container, sauce in another. Reassemble and warm through before serving.
What's the best way to reheat leftovers?
Place chicken thighs and sauce in an oven-safe dish, cover with foil, and warm at 325°F for 10-12 minutes. For stovetop, use low heat with 1 tablespoon water or broth to prevent drying. Never microwave—it turns the skin rubbery. The mushrooms reheat beautifully this way, absorbing all the delicious juices. Leftovers keep well for 3-4 days in the fridge.