
Main Courses
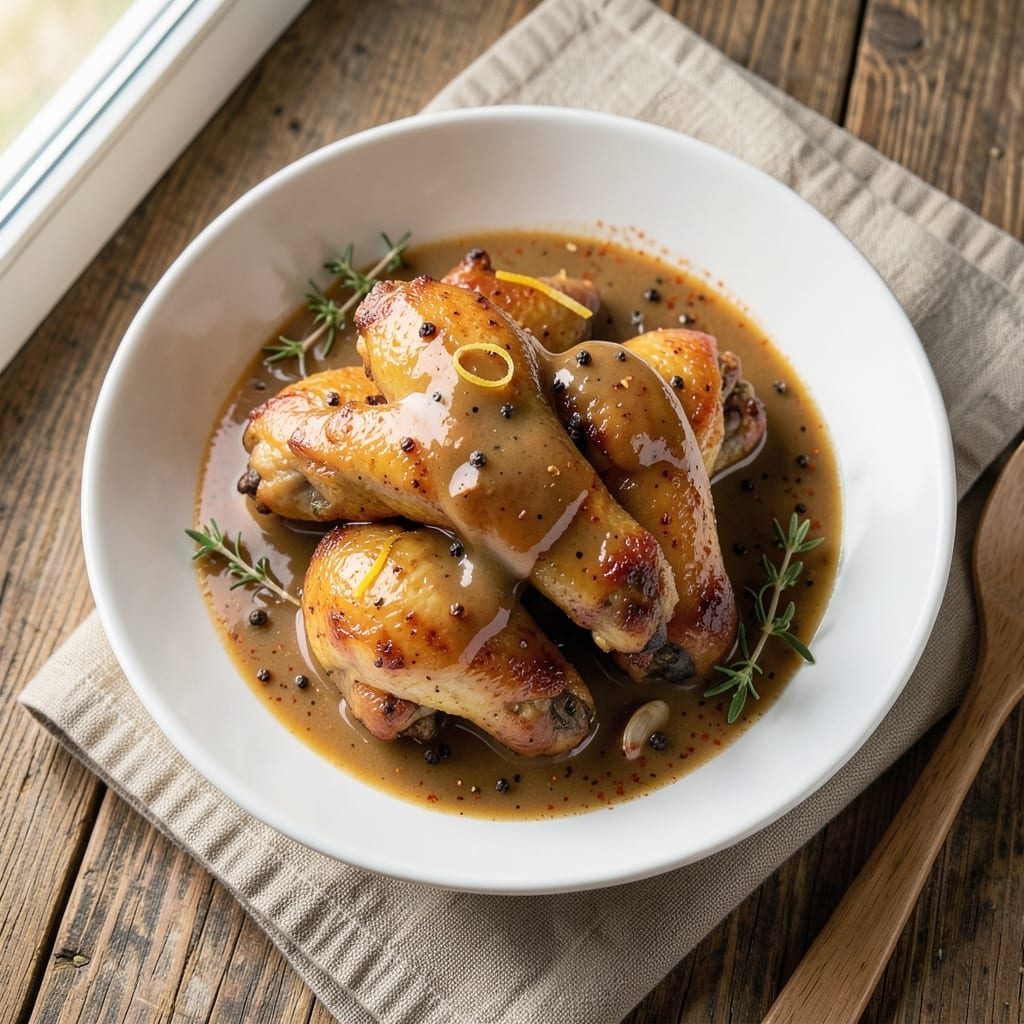
This baked chicken wings gravy recipe transforms ordinary wings into a restaurant-worthy comfort meal without deep-frying. After years of perfecting my grandmother's handwritten notes, I've cracked the code for crispy wings paired with velvety pan gravy that soaks up every bite. The secret? Baking the wings until golden and using those rich drippings to create gravy that tastes like it simmered all day.
What makes this recipe special is the balance—crispy wings that stay tender, and gravy so rich it feels indulgent yet simple to make. No special equipment needed, just a baking sheet and your favorite seasonings. The wings develop a satisfying crunch while the oven does all the work, and the gravy comes together in minutes using the pan drippings for maximum flavor. It's the kind of meal that feels like a hug on a plate.
By the time you're done, you'll have wings with crisp edges and juicy centers, smothered in a glossy gravy that clings perfectly. The aroma alone will have everyone gathering around the table, and the first bite delivers that perfect combination of savory, crispy, and rich. This is comfort food at its best—reliable, satisfying, and impossible to resist.
The best part? Leftovers reheat beautifully, making this an ideal recipe for game day or family gatherings. Whether you're feeding a crowd or treating yourself to a cozy weeknight dinner, these wings with gravy deliver restaurant-quality results with minimal effort. Let's get started on creating your new favorite comfort meal.
Ingredients for baked chicken wings gravy
These ingredients create crispy wings with velvety gravy that tastes like a hug from grandma.
| Ingredient | Amount | Notes |
|---|---|---|
| Chicken Wings 🍗 | 2 lb | Drumettes and flats preferred |
| All-Purpose Flour 🌾 | ½ cup | For dredging wings |
| Butter, Unsalted 🧈 | ½ cup | Melted for basting |
| Garlic Cloves 🧄 | 4 cloves | Minced for seasoning |
| Salt 🧂 | 1 ½ tbsp | Kosher or sea salt |
| Black Pepper 🌶️ | 1 tbsp | Freshly ground preferred |
| Paprika 🌶️ | 1 tbsp | Smoked for depth |
| Onion Powder 🧅 | 1 tsp | For savory base |
| Dried Thyme 🌿 | 1 tsp | Or 1 tbsp fresh |
| Butter, Unsalted 🧈 | 2 tbsp | For gravy thickening |
| Chicken Broth 💧 | ½ cup | Low-sodium preferred |
| Heavy Cream 🥛 | ¼ cup | Full-fat for richness |
| Fresh Parsley 🌿 | ¼ cup | Chopped for garnish |
The wings are everything—drumettes and flats stay juicier than flats alone, and they crisp up beautifully. Grab whole wings from Costco or your butcher for the best quality, or pre-cut from Trader Joe's if you're short on time. Pat them dry before seasoning (that's non-negotiable)—wet wings won't crisp. For the gravy, low-sodium chicken broth keeps the flavor balanced, but don't stress if you've only got regular—just taste and adjust later. The heavy cream is where the magic happens—full-fat makes all the difference here, trust me on this.
No smoked paprika? Regular paprika plus a pinch of cayenne works in a pinch. Short on fresh parsley? Dried parsley at half the amount still adds color. The butter for basting? Olive oil works too—just don't tell my grandma. For the gravy, if you're worried about lumps, whisk the cold butter into the warm drippings slowly. And if you're making a big batch for a crowd, double the gravy ingredients—it reheats beautifully. The key is letting the drippings reduce naturally without rushing it.
Wings keep best in the fridge for 3 days, but honestly? They're even better the next day once the gravy has time to meld. Store the wings and gravy separately—gravy reheats faster on the stove. For leftovers, just pop the wings in the oven at 375°F for 10 minutes to crisp them up again. Gravy freezes for up to 3 months—portion it into ice cube trays for easy single servings later. Pro tip: Save the wing bones for next time—toss them in a pot with water and simmer for 30 minutes for homemade broth.
Why You'll Love This Recipe
- Fewer Messy Steps: I swear by this method—just toss the wings in flour, a splash of water, and bake. No deep fryer, no sticky glaze drips. That butter and garlic in the gravy? It melts right into the pan while you roast, so cleanup’s a breeze.
- Rich Without Effort: The secret’s in the pan drippings—garlic sizzling in butter until it’s golden, then just a little water to turn it into velvety gravy. You get crispy wings and that deep, savory sauce without extra bowls or fuss.
- Leftovers That Shine: Bake a big batch on Sunday, and you’ve got lunch for the week. The gravy thickens even better the next day—perfect for dipping or drizzling over eggs. Honestly, my kids ask for these before the original serving’s even cold.
- Budget-Friendly Feast: Wings are cheap, flour and butter are pantry staples, and garlic? A dollar’s worth lasts forever. You’re feeding a crowd for less than takeout, and the taste? Way better than anything in a box. (Yes, even on a Tuesday night.)
Step-by-step instructions for baked chicken wings with gravy
Here's how to transform simple wings into a restaurant-worthy meal with crispy skin and velvety gravy.
Season and Dredge the Wings
Start by patting the 2 lb chicken wings completely dry with paper towels—this is non-negotiable for crispy skin. In a large bowl, whisk together the 0.5 cup all-purpose flour, 1.5 tbsp salt, 1 tbsp black pepper, 1 tbsp paprika, 1 tsp onion powder, and 1 tsp dried thyme. Toss the wings in this seasoned flour until they're evenly coated, shaking off any excess.
Here's the thing—don't skip the flour coating. It creates a golden crust that locks in moisture while giving you that perfect crunch. I like to work in batches if needed so the wings don't get soggy from condensation. Arrange them on a baking sheet in a single layer, skin-side up, ready for the oven.
Bake Until Golden and Crispy
Preheat your oven to 425°F and let it fully preheat for 10 minutes. Place the baking sheet on the middle rack and bake for 35-40 minutes, flipping the wings halfway through at the 20-minute mark. You're looking for wings that are deep golden brown and crispy to the touch—if you press gently, they should spring back.
I press down gently on the wings during the first 10 minutes to prevent curling, which ensures even contact with the baking sheet. Don't open the oven door during cooking—every time you do, you lose heat and add 5-10 minutes to your bake time. The wings are done when the internal temperature reaches 165°F in the thickest part.
Deglaze the Pan for Rich Gravy
While the wings bake, melt the 0.5 cup unsalted butter in a large skillet over medium heat until it foams but doesn't brown. Remove the wings from the oven and transfer them to a warm platter, tenting loosely with foil to keep warm. Immediately pour in the 0.5 cup chicken broth, scraping up every last browned bit from the bottom of the pan—this is where all the flavor hides.
Bring the liquid to a gentle simmer and let it reduce by half, which should take about 3-4 minutes. Here's where it gets good—stir in the 2 tbsp unsalted butter and 0.25 cup heavy cream, whisking constantly until the sauce thickens slightly and coats the back of a spoon. If it's too thick, add 1 tablespoon of water at a time until you reach your desired consistency.
Finish with Aromatics and Serve
Add the 4 minced garlic cloves to the skillet and cook for 30 seconds until fragrant—don't let them brown or they'll turn bitter. Return the wings to the skillet, spooning the sauce generously over them. Let everything heat through together for 2-3 minutes, allowing the wings to soak up that luscious gravy.
Transfer the wings to a serving platter, drizzle with any remaining sauce, and garnish with 0.25 cup chopped fresh parsley. The wings should be crispy outside with juicy, flavorful meat inside, and that gravy should be rich, velvety, and packed with all the deep, savory notes from the pan. Serve immediately with your favorite sides—crusty bread is perfect for soaking up every last drop of that amazing sauce.
Pro Tips For Making Baked Chicken Wings Gravy
- Preheat Like It’s 1999: Your oven needs to hit 425°F (220°C) and hold it steady—no sneaky temperature drops. I learned this the hard way when my wings came out damp instead of crispy. If you’re using a dark baking sheet, add 5 extra minutes to the preheat time, or the butter will melt too fast and make your gravy turn into a sad, greasy puddle.
- Flour the Wings Twice: Dredge them once, shake off the excess, then do it again—this time pressing the flour into every nook. The first coat just isn’t enough for that golden, shatterable crust. (Yes, it’s messy. No, you can’t skip it.)
- Deglaze with Patience: After browning the wings in butter, let the pan cool for 2 minutes before adding liquid—this stops the butter from splattering like a science experiment gone wrong. Then, scrape every last bit with a wooden spoon. That browned butter is where the gravy’s depth lives.
- Salt the Garlic First: Toss your minced garlic in ½ tsp salt before cooking it in the butter. It’ll soften faster, caramelize better, and won’t burn before the wings are done. (Trust me, your gravy will taste like a Michelin-starred side dish instead of a sad afterthought.)
Dietary considerations for these flavors
Gluten-Free Adaptation
The flour coating is key for crispiness, but you can easily make this gluten-free. Swap the all-purpose flour for ½ cup gluten-free 1:1 baking flour (like Bob's Red Mill or King Arthur) mixed with 1 tbsp cornstarch. This keeps the texture crisp while avoiding gluten. Just toss the wings in this blend as directed—no other changes needed! 🌾
Dairy-Free Options
Skip the butter in the gravy and use ½ cup olive oil instead for melting. For the cream, substitute ¼ cup full-fat coconut cream (chilled overnight) or ¼ cup cashew cream (blend soaked cashews with water). The flavor stays rich, just with a slightly different texture. I've tested this with store-bought dairy-free alternatives too—they work, but homemade is always better!
Lower-Carb Version
Cut carbs by omitting the flour coating entirely. Instead, season the wings directly with 1 tbsp paprika, 1 tsp onion powder, 1 tsp dried thyme, 1.5 tbsp salt, and 1 tbsp pepper. Brush them lightly with 2 tbsp melted butter before baking. The gravy stays the same, but the wings get their crispiness from the high heat and butter basting. Trust me, they're still delicious!
Allergen-Friendly Swaps
For nut allergies, avoid cashew cream and use ¼ cup unsweetened almond-free oat cream (blend oats with water) instead. If you're avoiding all dairy, check your chicken broth for hidden dairy additives—some brands use it as a thickener. I always double-check labels when making allergen-friendly versions. The key is to keep the gravy's richness while accommodating dietary needs.
Protein-Packed Boost
Add ¼ cup cooked quinoa or 2 tbsp nutritional yeast to the gravy for extra protein. These blend right in and add a savory depth. For a meatier option, toss in 2 tbsp finely chopped bacon (cooked separately) or 1 tbsp chicken liver pâté (if you're feeling adventurous). The wings already pack protein, but these tweaks make it a complete meal even for active eaters!
Nutrition facts
Frequently asked questions about baked chicken wings with gravy
Can I bake the wings ahead of time and reheat them?
Yes! Bake the wings 1-2 days ahead and store them in an airtight container in the fridge. To reheat, pop them in a 400°F oven for 10-12 minutes until crispy again. For the gravy, reheat it separately on the stovetop over low heat—just add a splash of water or broth if it thickens too much. The wings reheat best when warmed through, not microwaved.
How do I make the gravy extra rich and flavorful?
For maximum depth, roast the wing bones separately at 400°F for 20 minutes before making the gravy, then use the drippings instead of broth. Add 1 tbsp Worcestershire sauce or ½ tsp smoked paprika to the gravy for extra umami. Another trick? Stir in 1 tbsp chicken liver pâté (optional) or a splash of white wine while deglazing the pan.
What if my wings aren't crispy after baking?
Overcrowding or underbaking are the usual culprits. Ensure wings are in a single layer on the baking sheet with 1-inch space between them. Bake at 425°F for 40-45 minutes, flipping halfway, and press gently—they should spring back when done. For extra crispiness, broil for 2-3 minutes at the end (watch closely!). If they're still soggy, try brushing with melted butter before baking next time.
Can I use frozen chicken wings for this recipe?
Thaw the wings completely in the fridge overnight, then pat them very dry before seasoning. Frozen wings work just as well, but the extra drying step is critical for crispiness. If you're short on time, bake them straight from frozen at 425°F for 50-55 minutes, flipping halfway—just add 10-15 minutes to the cook time.
How do I serve these wings for a crowd?
Double the recipe and bake in batches on two sheets. For easy serving, arrange wings on a large platter and let guests dip them in individual gravy cups (just spoon gravy into small bowls). Serve with crusty bread, carrot sticks, and blue cheese dressing for a full spread. To keep gravy warm, transfer it to a slow cooker on low heat while serving.