
Main Courses
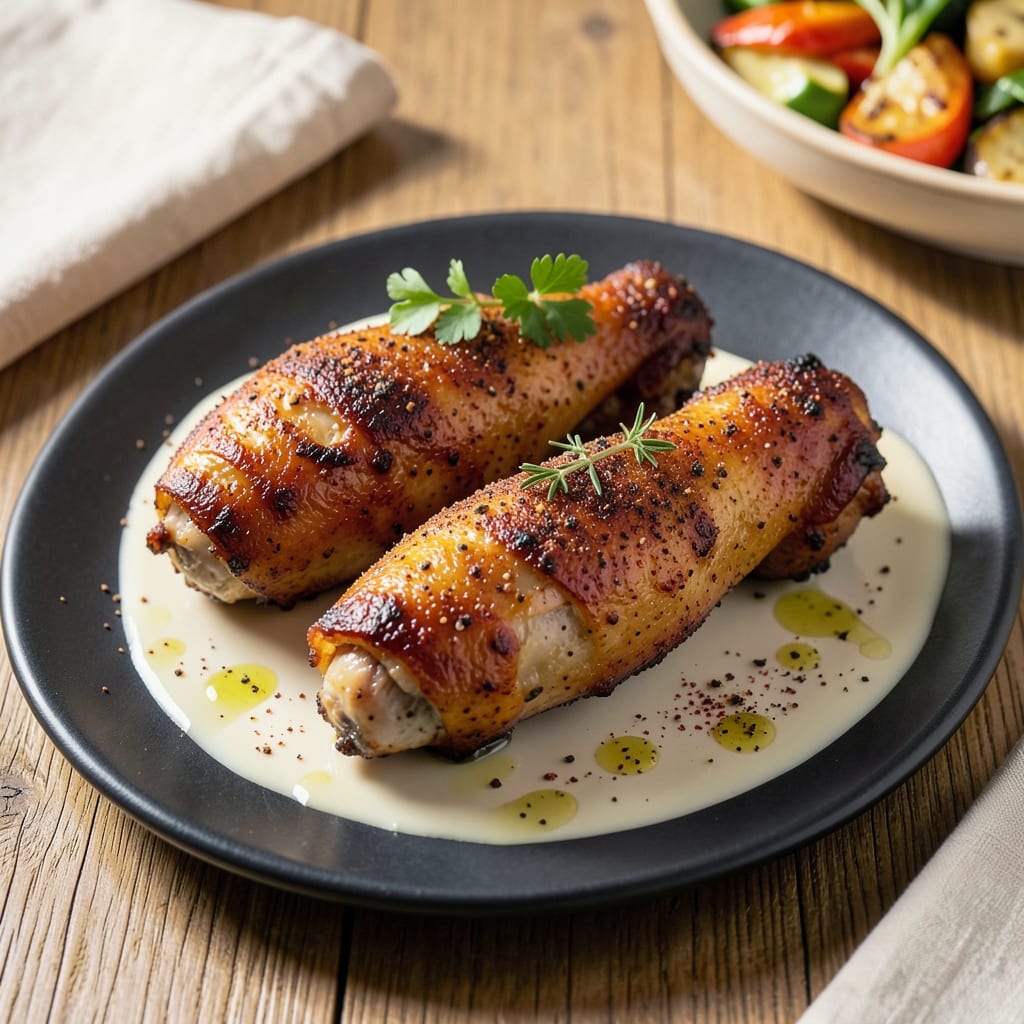
This baked frozen chicken drumsticks recipe transforms a pantry staple into a restaurant-worthy meal with minimal effort. The secret lies in proper seasoning and baking technique—no thawing required. I've perfected this method after years of testing, ensuring crispy skin and juicy meat every time, even when starting with frozen ingredients.
What makes this recipe work is the combination of high heat and indirect baking. The chicken starts on a wire rack to allow air circulation, which creates that coveted crispy texture while the meat stays tender inside. A simple blend of salt, pepper, and paprika forms the flavor foundation, but you can customize it with your favorite spices.
By the time you pull these golden drumsticks from the oven, you'll have perfectly browned skin that shatters at the touch and meat so tender it falls off the bone. The best part? This entire process takes just 45 minutes, making it ideal for weeknight dinners when you need something hearty without the fuss.
Pair these with roasted potatoes or a fresh green salad for a complete meal. The beauty of this recipe is its versatility—it works equally well as a main course or appetizer when cut into smaller pieces. Let's get started on creating crispy, juicy chicken drumsticks that'll impress anyone at your table.
Ingredients for baked frozen chicken drumsticks
Pantry staples plus a few key ingredients for restaurant-quality crispy drumsticks—no thawing needed.
| Ingredient | Amount | Notes |
|---|---|---|
| Chicken Drumsticks 🍗 | 1 ½ lb | Frozen, bone-in, skin-on preferred |
| All-Purpose Flour 🌾 | ½ cup | For dredging, optional for extra crisp |
| Olive Oil 🫒 | 2 tbsp | High smoke point for crisping |
| Kosher Salt 🧂 | 1 ½ tsp | Diamond Crystal preferred |
| Ground Black Pepper 🌶️ | ½ tsp | Freshly ground for best flavor |
| Smoked Paprika 🌶️ | 1 tsp | For that smoky depth |
| Garlic Powder 🧄 | ½ tsp | Adds subtle savory punch |
| Onion Powder 🧅 | ½ tsp | Balances flavors beautifully |
| Cornstarch 🌾 | 1 tbsp | For extra crispy skin |
| Lemon Juice 🍋 | 1 tbsp | Brightens the flavor |
| Fresh Rosemary 🌿 | 1 tbsp | Chopped, optional for aroma |
| Wire Rack 🔗 | 1 whole | For even air circulation |
The chicken is everything here. Grab bone-in, skin-on drumsticks—they're usually sold frozen in the meat section. Costco or Trader Joe's often have them pre-packaged, but check the regular grocery store freezer too. Look for pieces that are similar in size so they cook evenly. The cornstarch is your secret weapon for that shatteringly crisp skin—don't skip it. Fresh rosemary adds a nice aroma, but dried works in a pinch if that's what you've got.
No cornstarch? Extra flour works too, but the cornstarch gives you that perfect crunch. Short on smoked paprika? Regular paprika plus a pinch of cayenne gets you close. The lemon juice can be bottled, but fresh is better if you've got it. For extra flavor, add a sprinkle of brown sugar before baking—it caramelizes beautifully. And if you're feeling fancy, swap the olive oil for avocado oil—it's got a higher smoke point for even better crisping.
This recipe reheats beautifully—just pop them in the oven at 375°F for 10 minutes. Store leftovers in an airtight container for up to 4 days in the fridge. For longer storage, freeze them for 3 months. Pro tip: Portion the oil and seasoning mix in small containers so you're always ready for a quick weeknight dinner. The wire rack is non-negotiable—it keeps the skin crispy instead of soggy.
Why You'll Love This Recipe
- No Thaw Required: I’ll admit, I used to dread frozen drumsticks—until I realized you can bake these straight from the freezer. Just toss them in olive oil, salt, and pepper, then let the oven do the work. No defrosting, no waiting, no excuses.
- Crispy Without Fuss: That flour coating? It’s the secret weapon. The drumsticks get golden and shatteringly crisp on the outside while staying juicy inside—no deep-frying, no complicated marinades. Just simple, satisfying crunch with every bite.
- Game Day Hero: Between us, this is my go-to for tailgates, Super Bowl parties, or even a lazy Sunday with friends. The kids love picking them up, and honestly? They disappear faster than I can say “second round.”
- Budget-Friendly Staple: A pound of drumsticks costs less than half a chicken breast, and they feed a crowd. Leftovers? Perfect for wraps, salads, or reheated with a sprinkle of salt. My wallet and my family thank me every time.
Step-by-step instructions for crispy baked chicken drumsticks
Here's how to transform frozen drumsticks into restaurant-worthy bites with golden skin and tender meat.
Prep the Chicken for Maximum Crispiness
Preheat your oven to 425°F while you prepare the chicken. Place the 1.5 lb frozen chicken drumsticks on a wire rack set over a baking sheet. I like to use the rack because it allows hot air to circulate all around the drumsticks, preventing steaming and ensuring crispy skin on all sides.
In a small bowl, whisk together the 0.5 cup all-purpose flour, 1.5 tsp kosher salt, 0.5 tsp ground black pepper, 1 tsp smoked paprika, 0.5 tsp garlic powder, and 0.5 tsp onion powder. This dry rub will create a flavorful crust while helping the skin crisp up beautifully. If you're using the optional 1 tbsp cornstarch, mix it into the flour blend for extra crispiness.
Coat and Rest for Perfect Texture
Lightly brush the drumsticks with 1 tbsp olive oil to help the seasoning adhere. Then, using your hands or a paper towel, press the flour mixture evenly over each piece. You want a light, even coating—not too thick or it'll prevent crisping. Place the coated drumsticks back on the wire rack.
Here's a pro tip: Let the seasoned drumsticks sit at room temperature for 15-20 minutes before baking. This helps the skin crisp more evenly and prevents the inside from cooking too quickly while the outside stays raw. If you're short on time, just proceed to baking—it'll still turn out great, but the skin might be slightly less crispy.
Bake Until Golden and Juicy
Carefully transfer the wire rack with drumsticks to the preheated oven. Bake for 30 minutes, then flip each piece and rotate the rack for even browning. You'll know they're ready when the skin is deep golden brown and crispy, and the internal temperature reaches 165°F when checked with an instant-read thermometer.
During the last 5 minutes of baking, drizzle the drumsticks with 1 tbsp lemon juice and sprinkle with 1 tbsp chopped fresh rosemary (if using). This brightens the flavors and adds a fragrant finish. The lemon juice also helps keep the skin crispy by preventing it from becoming rubbery as it cools.
Rest and Serve for Maximum Juiciness
Remove the drumsticks from the oven and let them rest on the wire rack for 5-10 minutes before serving. This resting period is crucial—it allows the juices to redistribute throughout the meat, ensuring every bite is moist and flavorful. If you skip this step, you'll end up with dry drumsticks.
Serve immediately with your favorite dipping sauce or a squeeze of extra lemon. The skin should be perfectly crispy, the meat tender and juicy, and the flavors well-balanced with smoky, herby, and slightly tangy notes. These drumsticks are so good, you'll want to make them every week!
Pro Tips For Making Baked Frozen Chicken Drumsticks
- Pat the Drumsticks Dry: Frozen chicken holds onto moisture like a stubborn guest. Wipe each drumstick with paper towels before seasoning—this helps the flour stick and the skin crisp up instead of turning soggy. I used to skip this, and my crust always ended up mealy.
- Use a Meat Thermometer: Baked frozen drumsticks are tricky—you want them golden but not rubbery. Pull them out at 160°F internal temp (165°F is overkill for drumsticks). I learned this the hard way after cutting into a batch that was still gray inside but looked perfect on the outside.
- Don’t Overcrowd the Pan: If you’re baking more than 6 drumsticks at once, work in batches. Crowding steams them instead of browning, and you’ll end up with pale, unevenly cooked meat. A single layer with space between them guarantees crispy skin every time.
- Add a Splash of Water: Before baking, sprinkle 1-2 tablespoons of water over the floured drumsticks. It helps the flour create a lighter, crispier crust instead of a heavy, gluey coating. Sounds weird, but it works—my grandmother swore by this, and she was right.
Wine and beer pairings for this dish
Crisp White Wine
For a refreshing contrast to the smoky, crispy flavors of your baked drumsticks, I always reach for a dry Riesling or Sauvignon Blanc. The bright acidity and citrus notes cut through the richness of the chicken skin beautifully. A chilled bottle of Kim Crawford Sauvignon Blanc from New Zealand is my go-to—it’s crisp, aromatic, and pairs perfectly with the lemony finish of the dish. Serve it slightly cooler than room temperature for that refreshing sip. 🍷
Light Red Wine
If you prefer red wine, opt for something light-bodied like a Pinot Noir or Gamay. These wines have enough fruitiness to complement the smoky paprika and garlic powder in the seasoning without overpowering the delicate flavors of the chicken. I love a Meiomi Pinot Noir—it’s approachable, has a nice berry profile, and won’t clash with the dish. Let it breathe for 10-15 minutes before serving to enhance its aromas. 🍇
Hoppy Beer Pairing
For beer lovers, a hazy IPA or wheat beer works wonderfully. The citrusy hop notes in an IPA mirror the lemon juice in the recipe, while the slight sweetness of a wheat beer balances the savory flavors. Allagash White is a fantastic choice—it’s light, refreshing, and has a subtle vanilla note that pairs surprisingly well with the rosemary. Serve it ice-cold for the best experience. 🍺
Craft Beer Options
If you’re feeling adventurous, try a Belgian-style witbier like Hoegaarden. The coriander and orange peel flavors in these beers add a bright, almost spicy contrast to the smoky, herby notes of the drumsticks. For something bolder, a light amber ale with a touch of caramel will complement the crispy skin and juicy meat. Just avoid heavy stouts or porters—they’ll overpower the dish. 🍻
Non-Alcoholic Choices
Don’t drink alcohol? No problem! A sparkling apple cider or ginger beer adds a festive touch while cutting through the richness. For something more savory, try a cucumber-mint infused water—it’s refreshing and highlights the herby flavors of the rosemary. I also love a homemade lemonade with a splash of sparkling water for a zesty, crisp finish. 💧
Nutrition facts
Frequently asked questions about baked chicken drumsticks
Why do I need to bake these on a wire rack instead of directly on the pan?
The wire rack is your secret weapon for crispy skin! Without it, the drumsticks steam instead of crisp, leaving you with soggy skin. The rack lets hot air circulate all around, creating that perfect golden crust while keeping the meat juicy inside. It's worth the extra step for restaurant-quality results.
Can I use boneless drumsticks or thighs instead?
This recipe works best with bone-in, skin-on drumsticks—the bone helps keep the meat moist, and the skin crisps beautifully. If you only have boneless thighs, you can still use them, but reduce the baking time by about 5-7 minutes and watch closely to avoid drying out. The texture will be slightly different but still delicious.
What if my oven runs hot or cold? How do I adjust the temperature?
If your oven runs hot, reduce the temperature to 400°F instead of 425°F and add 5-10 minutes to the baking time. For cold ovens, increase to 450°F and check for doneness 5 minutes early. Always use an instant-read thermometer to check for 165°F internal temp—it's the most reliable method.
How can I make these extra crispy without burning them?
For maximum crispiness without burning, try this pro trick: After the initial 30 minutes of baking, transfer the drumsticks to a broiler-safe pan and broil for 2-3 minutes on high. Keep a close eye to avoid burning! The broiler gives you that extra crispy finish while the inside stays perfectly cooked. Just be ready to move them quickly.
Can I make these ahead of time for a meal prep?
These drumsticks reheat beautifully. Cook them as directed, then let them cool completely. Store in an airtight container in the fridge for up to 4 days or freeze for 3 months. To reheat, bake at 375°F for 10-15 minutes until heated through. The skin will be slightly less crispy but still delicious.