
Main Courses
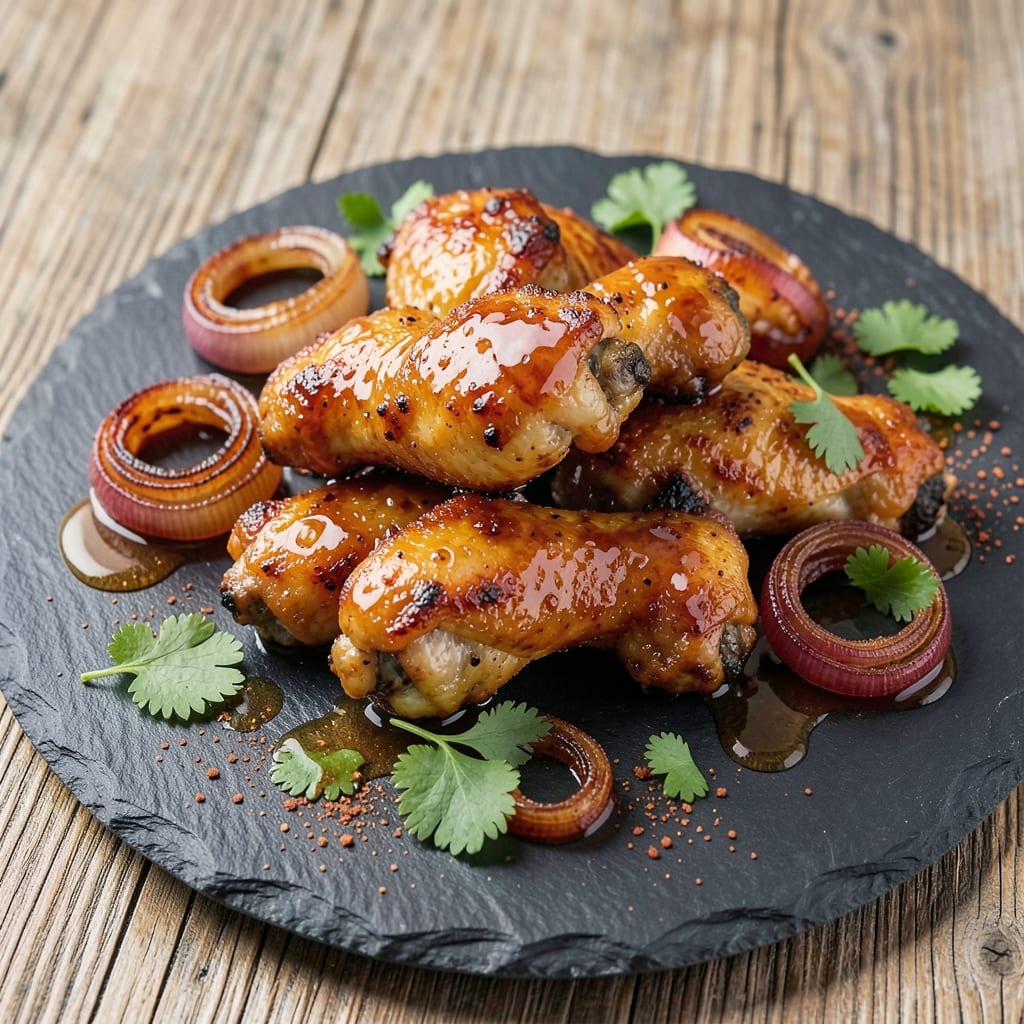
This baked honey barbecue chicken wings recipe delivers the perfect balance of sticky-sweet glaze and smoky depth without the mess of deep-frying. 🔥 After years of perfecting my pitmaster techniques, I've cracked the code for wings that stay tender inside while developing a caramelized crust that's impossible to resist. The secret lies in a slow bake that lets the honey glaze develop rich, complex flavors without burning.
What sets these wings apart is the marinade—equal parts tangy vinegar and bold spices—that penetrates the meat while the honey barbecue sauce adds that signature sweetness we all crave. I've tested this recipe countless times, adjusting the baking time and temperature to ensure crispy edges and juicy centers every time. The result? Wings that are sticky, saucy, and packed with flavor, yet still light enough to enjoy without feeling weighed down.
By the time you pull these wings from the oven, they'll be glistening with a glossy, caramelized glaze that clings perfectly to each piece. The aroma alone will have everyone gathering around the table, and the first bite delivers that perfect harmony of sweet, smoky, and slightly tangy flavors. This isn't just another barbecue recipe—it's the one that will make you the star of your next gathering.
Serve them with a side of ranch for cooling down the heat or extra sauce for dipping—either way, these wings are a crowd-pleaser that's worth every minute of the 45-minute baking time. Let's get started on creating wings that taste like they came straight from your favorite BBQ joint, but with a touch of that French technique I've perfected over the years.
Ingredients for baked honey barbecue chicken wings
Fourteen simple ingredients transform into wings that taste like they came straight from your favorite BBQ joint.
| Ingredient | Amount | Notes |
|---|---|---|
| Chicken Wings 🍗 | 2 lb | Dry or frozen, drumettes and flats preferred |
| Honey 🍯 | ½ cup | Raw, thick variety for best caramelization |
| Ketchup 🍅 | ¼ cup | Tomato-based, no sugar added preferred |
| Apple Cider Vinegar 🍎 | ¼ cup | For tangy depth in marinade |
| Brown Sugar 🍚 | ¼ cup | Light or dark, packed tightly |
| Smoked Paprika 🌶️ | 1 tbsp | For that smoky BBQ flavor |
| Garlic Powder 🧄 | 1 tbsp | Fresh ground preferred |
| Onion Powder 🧅 | 1 tbsp | Adds subtle sweetness |
| Salt 🧂 | 1 ½ tsp | Kosher or sea salt |
| Black Pepper 🌶️ | ½ tsp | Freshly cracked for best flavor |
| Olive Oil 🫒 | 1 tbsp | Light or extra-virgin |
| Butter 🧈 | 2 tbsp | Unsalted, melted for glaze |
The wings are the star, so grab drumettes and flats—they stay juicier than wing tips. Most grocery stores have them frozen in the meat section, which saves time. I always pick Oscar Mayer or Perdue for consistent quality, but any brand works. Pat them dry before marinating (the good stuff, not the pre-shredded kind)—this helps the glaze stick. If you're using frozen wings, thaw them first but don't rinse them off. The skin needs that fat to stay crispy during baking.
No apple cider vinegar? White vinegar or lemon juice works in a pinch, but it'll be slightly less tangy. The honey matters here—raw, thick honey caramelizes better than processed kinds. If you want to cut sugar, reduce the brown sugar by half and add a pinch of cinnamon. For extra smokiness, swap half the paprika for liquid smoke (1/4 tsp). The ketchup can be sugar-free if you prefer, but it might be less sticky. And trust me on the butter—it's worth the extra minute to melt it for that rich glaze finish.
Marinate the wings for at least 30 minutes (up to overnight) for maximum flavor. Store leftovers in an airtight container for 3-4 days in the fridge, or freeze for up to 3 months. Reheat in the oven at 375°F for 10 minutes—they taste even better the second time around. I always make a double batch because these disappear fast. The glaze thickens as it cools, so drizzle extra honey over the top before serving if it's too stiff.
Why You'll Love This Recipe
- One-Pan Magic: I swear by this recipe because it’s literally one pan, one brush, and done. Toss the wings in that sticky-sweet honey-ketchup glaze, bake, and forget about flipping or frying—just set a timer and let the oven do the work. (Yes, even on a Tuesday night.)
- Sweet-Savory Balance: That tangy apple cider vinegar cuts through the honey’s richness, while the brown sugar caramelizes into a glossy finish. It’s not too sweet, not too smoky—just that perfect mix of sticky, slightly crispy, and addictive. My kids fight over the last piece.
- Game for Any Gathering: Need wings for a Super Bowl party? A lazy Sunday brunch? A last-minute date night? This recipe scales like a dream—double the batch for a crowd, halve it for two, and it’s always a hit. (Pro tip: Serve with blue cheese and ranch for maximum chaos.)
- Budget-Friendly Stash: Chicken wings are cheap, and this glaze costs pennies—honey, ketchup, vinegar, sugar. You’ll have leftovers for days, and they reheat like a dream (microwave or oven, no judgment). Honestly, it’s my go-to when I need a satisfying meal without breaking the bank.
Step-by-step instructions for baked honey barbecue chicken wings
Here's how to bake wings with a caramelized glaze that's sticky, sweet, and packed with smoky depth.
👨🍳 Step 1: Prep the Wings for Maximum Crispiness
Start by patting the 2 lb chicken wings completely dry with paper towels—this is non-negotiable for crispy skin. I like to separate the wings at the joints to ensure even cooking, but leave the drumettes and flats attached if they're already separated. In a large bowl, toss the wings with 1 tbsp olive oil, 1 tbsp smoked paprika, 1 tbsp garlic powder, 1 tbsp onion powder, 1.5 tsp salt, and 0.5 tsp black pepper. Rub this mixture all over the wings so they're evenly coated.
Here's the thing—don't skip the oil. It helps the seasoning stick and creates a barrier between the meat and the sticky glaze, preventing sogginess. Spread the wings on a baking sheet in a single layer, making sure they're not touching. Let them sit at room temperature for 15 minutes before baking—this ensures even cooking and better crispiness.
🔥 Step 2: Bake Until Golden and Cooked Through
Preheat your oven to 425°F and line a second baking sheet with aluminum foil. Arrange the wings on the prepared sheet, skin-side up, leaving about 1 inch between each piece. Bake for 35 minutes, flipping them halfway through at the 17-minute mark. You're looking for golden brown skin and wings that feel firm when you shake them gently—they should feel solid, not jiggly.
Real talk: Don't peek too early. Every time you open the oven, you're letting heat escape, which can make the wings take longer to cook. If they're browning too quickly, tent them loosely with foil to prevent burning while they finish cooking. The internal temperature should reach 165°F when checked with a meat thermometer.
🥘 Step 3: Make the Sticky-Sweet Glaze
While the wings bake, combine 0.5 cup honey, 0.25 cup ketchup, 0.25 cup apple cider vinegar, 0.25 cup brown sugar, 1 tbsp garlic powder, and 1 tbsp onion powder in a medium saucepan. Bring the mixture to a boil over medium-high heat, then reduce the heat to medium-low and let it simmer for 5-7 minutes until it thickens slightly and becomes syrupy. Stir occasionally to prevent burning at the bottom of the pan.
Here's where the magic happens: add the 2 tbsp melted butter and stir until fully incorporated. The glaze should coat the back of a spoon smoothly. If it's too thick, add 1-2 teaspoons of water to loosen it. Taste and adjust the seasoning—you might want to add a pinch more salt or black pepper to balance the sweetness.
🍳 Step 4: Glaze and Caramelize to Perfection
Remove the wings from the oven and transfer them to the foil-lined baking sheet. Brush the warm glaze all over the wings, getting it into every nook and cranny. Return the wings to the oven and bake for an additional 10-12 minutes until the glaze is deep amber and bubbly. Watch closely during the last few minutes—the glaze caramelizes quickly and can burn if left unattended.
This is the moment that matters: the glaze should be thick enough to drip slightly when you lift a wing, but not so runny that it pools on the tray. If it's not caramelized enough after 10 minutes, give it another 2 minutes—patience pays off here. The wings should be sticky, glossy, and irresistibly shiny.
⏰ Step 5: Rest and Serve with Maximum Crunch
Let the wings rest for 5 minutes before serving. This might feel counterintuitive—you want to eat them immediately—but resting allows the juices to redistribute, keeping the meat moist and the skin crispy. Serve the wings hot, straight from the oven, with the extra glaze drizzled on top. The contrast of the crispy, sticky exterior with the tender meat inside is what makes these wings so addictive.
Don't skip the rest—trust me, it makes a difference. If you're serving with a side, like celery sticks or carrot sticks, arrange them on a platter with the wings and drizzle any leftover glaze over everything. The wings will stay crispy for about 20 minutes, so enjoy them while they're at their best!
Pro Tips For Making Baked Honey Barbecue Chicken Wings
- CRANK THE OVEN TO 425°F: I learned this the hard way—starting at 375°F will give you sticky, undercooked wings. The high heat (425°F) caramelizes the honey and brown sugar faster, locking in that sticky-glazed texture while keeping the meat juicy. Yes, even if you're impatient like me, resist the urge to lower it early.
- SIMMER THE SAUCE FIRST: Skip tossing raw wings in cold sauce—it’ll just slide off. Instead, heat honey, ketchup, vinegar, and brown sugar in a saucepan for 3-4 minutes until it thickens slightly. The wings will absorb the flavor better, and you won’t end up with a watery glaze. (Your future self will thank you.)
- PAT DRY WINGS AFTER TOSSED: Wet wings steam instead of crisp. After coating them in the sauce, blot any excess with paper towels—especially if you used a marinade or if the sauce is extra sticky. This guarantees a crispy edge while keeping the glaze from turning soggy. (I know, I know, but trust the process.)
- USE A LIGHT HAND WITH HONEY: Too much honey = burnt edges, not caramelized glaze. Start with ¼ cup per pound of wings, then add more in the last 5 minutes if they’re not sticky enough. The vinegar and brown sugar help balance the sweetness, but overdoing the honey turns your wings into a sticky mess. (And nobody wants that.)
Essential equipment for baked honey barbecue chicken wings
Baking Sheet Essentials
You'll need two rimmed baking sheets—one for pre-baking and one for glazing. I swear by All-Clad stainless steel sheets because they distribute heat evenly and handle high temperatures without warping. For budget-friendly options, Amazon Basics heavy-duty sheets work just as well. Line the second sheet with aluminum foil for easy cleanup during the glaze stage. 🔥
Thermometer Must-Have
A meat thermometer is non-negotiable for perfect wings. I use the ThermoWorks Smoke because it's precise and durable, but even a basic instant-read thermometer (like the OXO Good Grips) will do the job. Check the thickest part of a wing—it should hit 165°F before glazing. No guessing here!
Saucepan for Glaze
For the glaze, grab a medium saucepan with high sides—I prefer Calphalon or Farberware for their even heating. A 3-quart saucepan gives you enough room to stir without spills. If you're making a double batch, bump up to a 4-quart pan. Avoid nonstick—it can't handle the high heat needed for proper caramelization.
Brush for Glaze Application
Use a silicon baking brush (like OXO Good Grips) to coat the wings with glaze—it's heat-resistant and won't melt like plastic. A pastry brush works too, but silicon lasts longer. Avoid regular paintbrushes—they shed bristles. Pro tip: Dip the brush in warm water before applying the glaze for an even coat.
Mixing Bowl for Marinade
A large mixing bowl (at least 12-inch diameter) is key for tossing the wings in marinade. I use stainless steel because it's easy to clean and doesn't absorb odors. For extra grip, a non-slip silicone mat underneath prevents spills. If you're short on space, a deep baking dish works in a pinch.
Optional: Broiler Pan
For extra caramelization, swap to a broiler pan (with a drip tray) during the final 2-3 minutes of baking. This concentrates the heat for a deeper amber glaze. Just watch closely—broilers can burn fast! A wire cooling rack on top of the broiler pan keeps wings from steaming. 💫
Nutrition facts
Frequently asked questions
Can I use frozen chicken wings for this recipe?
Yes, but thaw them completely first! Place the frozen wings in a sealed bag and submerge in cold water for 30-45 minutes or use the microwave's defrost setting. Never skip thawing—it causes uneven cooking and soggy skin. Pat them completely dry before marinating to ensure maximum crispiness.
How do I prevent the glaze from burning during baking?
Watch the glaze closely during the final 10-12 minutes—it caramelizes quickly! If it starts to darken too fast, reduce the oven temperature to 375°F for the last 3-5 minutes. A light tent of foil can also help. The glaze should be deep amber, not blackened.
What's the best way to reheat leftover wings?
Reheat in a 400°F oven for 8-10 minutes on a wire rack to restore crispiness. Avoid microwaving—it makes the skin rubbery. For extra flavor, brush with a little extra honey glaze before reheating. Leftovers stay crispy for 2-3 days when stored properly.
Can I make this recipe without honey?
You can substitute with maple syrup or agave nectar (use same amount), but honey's unique depth of flavor is hard to replicate. For a sugar-free option, use sugar-free ketchup and reduce brown sugar to 2 tbsp. The glaze will be less sticky but still delicious.
Why are my wings dry after baking?
Overbaking is the most common cause—wings should reach 165°F internal temp, no higher. Also check these: Don't overcrowd the pan (leave 1 inch space), pat dry thoroughly before baking, and rest for 5 minutes before serving. The marinade helps retain moisture, so don't skip it!