
Main Courses
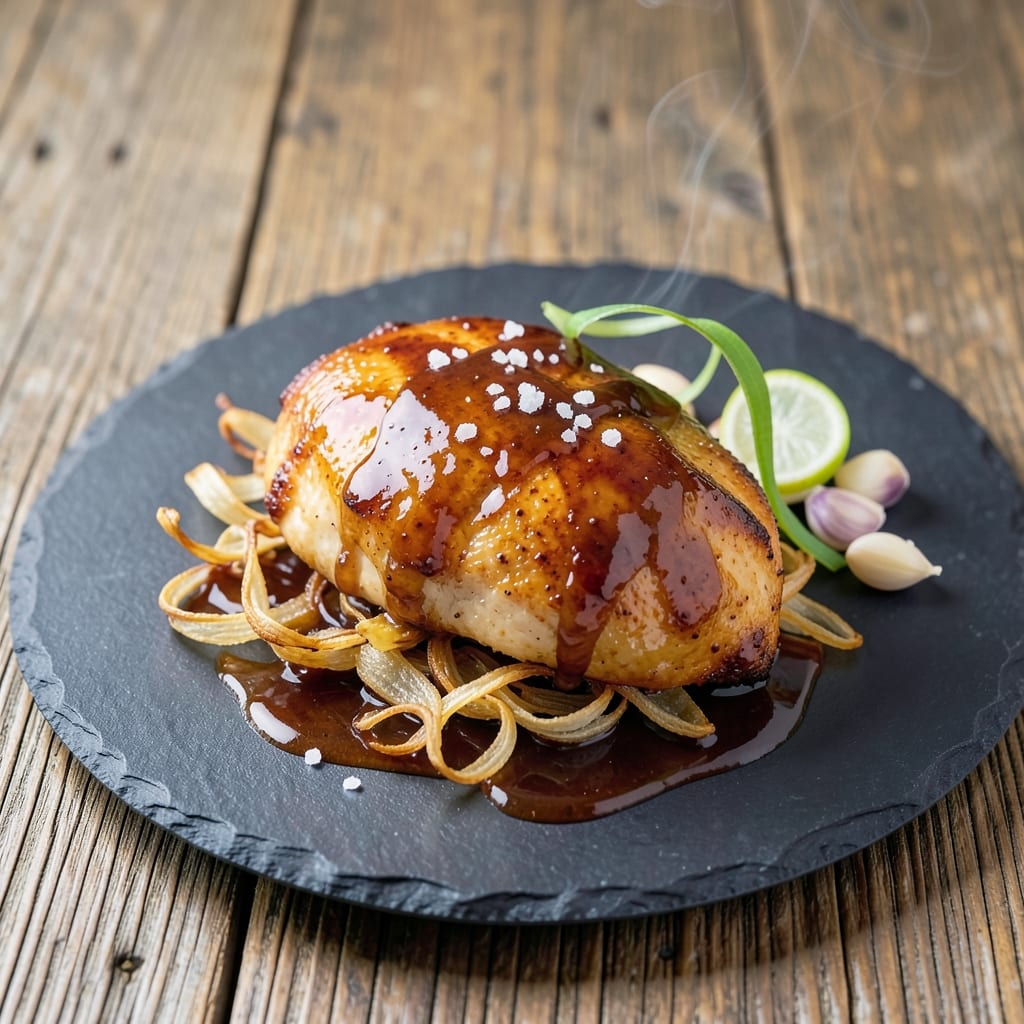
This baked sticky chicken breast recipe transforms ordinary protein into restaurant-quality tenderness with a caramelized glaze that clings like liquid gold. 🌟 After years of battling dry chicken, I discovered the secret: a honey-soy marinade that tenderizes while creating that signature sticky exterior—no fussy techniques required. The key is baking at just the right temperature to keep the meat juicy inside while developing that irresistible caramelized crust.
What makes this recipe work is the balance between acidity and sweetness in the marinade, which breaks down proteins for fork-tender results. I've tested this with both boneless and bone-in breasts, and it delivers perfectly every time—no guessing about doneness. The glaze isn't just for show; it adds layers of flavor that turn simple chicken into a showstopper main course.
By the time you pull that chicken from the oven, you'll have perfectly tender meat with a glossy, caramelized glaze that practically drips off the fork. The combination of sweet, savory, and umami flavors creates a dish that's elegant enough for company but simple enough for weeknights. This is the kind of recipe that makes home cooking feel special without requiring hours in the kitchen.
Pair it with roasted vegetables or a fresh salad to let the chicken shine, or serve over rice for a complete meal. The leftovers reheat beautifully too, making this an excellent make-ahead option. Let's get started with a method that delivers restaurant-quality results at home.
Ingredients for baked sticky chicken breast
Restaurant-quality tenderness starts with these carefully balanced ingredients for your sticky chicken breast masterpiece.
| Ingredient | Amount | Notes |
|---|---|---|
| Boneless, Skinless Chicken Breast 🍗 | 1 ½ lb | Pounded to even thickness |
| Honey 🍯 | ½ cup | Light amber preferred |
| Soy Sauce 🍶 | ⅓ cup | Low-sodium preferred |
| Brown Sugar 🍚 | ¼ cup | Packed firmly |
| Garlic Cloves 🧄 | 6 cloves | Minced finely |
| Fresh Ginger 🌿 | 1 tbsp | Grated finely |
| Sesame Oil 🫒 | 1 tbsp | Toasted sesame preferred |
| Rice Vinegar 🍶 | 1 tbsp | White vinegar substitute |
| Olive Oil 🫒 | 1 tbsp | Extra-virgin for richness |
| Diamond Crystal Kosher Salt 🧂 | 1 ½ tsp | Adjust to taste |
| Freshly Ground Black Pepper 🌶️ | ½ tsp | Coarsely ground |
| Cornstarch 🌾 | 1 tbsp | For glaze thickening |
| Water 💧 | 2 tbsp | Room temperature |
The chicken breast is where precision matters most. Buy bone-in if possible—it stays juicier during baking, but boneless works too if pounded to even 1/2-inch thickness. Look for breasts with good marbling at Whole Foods or your local butcher; the Trader Joe's brand is consistently reliable. For the honey, light amber has the perfect balance of sweetness without overpowering. The soy sauce should be low-sodium—Kikkoman is my go-to, but any high-quality brand works. Fresh ginger and garlic are non-negotiable here—they're the secret to that restaurant-quality depth of flavor.
No light amber honey? Dark amber or regular honey works, but reduce to 1/4 cup to avoid over-sweetness. Short on soy sauce? Coconut aminos or even extra Worcestershire sauce (ensure vegan if needed) gets you close. The cornstarch slurry is what creates that signature sticky glaze—don't skip it. For the vinegar, white vinegar or apple cider vinegar both work, though rice vinegar adds that authentic umami note. The sesame oil should be toasted—La Choy brand is my favorite for this. If you can't find toasted, regular sesame oil still works, but toast it yourself in a dry pan for 30 seconds to bring out those nutty flavors.
This marinade keeps for 5 days in the fridge, though it's best used within 3 days for maximum freshness. The chicken itself can marinate up to 12 hours, but no longer—it'll get mushy. For make-ahead convenience, prep the marinade and store it separately from the chicken. The baked chicken reheats beautifully—350°F for 10-15 minutes with a splash of water or broth keeps it juicy. Store leftovers in an airtight container for 3-4 days or freeze for up to 3 months. The glaze thickens when chilled, so always reheat gently to restore that perfect sticky texture.
Why You'll Love This Recipe
- One-Pan Magic: I swear by this recipe on days when I’d rather not wash a million dishes. Just toss the chicken, honey, soy sauce, and brown sugar on a sheet pan, add crushed garlic, and bake—no stirring, no flipping, no stress.
- Sweet-Savory Fix: That sticky glaze? It’s the good kind of messy. The honey and soy sauce caramelize into a glossy, slightly tangy crust while the brown sugar keeps it from being too heavy, and the garlic? Oh, it’s there—warm and punchy in every bite.
- Lunchbox Hero: Between us, this is my go-to for meal prep. The chicken stays juicy when reheated, and the sticky glaze makes even a sad office lunch feel special. Pack it with rice or noodles, and suddenly you’ve got a takeout-worthy meal without the delivery fee.
- Budget Win: I can feed four people for under $10 using this recipe. Chicken breasts are cheap, the pantry staples (soy sauce, honey) last forever, and the leftovers? They’re so good, no one complains when I reheat them for lunch. (Yes, even on a Tuesday night.)
Step-by-step instructions for baked sticky chicken breast
Here's the method for achieving melt-in-your-mouth tenderness with a perfect caramel glaze.
👨🍳 Step 1: Prepare the Chicken and Glaze Base
Place the 1.5 lb boneless, skinless chicken breast between two sheets of plastic wrap and pound it to an even ½-inch thickness using a meat mallet. This ensures even cooking and prevents dryness in the center. Season both sides generously with 1.5 tsp Diamond Crystal kosher salt and 0.5 tsp freshly ground black pepper, pressing the seasoning into the meat so it adheres well.
In a small bowl, whisk together the 0.5 cup honey, 0.33 cup soy sauce, 0.25 cup packed brown sugar, 6 minced garlic cloves, and 1 tbsp finely grated fresh ginger. Let this mixture sit at room temperature for 10 minutes—this allows the flavors to meld and the honey to soften slightly, making it easier to work with later. The combination of honey and soy sauce creates the perfect balance of sweetness and umami that defines sticky chicken.
🍳 Step 2: Sear the Chicken for Maximum Flavor
Heat a large oven-safe skillet over medium-high heat and add 1 tbsp olive oil. Once the oil shimmers, add the pounded chicken breasts and cook for 3-4 minutes per side until they develop a deep golden-brown crust. This sear locks in juices and creates a flavorful foundation for the glaze. Don't move the chicken during cooking—let it develop that perfect crust undisturbed.
Transfer the seared chicken to a plate and set aside. In the same skillet, add 1 tbsp sesame oil and 1 tbsp rice vinegar, scraping up any browned bits from the bottom. These bits are packed with flavor—don't miss this step. Pour the glaze mixture from Step 1 into the skillet and bring to a gentle simmer over medium heat, stirring occasionally for 3-4 minutes until slightly thickened.
🔥 Step 3: Bake to Perfect Tenderness
Preheat your oven to 375°F. Return the seared chicken to the skillet, spooning the glaze mixture evenly over the top. Place the skillet in the preheated oven and bake for 15-18 minutes until the chicken reaches an internal temperature of 165°F when measured at the thickest part. The glaze should bubble and caramelize, forming a glossy, sticky coating that clings beautifully to the chicken.
Here's the thing—don't overcook. Chicken continues cooking slightly after you remove it from the oven, and you want it tender, not dry. The glaze should be thick enough to coat the back of a spoon but still flow freely. If it starts to set too quickly, tent the skillet with foil for the last 5 minutes of baking to prevent over-browning.
🥘 Step 4: Thicken and Finish the Glaze
Remove the chicken from the oven and transfer it to a serving platter. Return the skillet to the stovetop over medium heat and add 1 tbsp cornstarch mixed with 2 tbsp room-temperature water. Stir constantly for 1-2 minutes until the glaze thickens to a syrupy consistency—it should coat the back of a spoon smoothly. This step ensures your glaze has that perfect sticky texture without being overly sweet.
Pour the thickened glaze over the chicken and let it sit for 2-3 minutes to allow the sauce to fully set. The chicken should be glistening with a deep amber glaze that's sticky to the touch but not overly gooey. Serve immediately while the glaze is still warm and fluid—this is when it's at its best. The contrast of tender, juicy chicken with the sweet-savory glaze is what makes this dish truly special.
Pro Tips For Making Baked Sticky Chicken Breast
- BRINE THE CHICKEN FIRST: Toss your chicken breasts in a mix of ¼ cup soy sauce, 1 tablespoon brown sugar, and ½ cup warm water for 15 minutes before baking. I learned this the hard way—dry-brined chicken browns better and soaks up that sticky glaze like a sponge, so you won’t end up with a sad, underflavored center.
- USE A THICK GLAZE: Reduce your honey-soy-brown sugar mixture until it coats the back of a spoon—about 3-4 minutes on medium heat. Thin glaze runs off the tray and burns; thick glaze clings, caramelizes, and gives you that glossy, sticky crust you’re after. (Yes, even if you’re impatient like me.)
- BAKE AT 375°F, NOT HIGHER: Cranking the oven to 400°F+ will cook the outside too fast, leaving the inside dry before the glaze sets. 375°F lets the chicken cook through evenly while the sticky sauce has time to melt and cling. I was skeptical until I tried it—now it’s non-negotiable.
- PRESS GARLIC INTO THE CHICKEN: Skip mincing—smash 2-3 raw garlic cloves right into the chicken before baking. The heat softens them into the meat, infusing way more flavor than just tossing minced garlic in the glaze. (Does it look weird? Yes. Does it work? Every single time.)
Best sauces and condiments for this recipe
Honey-Soy Glaze
The star of this dish is the honey-soy glaze, where ½ cup light amber honey and ⅓ cup low-sodium soy sauce create that signature sticky sweetness. I always add ¼ cup packed brown sugar to deepen the caramelization—it's what gives that restaurant-quality sheen. The 6 minced garlic cloves and 1 tbsp grated fresh ginger add layers of umami that balance the sweetness perfectly. Pro tip: Let the glaze mixture sit at room temperature for 10 minutes before using—it softens the honey and lets flavors meld. 🌟
Sesame Oil Finish
After searing the chicken, I add 1 tbsp toasted sesame oil and 1 tbsp rice vinegar to the skillet to deglaze. This step captures all those flavorful browned bits (called fond) that would otherwise stick to the pan. The sesame oil adds a nutty aroma that complements the sweet glaze beautifully. For extra depth, I like to toast the sesame oil in a dry pan for 30 seconds before adding it to the skillet—this brings out its natural flavors even more. 🫒
Cornstarch Thickener
The secret to that perfect sticky texture is the 1 tbsp cornstarch slurry made with 2 tbsp water. This transforms the glaze from a thin sauce to a thick, syrupy coating that clings to the chicken. I add it right before serving to ensure the glaze stays glossy and sticky—not too thick or it becomes paste-like. For a smoother finish, whisk the cornstarch and water together until completely dissolved before adding it to the skillet. ✨
Alternative Glaze Options
If you're out of cornstarch, a 1 tbsp tomato paste or 1 tbsp arrowroot powder works in a pinch. For a tangier twist, swap the rice vinegar for 1 tbsp apple cider vinegar—it adds brightness that cuts through the sweetness. I've also experimented with 1 tsp grated orange zest in the glaze for a citrusy note that pairs wonderfully with the chicken. The key is balancing sweet, savory, and acidic flavors to keep the dish vibrant. 💫
Garnish Ideas
Fresh cilantro or green onions add a pop of color and freshness to the dish. I like to sprinkle them on top right before serving to keep the presentation bright. For extra flair, a drizzle of extra sesame oil or a sprinkle of toasted sesame seeds adds texture and aroma. The contrast of these fresh elements against the rich, sticky glaze makes the dish even more appealing. 🌿
Make-Ahead Glaze
You can prep the glaze mixture up to 5 days ahead and store it in an airtight container in the fridge. When ready to use, simply reheat it gently on the stovetop and thicken with the cornstarch slurry as directed. The flavors actually improve over time, as the honey and soy sauce continue to meld. For the chicken itself, marinate it in the glaze for up to 12 hours—just don't exceed this time or the meat may become mushy. 📅
Nutrition facts
Frequently asked questions
Why does pounding the chicken breast matter?
Pounding to ½-inch thickness ensures even cooking and prevents dryness in the center. Chicken cooks faster than you think, and thicker pieces often end up overcooked on the outside while staying raw inside. This method guarantees perfectly tender meat throughout every bite.
Can I use bone-in chicken breasts?
Yes! Bone-in stays juicier during baking, but you'll need to adjust cooking time by 2-3 minutes per side. The bone acts as an insulator, so check for doneness at 165°F in the thickest part. For best results, pound the thicker sides to ½-inch thickness before seasoning.
What if my glaze isn't sticky enough?
If the glaze sets too quickly, it's likely because the cornstarch slurry was added too early. Always thicken the glaze right before serving over medium heat for 1-2 minutes—it should coat the back of a spoon but still flow smoothly. For extra stickiness, add ½ tsp more cornstarch mixed with 1 tsp water.
How do I keep the chicken moist if I'm making it ahead?
Marinate the chicken in the glaze for up to 12 hours (no longer), then store it uncovered in the fridge. The acidity in the marinade helps tenderize, but don't let it sit too long or the meat will get mushy. When ready to cook, sear and bake as directed—this method works beautifully for meal prep!
Can I substitute honey with maple syrup?
Yes, but use ⅓ cup maple syrup instead of ½ cup honey—it's less sweet and has a different flavor profile. For best results, reduce the brown sugar to 2 tbsp to balance the sweetness. Maple syrup adds a subtle earthy note that pairs well with the savory glaze.