
Main Courses
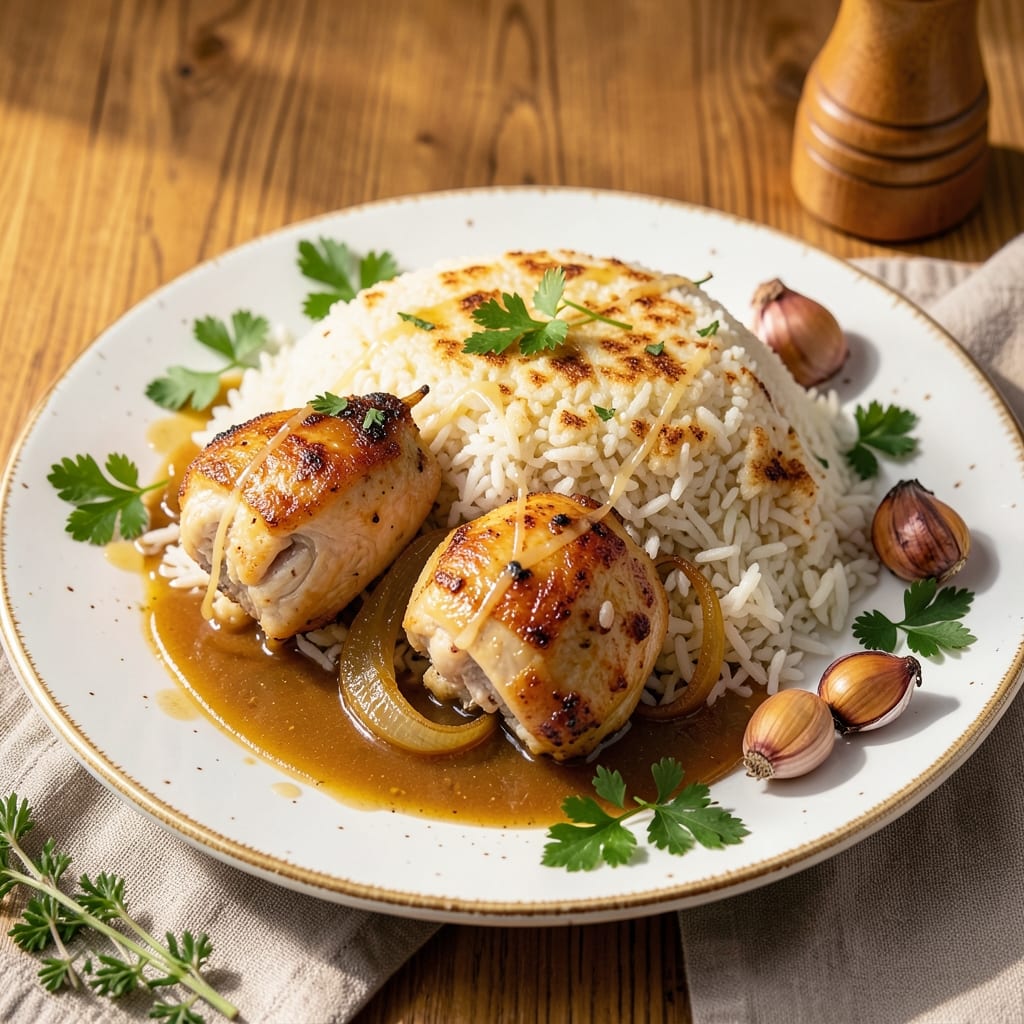
Betty Crocker’s fluffy rice and chicken recipe delivers the ultimate one-pan comfort meal with a golden, crispy top that’s impossible to resist. 💛 The secret lies in perfectly seasoned chicken thighs paired with tender, fluffy rice—all cooked together for maximum flavor and minimal cleanup. This classic dish is designed to feed a hungry family while keeping prep simple and foolproof.
What sets this recipe apart is the crispy, buttery rice crust that forms on top, adding texture and depth to every bite. The chicken stays juicy and flavorful, while the rice absorbs the savory broth, creating a dish that’s both satisfying and easy to make. With just one pan and a few key ingredients, you’ll have a restaurant-worthy meal ready in under an hour—no fancy techniques required.
Ingredients for betty crocker fluffy rice and chicken
Betty Crocker’s iconic crispy-topped rice and chicken relies on these 13 quality ingredients for restaurant-style comfort.
| Ingredient | Amount | Notes |
|---|---|---|
| Chicken Thighs 🍗 | 1 ½ lb | Bone-in, skin-on preferred |
| Long-Grain White Rice 🍚 | 1 ½ cups | Uncooked, like jasmine or basmati |
| Chicken Broth 💧 | 2 cups | Low-sodium preferred |
| Unsalted Butter 🧈 | 4 tbsp | Cold, cubed for crispy crust |
| Yellow Onion 🧅 | 1 whole | Medium, diced |
| Garlic Cloves 🧄 | 3 cloves | Minced for flavor |
| Salt 🧂 | 1 ½ tsp | Kosher or sea salt |
| Black Pepper 🌶️ | ½ tsp | Freshly ground |
| Dried Thyme 🌿 | ½ tsp | Or 1 tbsp fresh |
| Paprika 🌶️ | ½ tsp | Smoked preferred |
| All-Purpose Flour 🌾 | 2 tbsp | For crispy topping |
| Parmesan Cheese 🧀 | ¼ cup | Freshly grated |
| Fresh Parsley 🌿 | ¼ cup | Chopped for garnish |
The chicken thighs are non-negotiable—bone-in, skin-on gives the best flavor and texture. Look for thighs with good marbling at Costco or your local butcher shop for the best quality. If you can't find bone-in, skin-on, bone-in without skin works too, but trim excess fat. For rice, jasmine or basmati gives that signature fluffiness. The broth should be low-sodium—Swanson or Pacific Foods are reliable brands. Butter is key for that crispy crust, so use unsalted to control seasoning.
No chicken thighs? Bone-in chicken breasts work in a pinch, but thighs stay juicier. Short on thyme? Dried oregano at half the amount gets you close. The smoked paprika adds depth—if you only have regular paprika, add a pinch of liquid smoke for extra smokiness. For the crispy top, all-purpose flour is best, but cornstarch at the same amount works too. The Parmesan adds umami—grate it yourself for the best flavor. Fresh parsley brightens everything up, but dried works if you're in a bind.
Prep the chicken and rice ahead—they keep well in the fridge for 2 days. The crispy topping is best served immediately, but the rice reheats beautifully. Store leftovers in an airtight container with a paper towel on top to keep the crust crisp. This dish freezes well for up to 3 months—just reheat covered to preserve that golden crust. For extra crispiness, broil for 2-3 minutes before serving.
Why You'll Love This Recipe
- One-Pot Magic: I swear by this recipe because it’s all in one pot—no rice cooker, no extra bowls, just chicken thighs browning in butter with onions, then rice and broth poured right in. The butter coats everything as it steams, so you end up with rice that’s actually fluffy, not mushy.
- Butter-Basted Goodness: That unsalted butter searing the chicken thighs first? It’s the secret weapon. You get crispy edges on the chicken and a rich, golden crust on the rice—no fancy sauce needed. The broth deepens the flavor, but the butter? That’s where it all comes alive.
- Weeknight Workhorse: Between us, this is my go-to when I’m exhausted but still need a home-cooked meal. The rice absorbs the broth perfectly, so it reheats beautifully for lunches, and the chicken stays juicy even after two days. Honestly, it’s the kind of dish that makes you feel like you’ve done something special without trying.
- Budget-Friendly Feast: Chicken thighs are forgiving and cheap, and long-grain rice stretches forever. A single batch feeds four, and leftovers taste just as good cold for sandwiches or reheated for a lazy afternoon. I’ll be real—it’s the kind of recipe that makes grocery night less stressful.
Step-by-step instructions for Betty Crocker fluffy rice and chicken
Here's how to create a restaurant-worthy one-pan dish with tender chicken and perfectly fluffy rice.
🍳 Step 1: Sear the Chicken and Sauté Aromatics
Preheat your oven to 375°F. In a large oven-safe skillet, melt 2 tablespoons of the unsalted butter over medium-high heat. Add the 1.5 lb chicken thighs, skin-side down, and cook for 5-6 minutes until the skin is golden brown and crispy. Flip the chicken and cook for another 3-4 minutes until the internal temperature reaches 165°F.
Remove the chicken from the skillet and set aside. In the same skillet, add the remaining 2 tablespoons butter and melt over medium heat. Add the diced yellow onion and cook for 3-4 minutes until softened. Stir in the minced garlic cloves and cook for 30 seconds until fragrant. Sprinkle in the dried thyme, paprika, salt, and black pepper, stirring to combine.
👨🍳 Step 2: Create the Crispy Rice Topping
In a small bowl, combine the 1.5 cups long-grain white rice, 2 tablespoons all-purpose flour, and 0.25 cup grated parmesan cheese. Stir well to coat the rice evenly. This mixture will create the signature crispy topping that makes this dish special.
Return the skillet with the onion and garlic mixture to the stove. Stir in the 2 cups chicken broth and bring to a gentle simmer. Carefully place the chicken thighs back into the skillet, spooning the broth mixture over them. Sprinkle the rice mixture evenly over the top, pressing down gently to ensure even contact with the liquid below.
🔥 Step 3: Bake to Golden Perfection
Transfer the skillet to the preheated oven and bake for 30 minutes. After 30 minutes, carefully remove the skillet from the oven and use a fork to gently fluff the rice topping. Return the skillet to the oven and bake for another 10-15 minutes until the rice is tender and the topping is golden brown and crispy.
You'll know it's done when the rice is fluffy and the topping has turned a beautiful golden brown color. The chicken should be cooked through with crispy skin. Let the dish rest for 5 minutes before serving to allow the juices to redistribute.
🍽️ Step 4: Garnish and Serve
Remove the skillet from the oven and transfer the chicken and rice to a serving platter. Garnish with the 0.25 cup chopped fresh parsley for a pop of color and freshness. The crispy topping should be golden brown and crunchy, while the rice underneath should be perfectly fluffy and tender.
Serve immediately and enjoy this comforting one-pan meal. The combination of tender chicken, fluffy rice, and crispy topping creates a harmonious balance of textures and flavors that will satisfy everyone at the table.
Pro Tips For Making Betty Crocker Fluffy Rice And Chicken
- Sear the Chicken First: I learned this the hard way—skipping the sear means bland, rubbery chicken. Pat the thighs very dry, then hit them with high heat in the pan until golden brown (about 4-5 minutes per side). The crust locks in flavor and keeps them juicy when they finish in the broth.
- Toast the Rice Lightly: This isn’t the prettiest method, but it’s the tastiest: After draining the rice, spread it in a single layer on the stove over medium-low heat for 2-3 minutes. Stir occasionally until it’s just slightly translucent at the edges. It might look weird, but it prevents gummy rice and makes the butter cling better later.
- Use Cold Broth: Pouring hot broth straight from the pot into the rice? That’s how you end up with steam explosions and uneven cooking. Let the broth cool just enough to touch (about 10 minutes) before adding it to the rice. Your future self will thank you—no more soggy bottoms or half-cooked grains.
- Skip the Butter Rush: The recipe might say to add butter at the end, but I’ve found the real magic happens when you stir in half the butter with the rice while it’s still cooking (about 5 minutes before it’s done). The rest goes in at the finish for shine. This makes a real difference in texture—creamy without being greasy.
Essential equipment for this recipe
Oven-Safe Skillet
This is the star of your one-pan meal. I recommend a 12-inch cast-iron skillet like the Lodge Pre-Seasoned Cast Iron Skillet—it distributes heat evenly and creates that signature crispy crust. If cast iron isn't your thing, a heavy-duty stainless steel skillet (like All-Clad Stainless) works too, but watch the heat distribution closely. Avoid non-stick—it can't handle the high heat needed for that golden topping. 🔥
Measuring Tools
Precision matters for the crispy rice topping. Use a stainless steel measuring cup for the rice and broth, and a set of nested measuring spoons (like OXO Good Grips) for the butter, flour, and spices. A digital kitchen scale (I love the Escali Primo) helps when measuring the Parmesan for consistent grating. A fine-mesh strainer comes in handy for rinsing the rice if needed.
Butter Tools
Cold butter is key for that crispy crust. I keep a small offset spatula (like Mercer Culinary Genesis) handy for spreading the butter cubes evenly over the rice topping. A microplane helps grate fresh Parmesan finely, which melts better into the rice. For extra crispiness, I like to use European-style butter (like Plugrá)—it has a higher fat content for that perfect texture.
Oven Thermometer
Ovens run hot or cold, and accuracy matters for this recipe. A bimetallic stem thermometer (like Thermoworks Oven Thermometer) ensures your oven hits 375°F perfectly. I place mine in the oven while preheating—if it reads 390°F, I adjust my oven temperature down by 25°F to compensate. This small step makes a big difference in the crispiness of your topping.
Tongs and Tongs
You'll need heavy-duty tongs (like Nordic Ware) to safely flip the chicken thighs and rearrange the rice topping without burning yourself. A long-handled silicone spatula helps scrape up any stuck bits from the skillet. For garnishing, a small pair of kitchen shears makes quick work of chopping the parsley. Keep these tools within arm's reach—they'll be your best friends during cooking and serving.
Resting Tools
Let the dish rest before serving to keep everything juicy. I use a large wire cooling rack (placed over a baking sheet) to set the skillet on while it rests. This allows air to circulate underneath, preventing sogginess. A small bowl (for mixing the rice topping) and a sharp chef's knife (for dicing onions and mincing garlic) complete your essential toolkit. With these basics, you're ready to make this Betty Crocker classic with confidence. ✨
Nutrition facts
Frequently asked questions
Can I use chicken breasts instead of thighs?
Yes, but bone-in, skin-on thighs are ideal for juiciness. If using breasts, opt for bone-in cuts and reduce baking time by 5 minutes since they cook faster. For extra moisture, brining the chicken for 30 minutes in a saltwater solution (1 cup water + 1 tbsp salt) helps prevent dryness.
Why is my rice topping not crispy?
The crispy topping needs three things: cold butter, proper baking time, and a hot oven. Use cold butter cubes directly on the rice topping before baking. Ensure your oven is at 375°F (test with an oven thermometer) and bake until golden brown (40-45 minutes total). If it's soggy, try broiling for 2 minutes at the end.
Can I make this recipe in a slow cooker?
Not for the crispy topping, but you can adapt it! Cook the chicken separately, then layer rice and broth in the slow cooker on low for 3-4 hours. For crispiness, top with a mix of butter + flour + Parmesan and broil for 3-5 minutes at the end. The texture won't be identical, but it's a great backup.
How do I reheat leftovers without losing crispiness?
Reheat in the oven at 350°F for 10-15 minutes covered with foil, then uncover and broil for 2 minutes to restore crispiness. Avoid microwaving—it turns the topping soggy. For extra crunch, sprinkle with butter + breadcrumbs before reheating.
What’s the best way to store this dish?
Store in an airtight container with a paper towel on top to absorb moisture. Keep refrigerated for 3-4 days or freeze for up to 3 months. For freezing, cool completely first, then wrap tightly in plastic wrap before storing. Thaw overnight in the fridge—never at room temperature.