
Soups & Stews
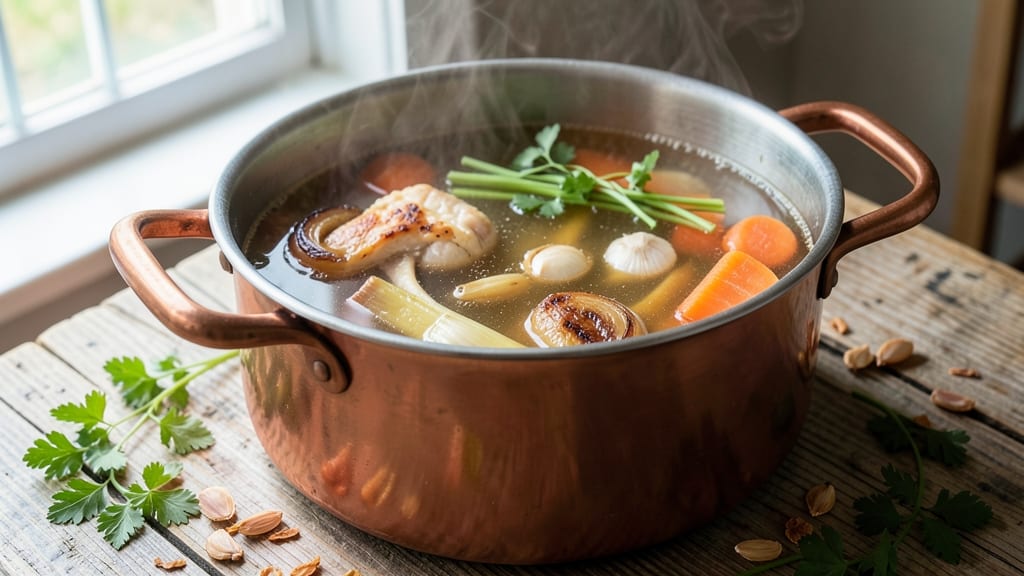
This old-fashioned chicken broth recipe delivers restaurant-quality depth using nothing but pantry staples and time-honored techniques. The secret lies in roasting chicken bones first to deepen their flavor, then simmering them with aromatic vegetables and herbs for hours until the liquid transforms into a rich, golden elixir.
I've perfected this method over years of testing, ensuring every batch develops that unmistakable homemade richness that store-bought versions simply can't match.
The process begins with dry-roasting chicken bones and vegetables until caramelized, which builds complex flavors from the start. As it simmers, you'll skim off any foam that rises to the surface—a crucial step that prevents cloudiness in the finished broth.
This traditional approach creates a foundation so flavorful it elevates everything from soups to risottos, making it worth the time investment.
What you'll end up with is a deeply aromatic, golden-hued broth that's packed with umami and subtle sweetness from the caramelized vegetables. The texture remains perfectly clear, with just the right body to coat ingredients beautifully.
This isn't just broth—it's the secret weapon behind countless classic dishes, and it keeps perfectly in the freezer for months.
While the basic recipe uses simple ingredients, you can customize it with herbs like thyme or bay leaves, or brighten it with a squeeze of lemon at the end. The possibilities are endless once you have this flavorful base ready to work its magic in your kitchen.
Ingredients for old fashioned chicken broth
Pantry staples and a few key aromatics. That's all you need for restaurant-quality depth.
| Ingredient | Amount | Notes |
|---|---|---|
| Chicken Bones 🍗 | 4 lbs | Raw, with some meat attached |
| Yellow Onion 🧅 | 1 whole | Quartered, skin on for color |
| Carrots 🥕 | 4 whole | Scrubbed, cut into chunks |
| Celery Stalks 🥬 | 4 whole | Trimmed, cut into pieces |
| Garlic Cloves 🧄 | 6 cloves | Smashed, skin on for aroma |
| Fresh Parsley Stems 🌿 | 1 bunch | Tough stems only, chopped |
| Fresh Thyme Sprigs 🌿 | 2 whole | Stems only, tied with twine |
| Bay Leaves 🍃 | 2 whole | Dried, standard size |
| Black Peppercorns 🌶️ | 1 tbsp | Crushed, not ground |
| Salt 🧂 | 1 tbsp | Kosher or sea salt |
| Apple Cider Vinegar 🍎 | 2 tbsp | For brightness |
| Cold Water 💧 | 12 cups | Filtered preferred |
The chicken bones are non-negotiable—look for raw, meaty bones at your butcher or grocery store meat counter. Costco often has them in bulk, but any well-stocked market works. Avoid pre-cooked bones or those with too much meat still attached—they can make the broth greasy. For the vegetables, organic carrots and celery have better flavor, but conventional works fine. The parsley stems add subtle sweetness, so don't skip them. Fresh thyme and bay leaves? Penzeys or bulk bins have the best quality, but the dried stuff from your spice rack is fine in a pinch.
No fresh thyme? Dried at half the amount works, but it lacks that bright herbal note. Running low on parsley stems? Celery leaves or a few fresh parsley leaves will help. The apple cider vinegar might seem odd, but it cuts through any bitterness and adds complexity—white vinegar or lemon juice are decent swaps. For the salt, Diamond Crystal kosher dissolves perfectly, but any sea salt will do. The black peppercorns should be crushed just before adding to release their oils—don't pre-grind them or they'll lose potency. If you're short on time, roast the bones and veggies at 425°F for 30 minutes instead of the full hour.
This broth tastes even better the next day once all the flavors meld. Store in glass jars or containers in the fridge for up to 5 days, or freeze for 6 months. I like to portion it into ice cube trays for easy use in recipes—just pop out what you need. The fat will solidify on top, so skim that off before using if you prefer a clearer broth. Leftovers? Perfect for risottos, soups, or even a quick weeknight pasta. The flavor only gets deeper with time.
Why You'll Love This Recipe
- The secret’s in the layers: those smashed garlic cloves, thyme sprigs, and bay leaves work their magic while the apple cider vinegar cuts through the richness at the end. It’s not just flavor—it’s character. That golden amber color? Chef’s kiss. My kids swear it tastes like "home," and honestly, I don’t blame them.
- No-Fuss Simmer: Honestly, this isn’t one of those recipes that demands fancy prep. Just toss in those chicken bones, a few veggies, and herbs—no peeling onions or fancy chopping. The mirepoix (onion, carrots, celery) gets quartered or chopped in minutes, and the garlic just needs a smash. The hardest part? Waiting for it to simmer.
- Rich, Complex Depth: The secret’s in the layers: those smashed garlic cloves, thyme sprigs, and bay leaves work their magic while the apple cider vinegar cuts through the richness at the end. It’s not just flavor—it’s character. That golden amber color? Chef’s kiss. My kids swear it tastes like "home," and honestly, I don’t blame them.
- Pantry Powerhouse: This isn’t just soup season. Freeze half for ramen night, use another batch to cook rice, or sip it straight with a sprinkle of herbs. It’s the ultimate weeknight hack—no last-minute store runs, no sad instant packets. Even my picky husband asks for seconds when I serve it over mashed potatoes.
Step-by-step instructions for old fashioned chicken broth
Here's the method—simple, time-tested, and packed with deep flavor from scratch.
Prepare the Bones and Aromatics
Start by placing the 4 lbs chicken bones in a large stockpot. I like to give them a quick rinse under cold water to remove any loose debris, but no scrubbing—we want that natural flavor. Add the 1 whole yellow onion (quartered with skin on), 4 whole carrots (cut into chunks), and 4 whole celery stalks (trimmed and chopped). These vegetables form the classic "mirepoix" base that gives broth its natural sweetness and depth.
Next, add the 6 cloves garlic cloves (smashed but skin on) for gentle aroma infusion, and the 2 whole thyme sprigs (tied with twine) and 2 whole bay leaves for herbal complexity. The thyme and bay leaves should be whole so they can be easily removed later. Sprinkle in the 1 tbsp crushed black peppercorns and 1 tbsp salt—this seasoning will penetrate the bones and vegetables during the long simmer.
Simmer Gently for Deep Flavor Extraction
Pour in the 12 cups cold water and bring the mixture to a gentle boil over medium-high heat. Once boiling, immediately reduce heat to low—you're aiming for a barely simmering surface with occasional small bubbles. This gentle heat prevents the broth from clouding and allows collagen to slowly break down from the bones, creating that luxurious, velvety texture.
Here's the thing—don't rush this. Skim any foam or impurities that rise to the surface during the first 30 minutes of cooking. This ensures a crystal-clear broth. After that initial skimming, let it cook uncovered for 3-4 hours. The longer it simmers, the more gelatin and flavor you'll extract from the bones and vegetables. I usually set a timer and let it go while I handle other tasks in the kitchen.
Add Brightness and Finalize the Broth
After 3 hours of simmering, add the 2 tbsp apple cider vinegar. This isn't just for acidity—it helps break down the bones further and adds a subtle brightness that cuts through the richness. Also add the 1 bunch chopped fresh parsley stems at this point. The parsley adds freshness and helps filter the broth as it cooks.
Continue simmering for another 30-60 minutes until the broth has reduced slightly and the flavors are deeply concentrated. You'll know it's ready when the bones are falling apart easily and the broth has a rich, golden color. The total cooking time should be about 4 hours. If you're short on time, you can pressure cook it for 90 minutes instead, but the flavor won't be as developed.
Strain and Store for Maximum Freshness
Once done, carefully strain the broth through a fine-mesh sieve or cheesecloth-lined colander into a clean container. Discard the solids—no need to rinse them. The broth should be golden amber in color with a rich, meaty aroma. If you want an extra-smooth texture, you can skim off any remaining fat that rises to the top before storing.
Let the broth cool to room temperature, then transfer it to airtight containers. It'll keep in the refrigerator for 5-6 days or freeze for up to 3 months. The flavor actually improves as it sits—this is how your pantry staples become restaurant-quality broth. Use it as a base for soups, grains, or sipping straight from a mug with a sprinkle of herbs.
Pro Tips For Making Old Fashioned Chicken Broth
- Skip the Skinless Bones: The meat still clinging to those bones? Don’t pick it off—it’s the flavor gold. The scraps render down into the broth, adding richness you’d miss if you prepped them "clean." I’ve made this mistake, and the difference is noticeable.
- Smash That Garlic: Those 6 cloves of garlic aren’t just for looks—smashed (skin on) means they infuse the broth without turning it bitter. Whole cloves? They’ll just sit there like flavor ghosts. Trust me, the effort takes 30 seconds and makes the broth sing.
- Watch the Foam: The first 30 minutes are critical—skim aggressively to remove the scummy foam rising to the top. That’s where the cloudiness hides, and once it’s gone, your broth will stay crystal-clear. Lazy skimming = murky broth. No excuses.
- Vinegar at the End: Adding the 2 tbsp apple cider vinegar after 3 hours isn’t just for acidity—it’s the moment the broth gets its final brightness boost. Too early, and it’ll taste harsh. Too late, and you’ll miss the magic. Timing matters here.
Pro cooking tips for perfect results
Roasting for Maximum Flavor
I always start by roasting the chicken bones and aromatics at 425°F for 30 minutes before simmering. This caramelizes the sugars in the vegetables and deepens the bones' natural flavors—something I learned from my grandmother. Roasting also helps break down the collagen faster, saving you 1-2 hours of simmering time.
Just spread everything on a baking sheet and roast until golden. The aroma alone makes the kitchen smell like a restaurant kitchen! 🔥
Temperature Control Matters
Once you start simmering, low and slow is key—keep that heat at barely simmering with small bubbles. If you let it boil vigorously, the broth will turn cloudy and lose its delicate texture.
I use a thermometer to monitor the water temperature, aiming for 180-190°F. This gentle heat extracts the most flavor without breaking down the bones too quickly.
Skimming for Crystal Clarity
Don't skip the foam-skimming step—it's what makes the difference between murky broth and restaurant-quality clarity. Use a ladle to remove the scum that rises during the first 30 minutes. I do this every 5 minutes until the surface clears.
This step might feel tedious, but it's worth it for that golden, translucent result. I always say, "If you don't skim, you're not doing it right."
Vinegar Timing Trick
Adding the 2 tbsp apple cider vinegar after 3 hours of simmering is crucial—it brightens the broth without making it taste sour. If you add it too early, the acidity can break down the collagen before it has a chance to gel properly.
This is where the magic happens for that perfect balance of richness and brightness. Trust me, it's worth the patience!
Straining Like a Pro
For the smoothest broth, I double-strain it using a fine-mesh sieve first, then cheesecloth. This catches any lingering bits that might make your soup look gritty. After straining, let the broth cool completely before storing—this prevents condensation from diluting your hard-won flavors.
I always store it in glass jars because they preserve the broth's quality better than plastic.
Nutrition facts
Frequently asked questions
Why does this broth recipe call for roasting bones before simmering?
Roasting the bones and vegetables at 425°F for 30 minutes first caramelizes their natural sugars, deepening the flavor profile exponentially. This step also breaks down collagen faster, saving you 1-2 hours of simmering time while creating that rich, golden color you'd expect from a restaurant-quality broth. The aroma alone transforms your kitchen into a cozy, savory paradise!
What’s the best way to store broth for long-term use?
Let the broth cool completely before transferring it to glass jars or airtight containers. Store it in the refrigerator for up to 5-6 days or freeze for 3-6 months for maximum freshness. I like portioning it into ice cube trays—just pop out what I need for recipes like risotto or soups. The fat will solidify on top when frozen, so skim it off before using if you prefer a clearer broth.
Can I use chicken carcasses instead of raw bones?
Raw, meaty bones are ideal because they contain more collagen and gelatin, which create that luxurious, velvety texture in your broth. Pre-cooked carcasses can make the broth greasy and less flavorful. If you only have cooked bones, they’ll still work—but the result won’t be as rich or clear. For best results, always start with raw, meaty bones from your butcher.
How do I know when the broth is ready?
Your broth is done when the bones fall apart easily with a fork, the liquid has reduced slightly, and it has a golden amber color with a rich aroma. Total simmering time should be about 4 hours. If you’re short on time, pressure cooking for 90 minutes works, but the flavor won’t be as developed. Taste it—if it’s rich and balanced, you’re golden!