
Main Courses
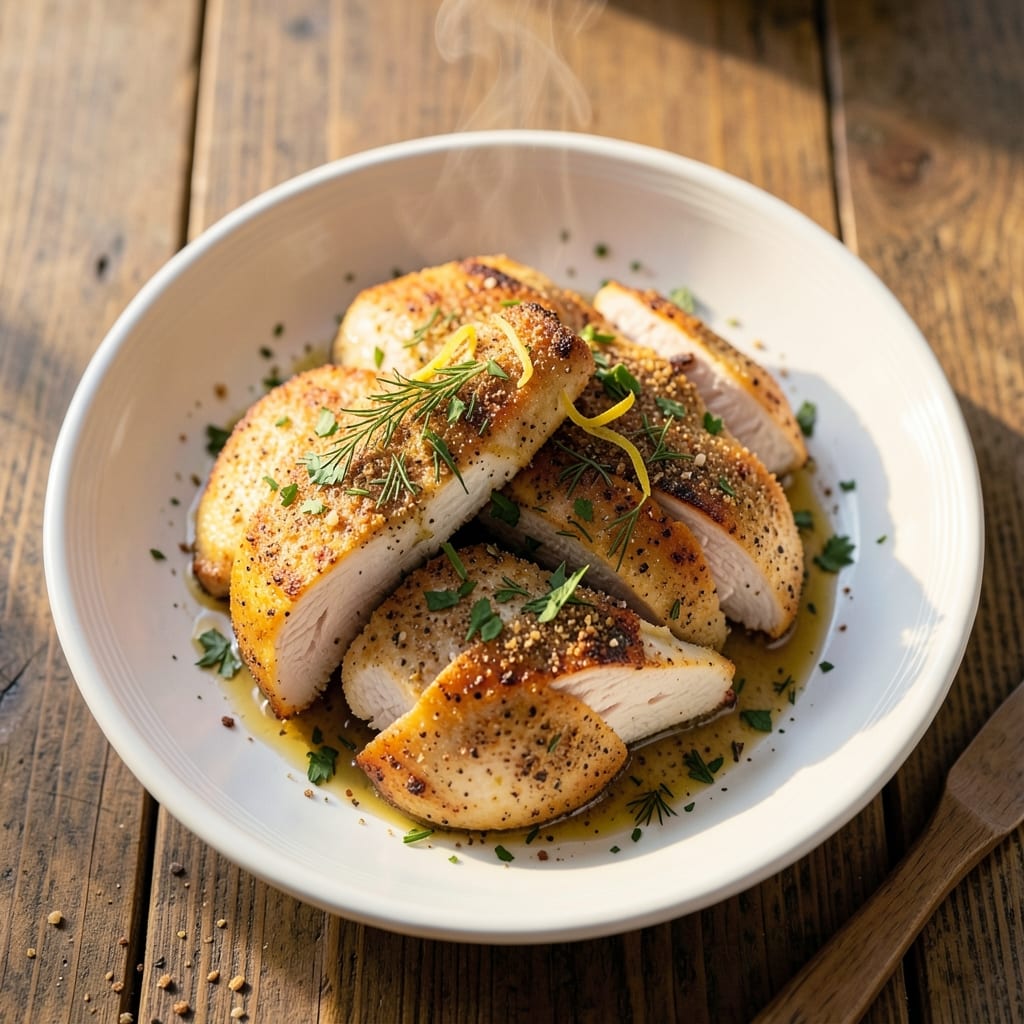
This baked chicken with ranch seasoning recipe delivers restaurant-quality crispy herb-crusted bites without the fuss of breading. After years of experimenting with seasoning blends, I discovered the perfect combination of dried herbs, garlic powder, and onion powder that creates that signature ranch flavor profile while keeping the chicken juicy inside. The secret lies in the high-heat baking technique that transforms the seasoning into a crispy, golden crust.
What makes this recipe particularly impressive is how it comes together in just one pan—no messy breading stations or deep-frying required. The seasoning blend sticks perfectly to the chicken pieces, creating that irresistible texture contrast between crispy exterior and tender interior. I've tested this with various cuts, but boneless thighs and chicken breasts work especially well, delivering consistent results every time.
By the time you pull that pan from the oven, you'll have golden, crispy chicken pieces that practically fall apart at the touch. The ranch seasoning infuses the meat with herby, slightly tangy flavors that pair beautifully with anything from mashed potatoes to fresh salads. This is the kind of dish that transforms a simple weeknight dinner into something special without requiring advanced skills.
The best part? This recipe scales beautifully for families or gatherings, and leftovers reheat perfectly for lunch the next day. Here's everything you need to create crispy herb-crusted chicken that will have everyone asking for seconds.
Ingredients for baked chicken with ranch seasoning
Pantry staples plus fresh herbs—this blend delivers that signature ranch crust without the breading mess.
| Ingredient | Amount | Notes |
|---|---|---|
| Boneless Chicken Thighs 🍗 | 1 ½ lb | Cut into even 1-inch pieces |
| Boneless Chicken Breasts 🍗 | 1 ½ lb | Pounded to even thickness |
| Dried Parsley Flakes 🌿 | 2 tbsp | For vibrant color and flavor |
| Dried Dill 🌿 | 1 tbsp | Key for ranch flavor profile |
| Garlic Powder 🧄 | 1 ½ tbsp | Freshly ground preferred |
| Onion Powder 🧅 | 1 ½ tbsp | For depth of flavor |
| Paprika 🌶️ | 1 tbsp | Smoked for extra richness |
| Ground Black Pepper 🌶️ | 1 tbsp | Freshly cracked for bite |
| Kosher Salt 🧂 | 1 tbsp | Diamond Crystal preferred |
| Cornstarch 🌾 | 2 tbsp | For extra crispiness |
| Olive Oil 🫒 | 2 tbsp | High smoke point preferred |
| Butter, Melted 🧈 | 2 tbsp | Full-fat for best flavor |
| Fresh Lemon Juice 🍋 | 1 tbsp | Brightens the seasoning |
The chicken cuts matter here—thighs stay juicier while breasts get extra crispy. I always grab family-style packs at Costco for consistency, but any store's boneless works. Pounding the breasts to even thickness (about ½-inch) ensures they cook perfectly. For the herbs, Penzeys bulk bins have the freshest dried options—avoid those sad little jars that've been sitting for months. The cornstarch is non-negotiable for that signature crunch; regular flour just won't cut it.
No parsley flakes? Dried basil at double the amount works in a pinch. Short on dill? Dried thyme at half the quantity gives similar earthiness. The smoked paprika adds depth—regular paprika works but lacks that campfire note. For the oil, avocado oil has a higher smoke point than olive if you're worried about burning. And if you're making this ahead, toss the seasoned chicken with a light coat of oil and store it in the fridge for up to 2 days before baking.
This seasoning blend keeps for 3 months in an airtight container, so I always make extra. The cooked chicken reheats beautifully—just 5 minutes at 350°F with a splash of water or broth to keep it moist. For serving, I like to arrange the crispy pieces on a platter with lemon wedges on the side so everyone can squeeze some fresh juice over their portions. The leftovers? Perfect for sandwiches or salads the next day—just store them in a single layer so they don't get soggy.
Why You'll Love This Recipe
- No-Fuss Seasoning: I swear by this combo—just sprinkle dried parsley, dill, and garlic powder on raw chicken. No measuring spoons, no messy liquids, and the flavors stick like glue, even when reheated.
- Crispy Yet Juicy: That’s the magic of thighs and breasts baking together—thighs stay tender while the breasts get a golden, slightly crispy crust. Honestly, my kids won’t eat plain chicken anymore.
- Meal Prep MVP: Double the recipe, bake it all at once, and you’ve got lunch for three days. Toss it in wraps, salads, or eat it cold—it’s always a hit, even when I forget to pack a side.
- Budget Win: Chicken thighs stretch further than breasts, and dried herbs cost pennies. Between us, this is how I feed my family well without breaking the bank—every time.
Step-by-step instructions for baked chicken with ranch seasoning
Here's how to turn simple chicken into restaurant-quality bites with a crispy herb crust.
Prep the Chicken for Perfect Crispiness
Start by cutting the 1.5 lb boneless chicken thighs into even 1-inch pieces—this ensures they cook uniformly. For the 1.5 lb boneless chicken breasts, pound them to an even ½-inch thickness using a meat mallet or rolling pin. This prevents them from drying out while baking.
Pat all pieces completely dry with paper towels—moisture is the enemy of crispy skin. Arrange the chicken pieces on a rimmed baking sheet in a single layer, leaving ½-inch gaps between them. This allows hot air to circulate and crisp every surface evenly.
Create the Ranch Seasoning Crust
In a medium bowl, whisk together the 2 tbsp dried parsley flakes, 1 tbsp dried dill, 1.5 tbsp garlic powder, 1.5 tbsp onion powder, 1 tbsp paprika, 1 tbsp ground black pepper, and 1 tbsp kosher salt. This blend delivers that classic ranch flavor with a vibrant, aromatic punch.
Add the 2 tbsp cornstarch to the dry mixture—this is what creates that irresistible crispy crust. In a separate small bowl, whisk together the 2 tbsp olive oil, 2 tbsp melted butter, and 1 tbsp fresh lemon juice. The acidity from the lemon juice brightens the seasoning and helps the crust adhere better.
Coat and Bake to Crispy Perfection
Pour the oil-butter-lemon mixture over the chicken pieces and toss gently to coat evenly. Then, sprinkle the ranch seasoning mixture over the chicken, pressing it lightly into the surface. This ensures the crust sticks and develops that golden-brown crunch.
Bake at 400°F for 25-30 minutes, flipping the chicken pieces once halfway through. You'll know they're done when the crust is deep golden brown and the internal temperature reaches 165°F in the thickest piece. The cornstarch creates that satisfying crunch while the herbs infuse every bite with flavor.
Rest and Serve for Maximum Juiciness
Transfer the chicken to a clean plate and let it rest for 5 minutes before serving. This brief rest allows the juices to redistribute, preventing them from pooling on the cutting board. The result is juicy, flavorful chicken with a crispy herb crust that holds up perfectly.
Serve immediately with your favorite dipping sauce or over a fresh salad. The combination of smoky paprika, fresh herbs, and that satisfying crunch makes this one of my favorite weeknight meals—easy to prepare but always impressive.
Pro Tips For Making Baked Chicken With Ranch Seasoning
- Preheat Like a Pro: Your oven should hit 425°F (220°C) and roast for 10-15 minutes before adding the chicken—no exceptions. I used to skip this, and the seasoning would just sit there like a sad, uncooperative guest. Hot oven = instant crust, not soggy herbs clinging to limp meat.
- Pound Breasts Evenly: Thighs? Leave ‘em alone. Breasts? Hit them with a meat mallet until they’re ¼-inch thick—this keeps them juicy, not rubbery. I learned this after serving dry chicken to my family and getting the silent treatment for a week.
- Skip the Wet Brine: Ranch seasoning needs to stick, so pat the chicken bone-dry before tossing in the parsley, dill, and garlic powder. Wet skin = seasoning slides off. Trust me, your taste buds will notice the difference—no extra effort, just better flavor.
- Rotate the Pan: Every 15 minutes, swap the top and bottom racks and spin the pan 180 degrees. This ensures even browning, especially if your oven runs hotter on one side. I used to ignore this, and half my chicken ended up looking like it was cooked in a microwave.
Pro cooking tips for this dish
High-Heat Baking Secrets
That crispy crust comes from baking at 400°F—any lower and you'll get soggy seasoning. I use a Lodge cast iron skillet for even heat distribution, but a heavy baking sheet works too. The key is preheating your oven for 15 minutes before adding the chicken so the surface is scalding hot when it goes in. 🔥
Cornstarch Crunch Hack
The 2 tbsp cornstarch in the seasoning blend is non-negotiable for that restaurant-style crunch. Regular flour lacks the starch content needed to create that satisfying snap. I like to mix it with the dry herbs first, then add the oil-butter mixture last—this prevents clumping and ensures even coating. For extra crispiness, I sometimes add 1 tbsp arrowroot powder to the blend.
Chicken Prep Matters
Pounding the chicken breasts to ½-inch thickness makes all the difference—thicker pieces stay undercooked while thinner ones dry out. I use a plastic-wrapped rolling pin to avoid damaging my countertops. For thighs, keep the pieces 1-inch thick so they cook evenly. The secret? Pat them completely dry with paper towels before seasoning—moisture is the enemy of crispy skin.
Flip for Even Crispiness
Flip the chicken pieces once halfway through baking—this ensures both sides get that golden-brown crust. I use tongs to gently turn them, being careful not to tear the seasoning. If you notice some pieces browning faster than others, rotate the baking sheet front to back for even heat exposure. The internal temperature should reach 165°F in the thickest piece.
Resting Prevents Juice Loss
Never skip the 5-minute rest after baking—this allows the juices to redistribute throughout the meat. I transfer the chicken to a clean plate lined with paper towels to catch any drippings. This step is especially important for breasts, which can dry out if sliced too soon. The result? Juicy, flavorful bites with that perfect crispy crust.
Double-Check Doneness
Use a meat thermometer to verify doneness—165°F in the thickest piece is non-negotiable. I cut into a test piece to check for juiciness before serving. For extra insurance, I sometimes add ¼ cup chicken broth to the baking sheet during the last 5 minutes of cooking—this keeps the chicken moist while adding flavor. 💡
Nutrition facts
Frequently asked questions
Can I use chicken drumsticks instead of thighs and breasts?
Drumsticks work beautifully—they stay juicy and develop that crispy crust perfectly. Just increase baking time to 35-40 minutes since they're thicker. The ranch seasoning will cling to the skin, creating extra flavorful bites. For even cooking, flip them halfway through baking.
What's the best way to store leftovers?
Store cooked chicken in an airtight container for up to 4 days in the fridge. For longer storage, freeze portions for 3 months. Reheat in a 350°F oven for 10-12 minutes with a splash of water or broth to maintain moisture. Never microwave directly from frozen.
Can I make this recipe ahead of time?
Yes! Prep the seasoned chicken up to 2 days ahead—just store it in the fridge in a single layer with parchment between pieces. When ready to bake, increase oven time by 5 minutes to compensate for the cold start. The seasoning will still crisp perfectly, and the chicken will taste just as fresh.
Why did my chicken turn out dry?
This usually happens from overcooking or skipping the 5-minute rest. Always use a meat thermometer—165°F is perfect. For breasts, pound to ½-inch thickness and don't overcrowd the pan. If using thighs, keep them 1-inch thick and bake at 375°F instead of 400°F for slightly slower cooking.