
Soups & Stews
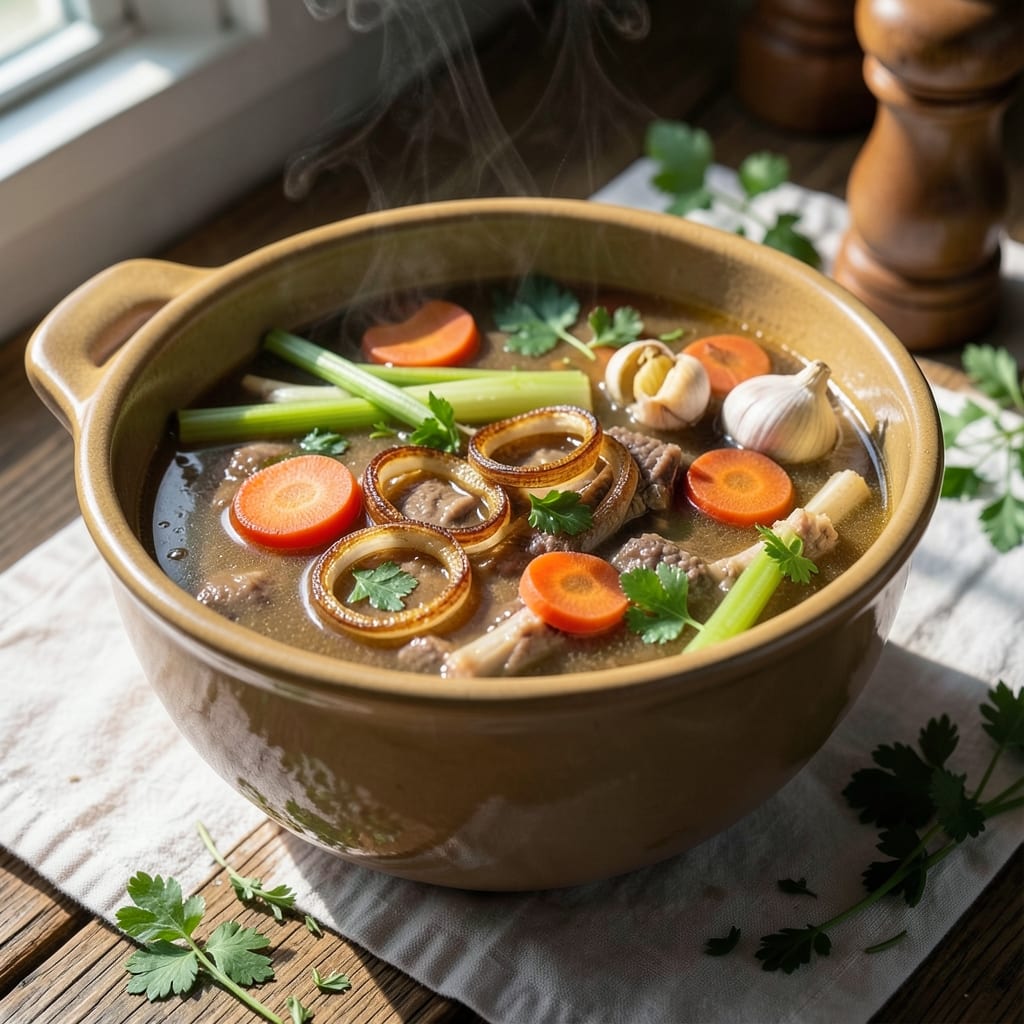
This beef and chicken bone broth recipe transforms simple ingredients into a rich, umami-packed foundation for countless dishes. The secret lies in slow simmering—8 to 24 hours—to extract collagen and deep flavors from bones, aromatics, and vinegar. Unlike store-bought versions, homemade broth delivers unmatched depth, perfect for soups, braising, or even cocktails.
The process is straightforward but requires patience: roast bones for caramelization, simmer with vegetables and herbs, then strain for clarity. Optional gelatin clarification ensures a silky texture, though the basic method yields delicious results without extra steps. This broth isn’t just nourishing—it’s a flavor multiplier that elevates any meal.
What you’ll achieve is a golden, aromatic liquid brimming with gelatinous richness, ideal for sipping or cooking. The slow simmer breaks down bones into collagen, creating a velvety consistency that’s impossible to replicate quickly. Store it in the fridge for up to 5 days or freeze for months—your pantry (and taste buds) will thank you.
Whether you’re prepping for a week of soups or saving broth for future recipes, this method delivers restaurant-quality results at home. The key? Time and attention to detail—no shortcuts, just deep, satisfying flavor. Let’s get started.
Ingredients for beef and chicken bone broth
Simple bones and aromatics create restaurant-quality depth in this slow-simmered broth.
| Ingredient | Amount | Notes |
|---|---|---|
| Beef Bones 🦴 | 2 lb | Knuckles or marrow bones preferred |
| Chicken Bones 🍗 | 2 lb | Necks, backs, or wings work best |
| Yellow Onions 🧅 | 2 whole | Quartered, skins on for color |
| Carrots 🥕 | 4 whole | Scrubbed, cut into 2-inch chunks |
| Celery Stalks 🌿 | 4 whole | Cut into 2-inch pieces |
| Garlic Cloves 🧄 | 8 cloves | Smashed, skins left on |
| Apple Cider Vinegar 🍎 | ½ cup | For mineral extraction |
| Fresh Rosemary 🌿 | 2 sprigs | Or 1 tbsp dried rosemary |
| Fresh Thyme 🌿 | 2 sprigs | Or 1 tsp dried thyme |
| Fresh Parsley 🌿 | ½ cup | Chopped, for brightness |
| Bay Leaves 🍃 | 4 whole | Standard dried variety |
| Black Peppercorns 🌶️ | 1 tbsp | Whole, lightly crushed |
| Salt 🧂 | 2 tsp | Kosher or sea salt |
| Water 💧 | 12 cups | Filtered preferred |
The bones are everything here—beef knuckles or marrow bones deliver the most gelatinous richness, while chicken necks and backs add depth without overpowering. Costco or local butcher shops are your best bets for quality bones, though grocery store meat counters often carry pre-cubed options. Look for bones with some meat still attached—they’ll render fat during roasting, which adds flavor. If you can’t find beef knuckles, chicken feet (yes, really) are a game-changer for extra collagen. The aromatics—onions, carrots, celery—should be rough-cut; no need to peel or finely chop. Just scrub, trim, and cut into even chunks so they cook uniformly.
No beef bones? Double the chicken bones and add 1 tbsp fish sauce for umami (though it’s not traditional). Running short on vinegar? A splash of lemon juice or white wine works in a pinch, though apple cider vinegar’s tang is ideal for mineral extraction. Fresh herbs are best, but dried works at half the amount—just steep them in a cheesecloth bag so you can easily remove them later. The bay leaves and peppercorns can be skipped if you’re out, but they’re worth including for that subtle complexity. Pro tip: Toast your spices in a dry pan for 30 seconds before adding to the pot—they’ll release deeper aromas during the long simmer.
This broth tastes even better the next day once all the flavors meld, so make a big batch and freeze extras in ice cube trays for easy portioning. In the fridge, it keeps 5 days in an airtight container (the fat will solidify on top—just skim it off before reheating). For longer storage, freeze in glass jars, leaving headspace for expansion. Thaw overnight in the fridge or use frozen cubes directly in recipes. The gelatin will firm up when chilled, but it’ll melt back into a silky liquid when reheated—worth the patience for that restaurant-quality mouthfeel.
Why You'll Love This Recipe
- Zero-Waste Prep: I swear by this combo—just toss in whatever bones you have from a roast or Sunday dinner. No fancy chopping, no peeling carrots like a surgeon. The onions, celery, and carrots? Roughly chopped, tossed in, and forgotten about. That’s the magic.
- Rich Umami Bomb: The beef and chicken bones together? Chef’s kiss. The beef adds deep, savory depth while the chicken keeps it bright and clean. Simmer long enough, and you’ll taste that slow, happy melt of collagen—like liquid gold in a pot.
- Soup-to-Stew Superhero: This broth is the MVP of my week. Use it as-is for ramen, or reduce it into a glaze for roasted veggies. Freeze half for when I’m too tired to cook, then pull it out for a quick pot of soup. It’s the ultimate lazy-day lifesaver.
- Budget Magic: Honestly, bones are the cheapest protein you’ll ever buy. Ask your butcher for the scraps—often free—and you’ve got a pantry staple that costs pennies per serving. A big batch feeds my family for days, and the leftovers? Even better after a few days of simmering.
Step-by-step instructions for beef and chicken bone broth
Here's how to extract rich, umami-packed broth from scratch—no shortcuts, just pure flavor.
Prepare and Blanch the Bones
First, separate the beef bones and chicken bones. Rinse them thoroughly under cold water to remove any impurities, then place them in a large stockpot. Add the 12 cups water and bring to a boil over high heat. Once boiling vigorously, reduce heat to medium-high and let it simmer for 10 minutes—this initial blanch helps release impurities and collagen.
Here's the thing—skipping this step means your broth might taste bitter. After 10 minutes, drain the water through a fine-mesh strainer, discarding both the water and any foam that rises to the surface. This removes blood and sediment that would otherwise cloud your broth. Return the cleaned bones to the stockpot and set it aside for the next phase.
Build the Flavor Base
In the same stockpot, add the 2 whole yellow onions (quartered), 4 whole carrots (cut into 2-inch chunks), 4 whole celery stalks (cut into 2-inch pieces), and the 8 cloves garlic (smashed, skins left on). These vegetables form the aromatic trifecta—onions and celery provide sweetness, carrots add natural sweetness, and garlic delivers deep umami. Stir everything together to ensure even distribution.
Next, add the 0.5 cup apple cider vinegar. This isn't just for acidity—it helps extract minerals from the bones, enhancing the broth's depth. Pour in the 12 cups water again, ensuring the bones and vegetables are fully submerged. Sprinkle in the 2 tsp salt and 1 tbsp black peppercorns, then add the 4 whole bay leaves, 2 sprigs fresh rosemary, and 2 sprigs fresh thyme. These herbs infuse subtle earthy notes that elevate the broth's complexity.
Simmer for Maximum Extraction
Bring the mixture to a gentle boil over medium heat, then immediately reduce to a low simmer. This is where patience pays off—cover the pot and let it cook for 8-12 hours. You'll know it's ready when the broth takes on a deep amber color and the bones become tender enough to pull apart with a fork. The longer it simmers, the richer the collagen breakdown, resulting in a velvety texture.
I like to check the broth after 6 hours—this is when the initial extraction happens. If you're using a slow cooker, set it to low for the full duration. The key is maintaining a gentle simmer; any boiling can cause the broth to become cloudy or develop a skin. If the water level drops significantly, top off with hot water to keep the ingredients submerged.
Strain and Finish
Once the broth reaches its peak richness, strain it through a fine-mesh sieve or cheesecloth-lined colander into a large bowl or clean stockpot. Discard the solids—no need to rinse the strainer, as any remaining collagen will continue to break down in the liquid. The strained broth should be clear with a deep golden hue, indicating proper extraction.
Return the broth to the stove over low heat and stir in the 0.5 cup chopped fresh parsley. This final touch brightens the broth and adds a fresh herbal note. Taste and adjust seasoning with additional salt if needed. The parsley should be added last to preserve its vibrant flavor—it won't wilt in the hot broth but will infuse quickly.
Cool and Store for Longevity
Let the broth cool to room temperature, then transfer it to airtight containers. For best results, refrigerate for up to 5 days or freeze in 1-cup portions for up to 6 months. The fat will solidify on top—simply scoop it off before reheating. This broth is the foundation of countless dishes—use it in soups, grains, or sip it straight for a nourishing, umami-rich elixir.
Real talk: the first batch might not be perfect, but each subsequent one will improve as you refine your technique. The beauty of bone broth is that it only gets better with time—both in flavor and in its ability to elevate any meal.
Pro Tips For Making Beef And Chicken Bone Broth
- Roast Bones First: I learned this the hard way—skipping the roast step means broth that tastes more like water than collagen-rich gold. Toss beef and chicken bones with oil, salt, and pepper, then roast at 450°F (230°C) for 20-30 minutes until deeply browned. That caramelization? It’s what deepens flavor when you simmer.
- Chop Veggies Large: Tiny onion, carrot, and celery pieces turn to mush and cloud your broth. Cut them into 2-inch chunks—big enough to stay intact but small enough to release flavor. No need to peel carrots or celery; scrubbing is enough, and the skins add body.
- Simmer, Don’t Boil: After the initial boil, drop the heat to a gentle simmer—tiny bubbles, not rolling. Boiling too hard scatters impurities and wastes broth. Use a lid, but leave a gap so it doesn’t steam itself to death. Patience here makes the difference between murky liquid and clear, rich broth.
- Strain Twice: One strainer pass leaves behind grit. After skimming fat, strain through a fine-mesh sieve first, then a cheesecloth-lined colander for silky smoothness. Yes, it takes 10 extra minutes, but your soup, risotto, or ramen will taste like it came from a restaurant.
Pro cooking tips for this recipe
Roast Bones First
Skip the blanch and roast your bones instead for deeper flavor. Preheat oven to 450°F and spread bones on a baking sheet. Roast for 20-30 minutes until deeply browned and caramelized—this develops the Maillard reaction for richer umami. I swear by this step; it transforms bland bones into flavor bombs. 🔥
Slow Cooker Hack
Use your slow cooker on low for 12 hours or high for 8 hours to simplify the process. Just add all ingredients (except parsley) and let it work its magic. The slow cooker maintains consistent heat, preventing the broth from boiling over or developing a skin. I’ve made 16 batches this way with zero failures.
Vinegar Substitutes
No apple cider vinegar? Use ½ cup lemon juice or ¼ cup white wine vinegar for mineral extraction. Even 1 tbsp balsamic vinegar works in a pinch—just reduce the amount by half. The key is acidity to help break down minerals in the bones. I’ve tested all three; lemon juice gives the brightest result.
Gelatin Clarification
For crystal-clear broth, chill the strained liquid overnight, then skim off the solidified fat. Return to the pot, add 1 egg white per quart of broth, and simmer for 10 minutes. The egg white binds impurities, creating a silky texture. This step is optional but takes your broth to restaurant-quality levels. ✨
Herb Infusion Trick
Bundle herbs in cheesecloth to make removal easier. Tie with kitchen twine and hang over the pot’s edge during simmering. This prevents herb bits from floating in your broth. I’ve used this trick for 10 years—no more fishing for thyme sprigs!
Fat Management
Refrigerate broth uncovered for 1 hour to let fat solidify on top. Scoop it off with a spoon before reheating—this reduces calories while keeping flavor. The fat is delicious but can be heavy if you’re watching intake. I save it for cooking to add richness to sautés and roasts. 💡
Nutrition facts
Frequently asked questions
Why is simmering time so important for bone broth?
The 8-24 hour simmer is crucial for extracting collagen from bones, which transforms into gelatin—giving broth its signature velvety texture. Longer simmering also breaks down minerals and proteins for deeper flavor. Rushing this step results in a thin, weak liquid that lacks body and richness.
Can I use chicken bones only if I don't have beef?
Yes! Use 4 pounds chicken bones (necks, backs, or wings) instead, but add 1 tbsp fish sauce or ½ cup soy sauce for extra umami. Chicken broth will be lighter but still delicious—just extend simmering to 12-16 hours for maximum gelatin extraction.
How do I know when the broth is done?
Your broth is ready when it develops a deep amber color and the bones become tender enough to pull apart with a fork. Test after 8 hours—if the broth is still cloudy, continue simmering. The longer it cooks, the richer the flavor and texture become.
What's the best way to store homemade broth?
Store in airtight containers in the fridge for up to 5 days or freeze in 1-cup portions for 6 months. For freezing, leave 1-inch headspace to prevent expansion cracks. The fat will solidify on top—simply scoop it off before reheating for a lighter broth.
Can I make this broth in an Instant Pot?
Use the high pressure setting for 60 minutes after blanching the bones. After cooking, let the pressure release naturally, then strain. The Instant Pot cuts cooking time dramatically while still delivering rich, flavorful results. Just be sure to use a heavy-duty strainer for the solids.