
Main Courses
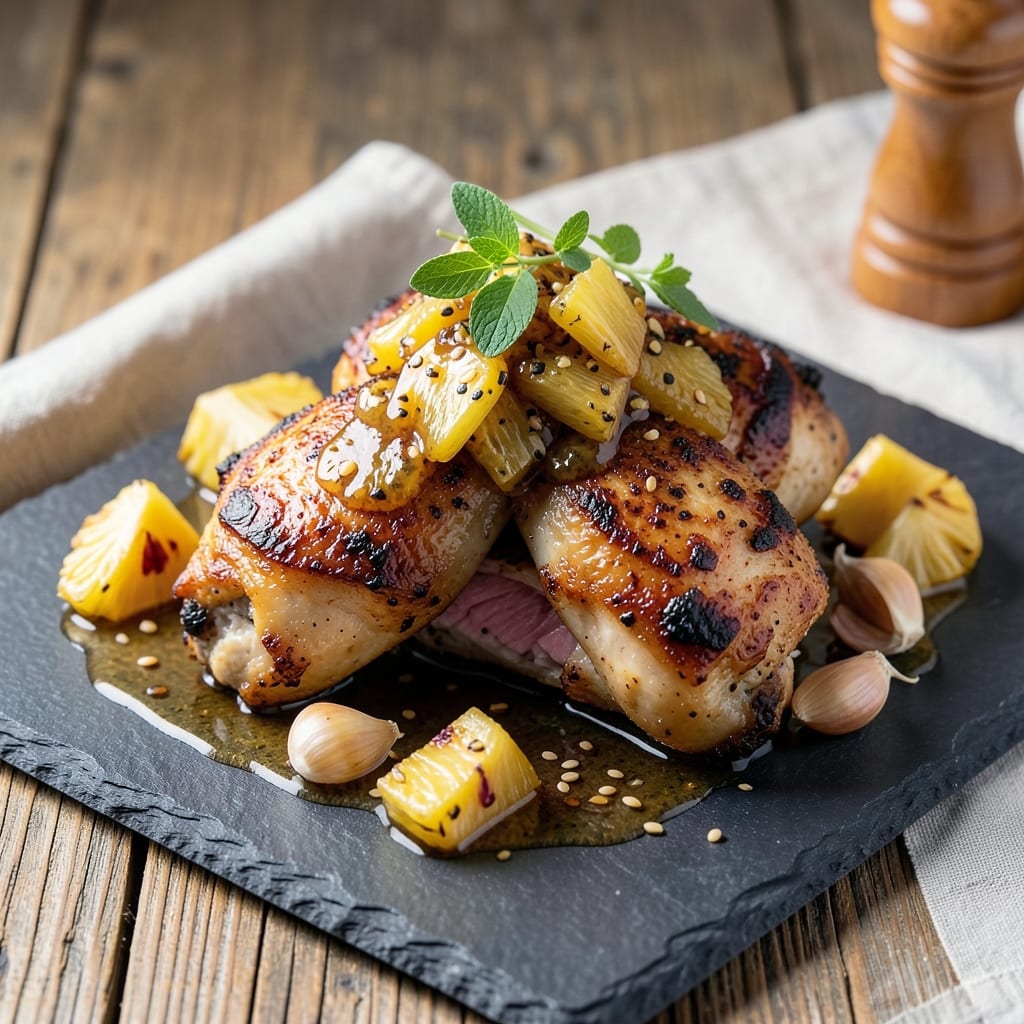
This baked pineapple chicken thighs recipe delivers crispy skin and juicy meat with a caramelized glaze that balances sweet and savory flavors perfectly. I developed this dish after years of experimenting with sticky-sauce recipes that either drowned the chicken or left it dry—this version gets it right every time. The key is baking the thighs first to render fat and create crispiness before finishing with the pineapple glaze.
The magic happens in the glaze—a blend of pineapple juice, brown sugar, and soy sauce that caramelizes beautifully in the oven. I let the chicken rest after baking to keep it juicy while the glaze thickens into a sticky, slightly crispy coating. This recipe uses simple pantry staples but delivers restaurant-quality results that taste even better the next day.
What you'll end up with is golden-brown chicken thighs with tender, juicy meat inside and a glaze that's sweet, tangy, and just slightly sticky. The pineapple flavor complements the savory chicken beautifully, creating a dish that's perfect for weeknight dinners or meal prep. Serve with steamed rice or roasted vegetables for a complete meal.
Between you and me, this recipe became a family favorite because it's foolproof—no fancy techniques required, just good ingredients and patience. The glaze can be made ahead, so you can focus on other sides while the chicken bakes. Let's get started!
Ingredients for baked pineapple chicken thighs
Simple pantry staples plus a few fresh ingredients for restaurant-style pineapple-glazed chicken thighs.
| Ingredient | Amount | Notes |
|---|---|---|
| Bone-In Chicken Thighs 🍗 | 1 ½ lb | Skin-on, trimmed of excess fat |
| Fresh Pineapple Juice 🍍 | ½ cup | No pulp, freshly squeezed preferred |
| Light Brown Sugar 🍚 | ¼ cup | Packed, not granulated |
| Soy Sauce 🥢 | 2 tbsp | Low-sodium preferred |
| Honey 🍯 | 1 tbsp | Wildflower or clover variety |
| Fresh Garlic Cloves 🧄 | 3 cloves | Minced for glaze |
| Fresh Ginger 🌿 | 1 tbsp | Finely grated, peeled |
| Olive Oil 🫒 | 1 tbsp | Extra-virgin for richness |
| Salt 🧂 | 1 ½ tsp | Kosher or sea salt |
| Ground Black Pepper 🌶️ | ½ tsp | Freshly ground preferred |
| Cornstarch 🌾 | 1 tsp | For glaze thickening |
| Fresh Pineapple Chunks 🍍 | 1 cup | For garnish, optional |
| Fresh Cilantro 🌿 | ¼ cup | Chopped, for garnish |
The chicken thighs are the star—bone-in, skin-on for that crispy skin you crave. Look for thighs with good fat cap at the grocery store, usually near the chicken breast section. I grab mine from Costco when I'm doing a big batch, but any supermarket should have them. Fresh pineapple juice is ideal, but canned pineapple juice works in a pinch—just shake the can to mix the juice. The brown sugar should be light, not dark, for a better caramelization. If you're feeling fancy, grab a small pineapple to juice yourself at Trader Joe's—they always have great fruit.
No fresh pineapple juice? Orange juice plus a splash of lime mimics the tang. Running low on honey? Maple syrup works 1:1, though it's a little more earthy. The garlic and ginger can be swapped for 1 tbsp garlic-ginger paste if you're short on time. For the glaze, cornstarch is key—it helps thicken that sticky goodness without making it cloying. If you don't have it, arrowroot powder works too. The soy sauce adds depth, so don't skip it—low-sodium is best so you can control the saltiness.
The chicken thighs keep best in the coldest part of your fridge for 2 days before baking. Once glazed and baked, they reheat beautifully—just pop them in a 350°F oven for 10-15 minutes until warmed through. The glaze thickens as it cools, so it's perfect for meal prep. I portion mine into containers with a side of rice, and it's ready for lunch all week. Store the fresh pineapple chunks separately if using for garnish—they'll stay fresh for 3-4 days in the fridge.
Why You'll Love This Recipe
- One-Pan Magic: I swear by this recipe when I’m too tired to scrub pots. The thighs go in raw, the pineapple juice caramelizes into sticky goodness, and you’re left with one pan that’s basically done for you. No flipping, no fuss—just slide it in the oven and let the brown sugar and soy sauce work their magic.
- Sweet-Savory Balance: Honestly, the flavor combo is what keeps me coming back. That bright pineapple juice cuts through the richness of the thighs, while the brown sugar and honey add just enough caramelized depth. It’s not too sweet, not too salty—it’s that perfect middle ground where every bite feels like a little vacation.
- Weeknight Workhorse: Between us, this is my go-to when I need something fast but still impressive. Serve it over rice for a full meal, or toss it in a wrap for a lunch the next day. It’s equally at home feeding my family of four or as leftovers that somehow taste even better reheated.
- Budget-Friendly Feast: Bone-in thighs stretch my grocery budget without sacrificing flavor, and the pineapple juice (or even canned in a pinch) keeps costs low. A single batch feeds us for days—packed lunches, dinner leftovers, or even breakfast tacos the next morning. Cheap, filling, and no one complains.
Step-by-step instructions for baked pineapple chicken thighs
Here's how to create that perfect balance of crispy skin and juicy meat with a sweet-savory glaze.
Prep the Chicken for Maximum Crispiness
Start by patting the 1.5 lb bone-in chicken thighs completely dry with paper towels. You want them bone dry—this is the secret to crispy skin. Trim any excess fat from the surface, leaving just a thin layer to protect the meat during baking.
Place the thighs skin-side up on a wire rack set over a baking sheet. This allows hot air to circulate underneath, ensuring even cooking and crispy skin all over. Season both sides generously with 1.5 tsp salt and 0.5 tsp ground black pepper. I like to press the salt into the meat so it adheres well—this helps with both seasoning and moisture control.
Make the Sweet-Savory Glaze
In a small saucepan, combine 0.5 cup fresh pineapple juice, 0.25 cup packed light brown sugar, 2 tbsp soy sauce, 1 tbsp honey, 3 minced garlic cloves, and 1 tbsp finely grated fresh ginger. Bring to a gentle simmer over medium heat and let it cook for 5-7 minutes until slightly thickened and fragrant.
While it simmers, whisk together 1 tsp cornstarch with 1 tablespoon water in a small bowl. Stir this slurry into the saucepan and cook for another 1-2 minutes until the glaze thickens enough to coat the back of a spoon. Remove from heat and let it cool slightly—it'll thicken more as it cools. The glaze should be syrupy but still pourable.
Pre-Bake for Crispy Skin
Preheat your oven to 425°F with the rack positioned in the middle. Once hot, place the prepared chicken thighs on the rack and bake for 20 minutes. This initial high-heat bake renders the fat and gets the skin beautifully crispy before we add the glaze.
After 20 minutes, flip the thighs skin-side up and check the skin—it should be golden brown and starting to crisp. If some areas aren't crispy yet, return them to the oven for another 5 minutes. The key is getting that perfect crispy texture before we baste with the glaze.
Glaze and Finish Baking
Carefully brush or spoon the cooled glaze evenly over the skin-side of each chicken thigh. Return the thighs to the oven and bake for an additional 15-20 minutes until the internal temperature reaches 165°F when measured at the thickest part of the thigh.
You'll know they're done when the skin is deep golden brown and the juices run clear when pierced with a meat thermometer. The glaze should be caramelized and slightly sticky. If it looks too thin, return it to the oven for another 5 minutes to thicken further.
Rest and Serve with Fresh Garnishes
Transfer the chicken thighs to a cutting board and let them rest for 5-10 minutes before serving. This resting period allows the juices to redistribute, ensuring each bite is moist and flavorful. The skin will stay crispy while the meat becomes even more tender.
Garnish with 1 cup fresh pineapple chunks and 0.25 cup chopped fresh cilantro just before serving. The bright acidity of the pineapple cuts through the richness of the glaze, while the cilantro adds a fresh finish. Serve with steamed rice or roasted vegetables for a complete meal.
Pro Tips For Making Baked Pineapple Chicken Thighs
- Pat the Thighs Dry: Skip the paper towels—rub the bone-in thighs with a clean kitchen towel until they’re really dry. The extra effort makes the glaze stick better and guarantees that crispy skin everyone craves. (Yes, even if you’re impatient like me.)
- Baste Like a Boss: Don’t just dump the sauce over the chicken—use a spoon or baster to slather it on every side halfway through baking. The first 20 minutes at 400°F get the skin going, but the real flavor happens when that sticky pineapple-soy glaze clings to the meat.
- Use Real Pineapple Juice: Store-bought juice lacks the depth of fresh. Blend 1 cup of chopped pineapple, strain it, and use that instead—it’s sweeter, brighter, and cuts through the richness of the thighs. (I learned this the hard way after a bland batch.)
- Start with Cold Chicken: Let the bone-in thighs sit in the fridge for 15–20 minutes before baking. Cold meat cooks more evenly and prevents the outsides from drying out before the insides hit 165°F. Trust me, your thermometer will thank you.
Storing and reheating your leftovers
Refrigerator Storage
Baked pineapple chicken thighs keep beautifully in the fridge for 2-3 days when stored properly. Let them cool completely before transferring to an airtight container—I use glass Pyrex with snap-on lids. The glaze thickens as it cools, so you might want to add a splash of water if it seems too stiff when reheating. Store with the skin-side up to preserve that crispy texture. 🥗
Freezer Prep Tips
For longer storage, freeze the baked chicken for up to 3 months. Let it cool completely, then wrap each thigh individually in plastic wrap before placing in a freezer-safe bag. Squeeze out excess air to prevent freezer burn. I like to portion the glaze separately if I'm freezing just the chicken—this way, you can reheat the glaze fresh when serving. Label with the date!
Reheating Perfection
My favorite method is oven reheating at 350°F for 10-15 minutes—this gently warms the chicken while keeping the skin crispy. Cover loosely with foil to prevent drying. For microwave reheating, use 50% power for 1-2 minutes, then check and add a splash of water if needed. The glaze might thin slightly when reheated, but that's normal.
Glaze Refresh
If the glaze looks too thick after reheating, simply add 1 tsp water or pineapple juice and warm for another 30 seconds. The original recipe's cornstarch helps it thicken back up nicely. For extra flavor, brush with a little fresh pineapple juice before serving—it brings back that bright, tangy note.
Meal Prep Hack
I make a double batch on Sundays and store half for lunches. The glaze actually tastes better the next day as the flavors meld. Pack with rice or roasted veggies in a bento box for easy grab-and-go meals. The pineapple chunks stay fresh for 3-4 days in the fridge if stored separately—just add them fresh when serving. 💡
Nutrition facts
Frequently asked questions
Can I use chicken breasts instead of thighs?
Chicken breasts will work, but thighs are ideal for this recipe because they stay juicier while baking. If you must use breasts, pat them extra dry and reduce baking time by 5-7 minutes to avoid dryness. The skin won't crisp as dramatically as thighs, but the glaze will still shine.
How do I adjust the sweetness level?
For less sweetness, reduce the brown sugar to 0.125 cup and add 1 tbsp extra pineapple juice to balance. For more caramelized flavor, increase the sugar by 1 tbsp and bake the glazed chicken 2-3 minutes longer to deepen the color.
Why did my glaze turn out too runny?
The glaze thickens as it cools, but if it's still too thin after baking, your oven may be too hot or the cornstarch didn't activate fully. Next time, simmer the glaze for 1 extra minute after adding the cornstarch slurry, or reduce oven temp to 375°F for the final bake.
What's the best way to make this gluten-free?
Swap the soy sauce for 2 tbsp gluten-free tamari or coconut aminos. The rest of the recipe stays the same—just confirm your cornstarch is certified gluten-free. The flavor will be slightly less umami, but still delicious when paired with fresh pineapple.
Can I grill this recipe instead of baking?
Pre-bake the chicken at 425°F for 15 minutes to get crispy skin, then grill over medium-high heat for 5-7 minutes per side. Brush with glaze during the last 2 minutes of grilling. The smoky flavor pairs beautifully with the sweet-savory glaze.