
Main Courses
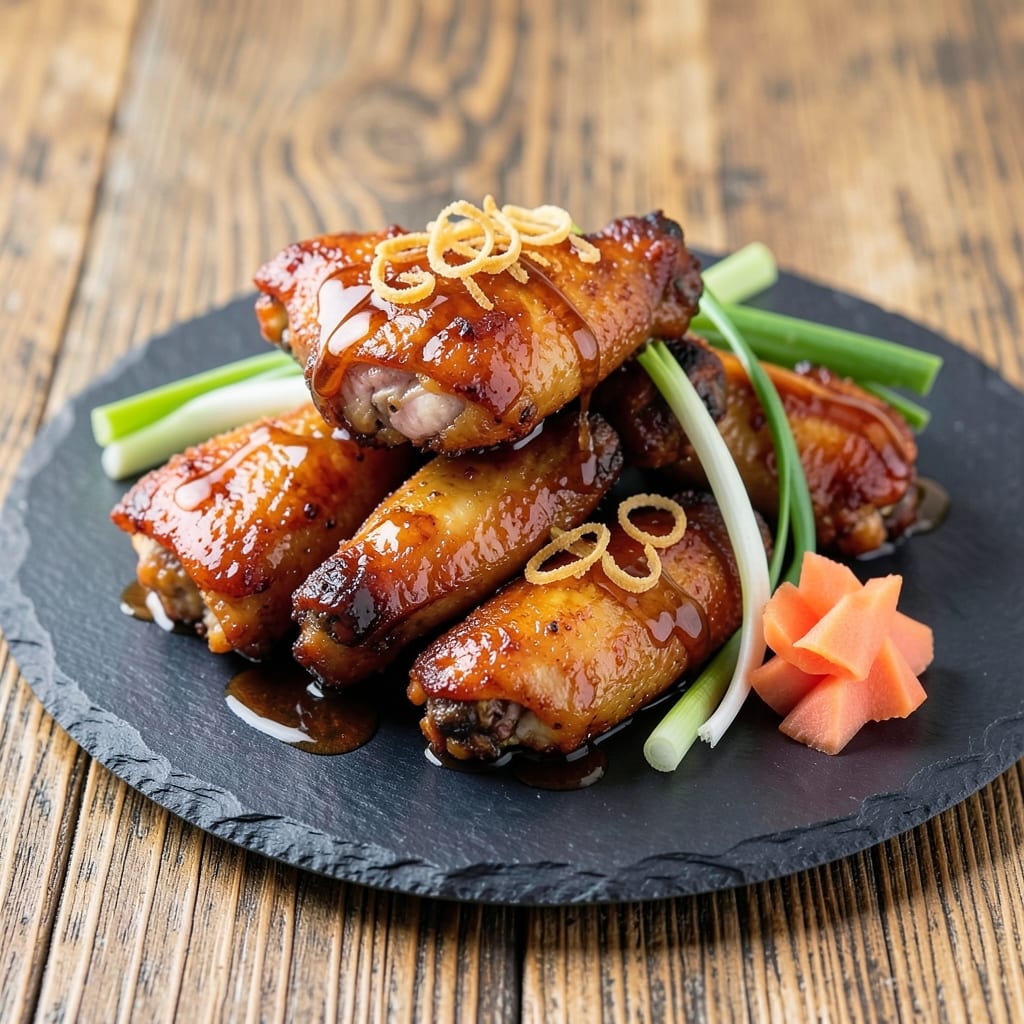
This baked teriyaki chicken wings recipe delivers crispy, golden edges with a sticky-sweet glaze that balances umami and caramelized depth—no deep fryer required. 🔥 After years of perfecting crispy textures in my Atlanta kitchen, I've cracked the code for achieving restaurant-quality wings at home with just an oven and 45 minutes. The secret lies in a dual-bake technique that ensures both crispiness and juiciness. What sets these wings apart is the homemade teriyaki glaze, where soy sauce, brown sugar, and ginger meld into a complex sauce that caramelizes beautifully during baking. I've tested countless variations, and this combination delivers the perfect balance of tangy, sweet, and savory notes that cling to every bite. The wings develop crispy skin while staying tender inside—a challenge I've mastered through precise timing and temperature control. By the time you pull these wings from the oven, you'll have a platter of glazed, crispy bites that look as impressive as they taste. The sauce pools in sticky rivulets, creating that irresistible combination of crunch and sauce with every bite. This recipe serves 4-6 and comes together in one pan, making it perfect for game day or weeknight dinners. The best part? These wings reheat beautifully, so you can make a big batch ahead of time. Serve with extra sauce on the side and a cool cucumber salad to balance the richness. Let's get cooking!
Ingredients for baked teriyaki chicken wings
Six ingredients for the sauce, three pounds of wings—this is your game-day lineup.
| Ingredient | Amount | Notes |
|---|---|---|
| Chicken Wings 🍗 | 3 lb | Split into drumettes and flats |
| Soy Sauce 🍶 | ½ cup | Low-sodium preferred |
| Brown Sugar 🍚 | ½ cup | Packed firmly |
| Fresh Ginger 🌿 | 2 tbsp | Finely grated |
| Garlic Cloves 🧄 | 4 cloves | Minced finely |
| Honey 🍯 | ¼ cup | Pure, not imitation |
| Sesame Oil 🫒 | 1 tbsp | Toasted sesame flavor |
| Rice Vinegar 🍶 | 1 tbsp | White vinegar works too |
| Cornstarch 🌾 | 1 tbsp | For crispy coating |
| Vegetable Oil 🫒 | 2 tbsp | For tossing wings |
| Salt 🧂 | 1 tsp | Kosher preferred |
| Black Pepper 🌶️ | ½ tsp | Freshly ground |
| Sesame Seeds 🌾 | 1 tbsp | Toasted for garnish |
The wings are your canvas here. Look for bone-in, skin-on wings—they crisp up best and stay juicy inside. Costco or Walmart usually have them pre-split into drumettes and flats, which saves time. If you're buying whole wings, ask the butcher to split them for you. Freshness matters: use within 2 days of purchase. For the sauce, low-sodium soy sauce is key—it keeps the flavor balanced without adding extra salt. And that brown sugar? Pack it firmly into the measuring cup, or you'll end up with less than you need.
No sesame oil? Avocado oil at half the amount works in a pinch, though the flavor won't be identical. Running out of rice vinegar? Apple cider vinegar is a solid swap—just add a pinch more sugar to balance the tartness. For the ginger, fresh is non-negotiable—dried ginger has a completely different flavor profile. If you're in a hurry, Trader Joe's sells pre-grated ginger in a jar, but it's not as potent. The cornstarch is your secret weapon for crispiness—don't skip it. And if you're feeling fancy, toast your sesame seeds in a dry pan for 30 seconds before garnishing—they'll taste like they came from a Korean BBQ joint.
These wings reheat like a dream—just toss them in the oven at 375°F for 10 minutes with a splash of water to keep the sauce sticky. Store leftovers in an airtight container for up to 3 days, though I've never had any last that long. The sauce? It keeps for 1 week in the fridge, and freezes beautifully for 3 months. Double the sauce if you're planning to reheat—it thickens up when chilled. Pro tip: Line your baking sheet with parchment paper for easy cleanup, and save the scraps for homemade chicken broth later.
Why You'll Love This Recipe
- One-Pan Magic: Honestly, I swear by this recipe because it’s that simple—just wings, a sauce mix, and 20 minutes in the oven. No boiling, no frying, no messy cleanup. The brown sugar caramelizes right on the sheet pan while the garlic and ginger infuse the wings with warmth.
- Sweet-Savory Balance: Between us, the combo of soy sauce’s umami and brown sugar’s caramelized bite is ridiculously addictive. The fresh ginger adds a little zing, and the garlic? It sticks to every crispy bite like it’s hugging you. That crispy edge with the sticky-sweet glaze? Chef’s kiss.
- Game for Any Gathering: I’ve served these at BBQs, game nights, and even as a lazy Sunday lunch—no one bats an eye. The wings hold up perfectly cold in a cooler (yes, even on a Tuesday night) and reheat like a dream. Bonus: They’re the kind of dish that makes you look like a hero without trying.
- Budget-Friendly Crowd-Pleaser: A pound of wings and a few pantry staples feed four for under $10. The leftovers? They’re my secret weapon for busy weeks—toss them in salads, rice bowls, or just microwave them straight from the fridge. Not the prettiest, but the taste makes up for it every time.
Step-by-step instructions for baked teriyaki chicken wings
Here's how to make wings that are crispy on the outside and sticky-sweet inside—every bite is pure flavor!
🔥 Step 1: Prep and Season the Wings for Maximum Crisp
Preheat your oven to 425°F and line two large baking sheets with parchment paper. Pat the 3 lb chicken wings completely dry with paper towels—this is non-negotiable for crispy skin. I like to split them into drumettes and flats for even cooking.
In a large bowl, toss the wings with 2 tbsp vegetable oil, 1 tsp salt, and 0.5 tsp black pepper until they're evenly coated. Let them rest for 10 minutes at room temperature while the oven heats up. This step ensures the oil penetrates the meat and you get that perfect golden-brown crust.
🍳 Step 2: Bake Until Golden and Crispy
Arrange the wings in a single layer on the prepared baking sheets, leaving ½ inch between each piece. Bake for 25 minutes, flipping them halfway through, until they're golden brown and crispy. You'll know they're ready when the skin looks dry and the edges start to curl slightly.
Don't walk away during this step—check at the 20-minute mark if your oven runs hot. If they brown too quickly, tent them loosely with foil. The goal is crispy skin, not burnt edges. Once they're perfectly browned, remove them from the oven and let them cool for 5 minutes on a wire rack.
🥘 Step 3: Make the Sticky-Sweet Teriyaki Glaze
While the wings bake, combine 0.5 cup soy sauce, 0.5 cup packed brown sugar, 0.25 cup honey, 1 tbsp rice vinegar, 1 tbsp sesame oil, 2 tbsp finely grated fresh ginger, and 4 minced garlic cloves in a saucepan. Bring to a boil over medium heat, then reduce to a simmer.
Let it cook for 5-6 minutes until it thickens slightly and becomes syrupy. Stir in 1 tbsp cornstarch mixed with 1 tablespoon water to help it coat the wings beautifully. The glaze should be thick enough to cling but still flow easily—like honey drizzled over pancakes.
🍽️ Step 4: Glaze and Finish for Ultimate Crispiness
Return the oven to 425°F and place the baked wings back on the sheets. Pour the teriyaki glaze evenly over the wings, making sure each piece is fully coated. Bake for an additional 8-10 minutes, basting them with extra glaze halfway through, until the sauce is bubbly and caramelized.
Watch closely in the last 2 minutes—the glaze should be glossy and sticky, not dry. Once they're perfectly glazed and still crispy, transfer the wings to a serving platter. Sprinkle with 1 tbsp toasted sesame seeds for that final crunchy texture and visual pop.
Pro Tips For Making Baked Teriyaki Chicken Wings
- Preheat Like It’s 1999: Your oven needs to hit 425°F and sit for 10 full minutes before those wings go in—no exceptions. I used to toss them in cold and wondered why the sauce never caramelized properly. That extra heat jumpstarts the Maillard reaction, so the wings crisp up instead of steaming.
- Blend the Ginger Fine: Grate that fresh ginger super fine—think powder, not matchsticks. I learned this the hard way when chunks fell out of the sauce and left weird texture in every bite. A microplane or food processor saves your wings from chewy surprises.
- Don’t Crowd the Pan: Spread wings in a single layer with space between them—no overlapping, even if it means two batches. I crammed them in once and ended up with soggy wings drowning in their own sauce. Airflow = crispy, not sad.
- Broil for the Glaze: Finish under the broiler for 2-3 minutes, watching like a hawk. The sugar in that teriyaki turns into a sticky, glossy crust—just don’t walk away. I’ve ruined more batches by letting it burn while I “just checked the mail.”
Regional styles of these flavors
Hawaiian Style
In Hawaii, teriyaki wings get a tropical twist with pineapple chunks and a splash of orange juice in the glaze. I swap ½ cup of the brown sugar for ½ cup pineapple juice and add 1 cup diced fresh pineapple to the saucepan at the end. The acidity from the pineapple tenderizes the wings slightly, creating a perfect balance. Serve with a side of coconut rice and fresh mango slices for that island vibe. 🌺
Korean-Inspired
For a Korean-inspired version, I boost the umami by adding 1 tbsp gochujang (Korean chili paste) and 1 tbsp sesame paste to the glaze. The gochujang adds a subtle heat that pairs perfectly with the sweetness. I also toss the wings with 1 tbsp toasted sesame seeds before baking for extra texture. Garnish with sliced green onions and serve with a side of kimchi for a full Korean BBQ experience. 🌶️
Southern BBQ Fusion
This fusion takes teriyaki wings to the next level by adding a smoky element. After glazing, I brush the wings with 1 tbsp apple cider vinegar and sprinkle with ½ tsp smoked paprika before the final bake. The result is a sweet, tangy, and slightly smoky flavor that reminds me of my time on the Southeast BBQ circuit. Serve with coleslaw and cornbread for a true Southern feast. 🔥
Spicy Sriracha Twist
If you love heat, this version is for you. Stir 1 tbsp sriracha into the glaze and add 1 tsp red pepper flakes to the initial wing seasoning. For extra kick, drizzle the finished wings with a mix of 1 tbsp sriracha and 1 tsp honey. The sweet and spicy combo is addictive, and it pairs perfectly with a cool cucumber salad. This is my go-to for game day when I want to impress the crowd. 🌶️
Japanese Yakitori Style
For a more refined take, I use mirin instead of rice vinegar and add 1 tbsp sake to the glaze. The mirin adds a delicate sweetness, while the sake deepens the umami. I also brush the wings with 1 tbsp melted butter before baking for extra richness. Garnish with thinly sliced scallions and serve with steamed jasmine rice and a side of edamame**. This version feels like a high-end izakaya experience. 🍶
Nutrition facts
Frequently asked questions
Can I use frozen chicken wings instead of fresh?
Fresh wings are ideal, but frozen works in a pinch! Thaw them completely in the refrigerator overnight. Pat them completely dry before seasoning—this extra step prevents soggy skin. For best results, let them air-dry for 20 minutes after thawing to remove any excess moisture.
Why did my wings come out dry instead of crispy?
This usually happens from overcrowding or underbaking. Arrange wings in a single layer with ½ inch between each, and bake at 425°F until internal temp reaches 165°F. For extra crispiness, broil for 2-3 minutes at the end. Also ensure your oven rack is in the middle position for even heat circulation.
How can I make this recipe gluten-free?
Replace the soy sauce with ½ cup gluten-free tamari and ensure your cornstarch is certified gluten-free. All other ingredients are naturally gluten-free. For extra flavor, add 1 tsp gluten-free fish sauce to the glaze. Always check labels on sesame oil and vinegar to confirm gluten-free status.
Can I prep the glaze ahead of time?
Make the glaze up to 3 days ahead and store it in the fridge. Reheat gently in a saucepan until warm before using. For extra shine, add 1 tsp water when reheating. The sauce thickens as it cools, so thin with a splash of water if needed before glazing the wings.
What's the best way to serve these wings?
Serve immediately with extra glaze on the side, sesame seeds sprinkled on top, and a cool contrast like cucumber salad or steamed rice. For a complete meal, add quick-pickled veggies or edamame. Pro tip: Use chopsticks for dipping—it makes the experience feel more special!