
Main Courses
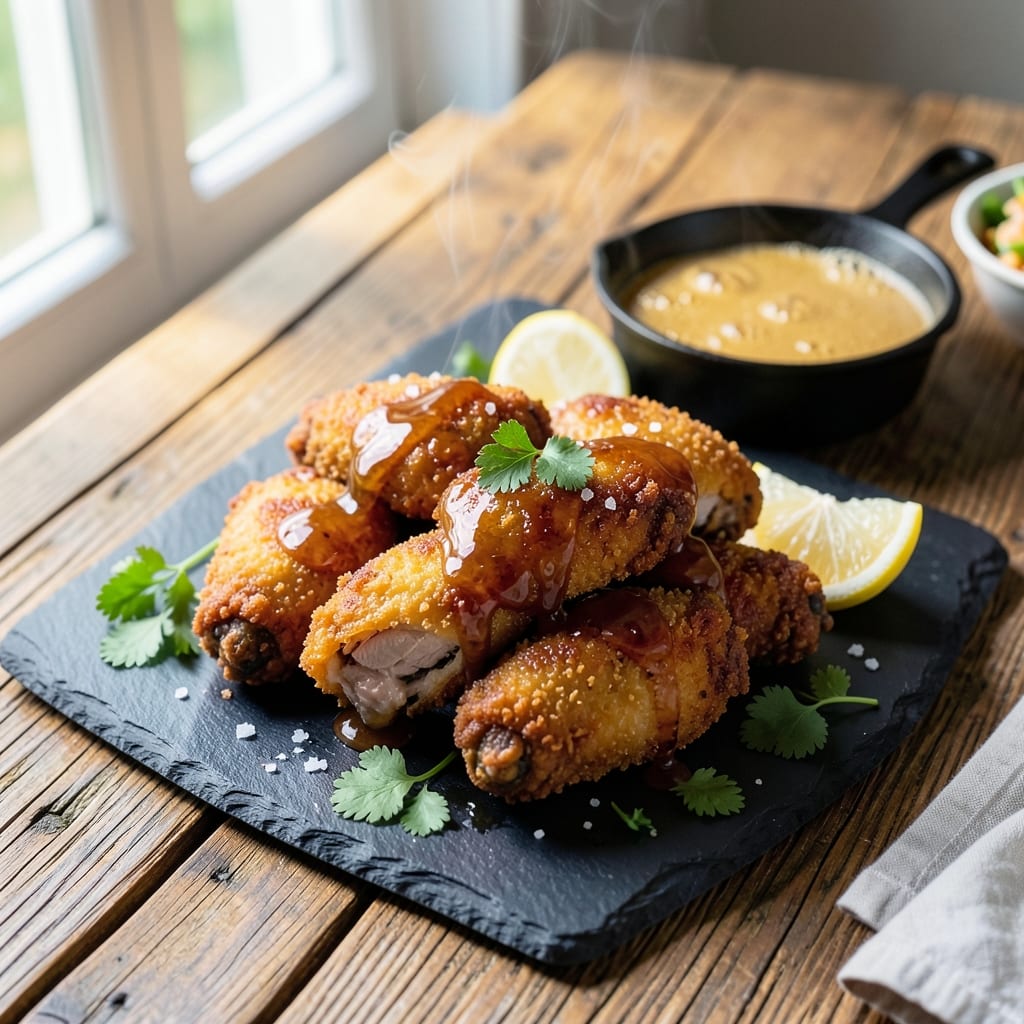
This basic fried chicken wings recipe delivers that perfect crispy crust that stays golden and crunchy all night long—no soggy disappointment here. I've perfected the technique over years of testing, and the secret lies in the batter and frying temperature. Whether you're hosting a game day or craving a classic comfort food, these wings will be your go-to recipe. The process starts with a simple marinade of salt, pepper, and paprika, then a light, airy batter that creates that signature crispy texture. Frying at 350°F ensures even cooking without burning, while the right oil ratio keeps the wings from absorbing too much grease. The result? Wings with a shatteringly crisp exterior and juicy, tender meat inside—every time. What makes this recipe foolproof is the method: double-dipping the wings in the batter ensures maximum crispiness, and frying in small batches maintains the perfect temperature. The key to keeping them crispy after frying? A wire rack in the oven set to 200°F for just a few minutes—this keeps them warm and crunchy, not greasy. Serve with your favorite dipping sauces, whether it's classic ranch, tangy buffalo, or a sweet honey mustard. This recipe is as versatile as it is delicious, and once you try it, you'll never go back to store-bought again.
Ingredients for basic fried chicken wings
Game day staples with a crispy secret—no fancy ingredients, just perfect technique.
| Ingredient | Amount | Notes |
|---|---|---|
| Chicken Wings 🍗 | 2 lb | Split into drumettes and flats |
| All-Purpose Flour 🌾 | 2 cups | For light, crispy batter |
| Large Eggs 🥚 | 1 whole | Room temperature for best batter |
| Beer 🍺 | ½ cup | Light lager for crispiness |
| Vegetable Oil 🫒 | 4 cups | High smoke point preferred |
| Salt 🧂 | 1 tbsp | Kosher or sea salt |
| Ground Black Pepper 🌶️ | 1 tsp | Freshly ground preferred |
| Paprika 🌶️ | 1 tbsp | Smoked for extra flavor |
| Garlic Powder 🧄 | 1 tsp | For subtle depth |
| Baking Soda 🧪 | ½ tsp | For extra crispiness |
| White Vinegar 🍶 | 1 tbsp | Balances batter flavor |
| Butter 🧈 | 1 tbsp | Melted for post-fry shine |
The wings should be fresh—ask the butcher for drumettes and flats if possible, or split them yourself. Costco or Trader Joe's usually have them pre-split, which saves time. Look for plump wings with minimal bruising. The flour matters too—King Arthur or Gold Medal brands work best for that light, airy batter. If you can't find light lager, any beer with low alcohol content will do. The key is the ratio: beer to flour should be 1:4 for that perfect crispiness.
No beer? Substitute sparkling water or club soda—it's all about the bubbles for that crispy texture. Short on baking soda? Skip it entirely—the recipe still works, just slightly less crisp. The butter at the end is non-negotiable for that restaurant-quality shine. If you're worried about grease, use a paper towel to blot the wings before adding the butter. For extra flavor, swap the smoked paprika for half cayenne and half paprika—just don't tell anyone it's spicy. The wings can be prepped ahead: marinate them overnight for even more flavor.
Fry in small batches—overcrowding drops the oil temperature, leading to greasy wings. Keep the oil at 350°F using a thermometer for best results. After frying, place wings on a wire rack in a 200°F oven for 5-10 minutes to keep them crispy. Store leftovers in the fridge for 3 days, but honestly, they won't last that long. Freeze extras for up to 3 months—just thaw in the fridge overnight before reheating. The batter mix keeps in the fridge for 24 hours, so make it fresh if you can.
Why You'll Love This Recipe
- Five-Ingredient Magic: I swear by this combo—flour, eggs, beer, oil, and wings. That’s it. No fancy marinades or last-minute shopping trips. The beer in the batter? It’s the secret that keeps things crispy without tasting like a bar recipe.
- Crispy-Creamy Balance: Between us, this is the only fried wing recipe where the crust doesn’t turn into a sad, greasy shell. The beer tenderizes the inside while the flour creates that perfect crunch—golden edges, juicy bite. Honestly, it’s the kind of texture that makes you close your eyes and nod.
- Game Day or Lazy Night: I’ve served these at tailgates (where they disappear fast) and as a 10-minute dinner on nights when I’d rather watch The Office reruns than cook. Toss them with ranch or hot sauce, or just eat them straight—no judgment here.
- Leftovers That Don’t Suck: Most fried wings turn into a greasy mess the next day, but these? Still crispy if you reheat them properly (air fryer, baby). And because they’re cheap to make—bulk wings stretch far—I can feed my whole family without breaking the bank. (Yes, even on a Tuesday night.)
Step-by-step instructions for crispy fried chicken wings
Here's how to make wings with a golden crust that stays crunchy even after hours on the table.
Prep the Wings for Maximum Crispiness
Pat the 2 lb chicken wings completely dry with paper towels—this is the secret to crispy batter. I mean really dry, especially around the joints where moisture tends to hide. Split each wing into drumettes and flats for even cooking. Arrange them on a baking sheet and let them sit at room temperature for 30 minutes while you prepare the batter.
This drying step ensures the batter adheres properly and creates that perfect crunch. If you skip this, you'll end up with soggy spots underneath the crust. Trust me, the extra 30 minutes makes all the difference in the final texture.
Make the Secret-Crispy Batter
In a large bowl, whisk together the 2 cups all-purpose flour, 1 tbsp salt, 1 tsp ground black pepper, 1 tbsp paprika, 1 tsp garlic powder, and 0.5 tsp baking soda. The baking soda is what gives these wings that extra crunch—don't skip it. In a separate bowl, beat the 1 whole large egg until just combined, then whisk in the 0.5 cup beer and 1 tbsp white vinegar.
Here's the thing—adding vinegar to the wet ingredients balances the batter and prevents it from getting too heavy. The beer adds subtle flavor while helping create that light, crispy texture. Pour the wet ingredients into the dry and stir gently until just combined. You're looking for a thick, shaggy batter—not too runny, not too stiff. Let it rest for 5 minutes while you heat the oil.
Heat the Oil to the Perfect Temperature
Fill a deep skillet or Dutch oven with the 4 cups vegetable oil and heat over medium-high heat until it reaches 350°F on a deep-fry thermometer. If you don't have a thermometer, test the oil by dropping in a small piece of batter—it should sizzle and rise to the surface immediately. If it sinks or burns, your oil isn't hot enough.
Maintaining the right temperature is crucial. Oil that's too hot burns the outside before the inside cooks through, while oil that's too cool makes for greasy, limp wings. Keep the heat steady and don't overcrowd the pan—you want the oil to return to temperature between batches.
Fry the Wings in Small Batches
Working in batches of 6-8 wings at a time (don't overcrowd!), carefully lower the wings into the hot oil using tongs. Fry for 10-12 minutes, turning occasionally, until they're golden brown and the internal temperature reaches 165°F. You'll know they're done when the batter is crispy and the meat is cooked through.
Here's where timing matters: the wings should be golden brown but not dark brown. If they brown too quickly, your oil is too hot. If they take longer than 12 minutes, it's too cool. Transfer fried wings to a wire rack set over a baking sheet to drain excess oil. This keeps them crispy instead of turning soggy.
Finish with Butter for Extra Shine and Crunch
While the wings are still hot, melt the 1 tbsp butter in a small saucepan over low heat. Once melted, carefully pour the butter over the fried wings, tilting the rack to coat them evenly. This step adds that beautiful golden sheen and locks in the crispiness. Let the wings cool for 5 minutes before serving.
Real talk: this butter step is what separates good wings from great wings. It adds flavor and helps maintain that crunch even after sitting out. Serve immediately with your favorite dipping sauces, and enjoy that satisfying crunch with every bite—just like from your favorite sports bar!
Pro Tips For Making Basic Fried Chicken Wings
- Pat the Wings Dry: I learned this the hard way—wet wings steam instead of crisp. Grab paper towels and press hard on each wing before dredging in flour. Even if they feel damp, take the extra 30 seconds. The beer batter won’t stick properly otherwise, and you’ll end up with soggy, uneven coating.
- Use Room-Temp Beer: Cold beer thins the batter unpredictably, leading to clumpy messes. Pour your beer into a bowl 10 minutes before mixing—just long enough to lose that fridge chill. Room temperature also helps the flour absorb evenly, so your wings get that light, airy crust instead of a gluey one.
- Fry in Batches, Not Crowds: I used to dump all the wings in at once, thinking it’d save time. Big mistake—they steam and turn greasy. Fry 8–10 wings per batch in 350°F oil, giving them space to sizzle freely. Overcrowding drops the oil temp, and you’ll end up with oil-slathered, greasy wings instead of golden, crispy ones.
- Rest the Wings First: Skip the rush—let the wings sit uncovered on a wire rack for 30 minutes after patting dry. This evens out moisture and helps the flour adhere better. I was skeptical until I tried it: the batter sticks more evenly, and the wings fry faster because they’re not releasing steam mid-cook. (Yes, even if you’re impatient like me.)
Creative variations of these flavors
Spicy Buffalo Style
For a kick of heat, toss your fried wings in ½ cup hot sauce (I love Frank's RedHot) mixed with 2 tbsp melted butter—just enough to coat them evenly. The tangy, spicy sauce cuts through the richness of the fried batter beautifully. Serve with extra hot sauce on the side for those who want more heat. 🌶️
Honey Garlic Glaze
Swap the butter finish for a sweet-savory glaze by mixing ¼ cup honey, 2 tbsp soy sauce, and 1 tbsp minced garlic in a small saucepan. Simmer for 2 minutes until slightly thickened, then brush over the fried wings. The honey caramelizes slightly, giving you a sticky, flavorful coating that pairs perfectly with a cool ranch dip.
Lemon Pepper Crunch
Brighten up your wings with a zesty lemon pepper twist. After frying, toss the wings in a mix of 1 tbsp lemon zest, 2 tbsp lemon juice, 1 tbsp black pepper, and 1 tsp garlic powder. The citrus cuts through the richness, and the pepper adds a fresh, crisp kick. This variation is perfect for a lighter, brighter flavor profile.
BBQ Dry Rub
For a smoky, sweet finish, coat your wings in a dry rub made from 1 tbsp brown sugar, 1 tbsp smoked paprika, 1 tsp garlic powder, and ½ tsp cayenne. Press the rub into the wings before frying, and finish with a drizzle of BBQ sauce after they come out of the oil. This gives you that classic BBQ flavor with a crispy, golden crust.
Garlic Parmesan
Add a cheesy, garlicky twist by mixing ½ cup grated Parmesan cheese, 2 tbsp minced garlic, and 1 tbsp chopped parsley. Toss the fried wings in this mixture while they're still hot so the cheese melts slightly. The result is a rich, savory coating that’s sure to impress. This variation is a crowd-pleaser for any gathering. 🧀
Nutrition facts
Frequently asked questions
Can I use frozen chicken wings instead of fresh?
Yes, but you'll need to thaw them first! Place frozen wings in a sealed bag and refrigerate overnight. Pat them completely dry before dipping in batter—any moisture will prevent crispiness. For extra insurance, let them air-dry on a wire rack for 15-20 minutes after thawing. Never skip the drying step or your batter won't adhere properly.
What's the best oil for frying chicken wings?
Use vegetable oil or peanut oil—they have high smoke points (400°F+) and stay stable at 350°F. Avoid olive oil (too low smoke point) or butter (burns easily). For extra flavor, try a 50/50 blend of vegetable oil and melted duck fat, but keep it at 325°F to prevent burning. Always use enough oil to submerge wings halfway.
Why did my wings turn out greasy instead of crispy?
Most likely your oil was too cool or you overcrowded the pan. Keep batches small (6-8 wings) and maintain 350°F using a thermometer. Also check your drying step—any moisture on the wings will make the batter absorb oil instead of creating a crisp shell. For extra insurance, let fried wings rest on a wire rack for 5 minutes before adding butter.
Can I make this recipe ahead of time?
Fry the wings up to 2 days ahead and store in an airtight container. Re-crisp in a 400°F oven for 5-8 minutes before serving. For the batter mix, prepare it up to 24 hours ahead and refrigerate—stir well before using. The wings reheat best when warmed from room temperature, not straight from the fridge.
What's the secret to keeping wings crispy after frying?
Three things:
- Fry in small batches to maintain oil temperature,
- Drain on a wire rack (not paper towels) to evaporate excess moisture, and
- Keep warm in a 200°F oven on a wire rack for 5-10 minutes before serving. The rack lets air circulate, preventing steam from making them soggy. For parties, serve family-style from a chafing dish with the rack underneath.