
Soups & Stews
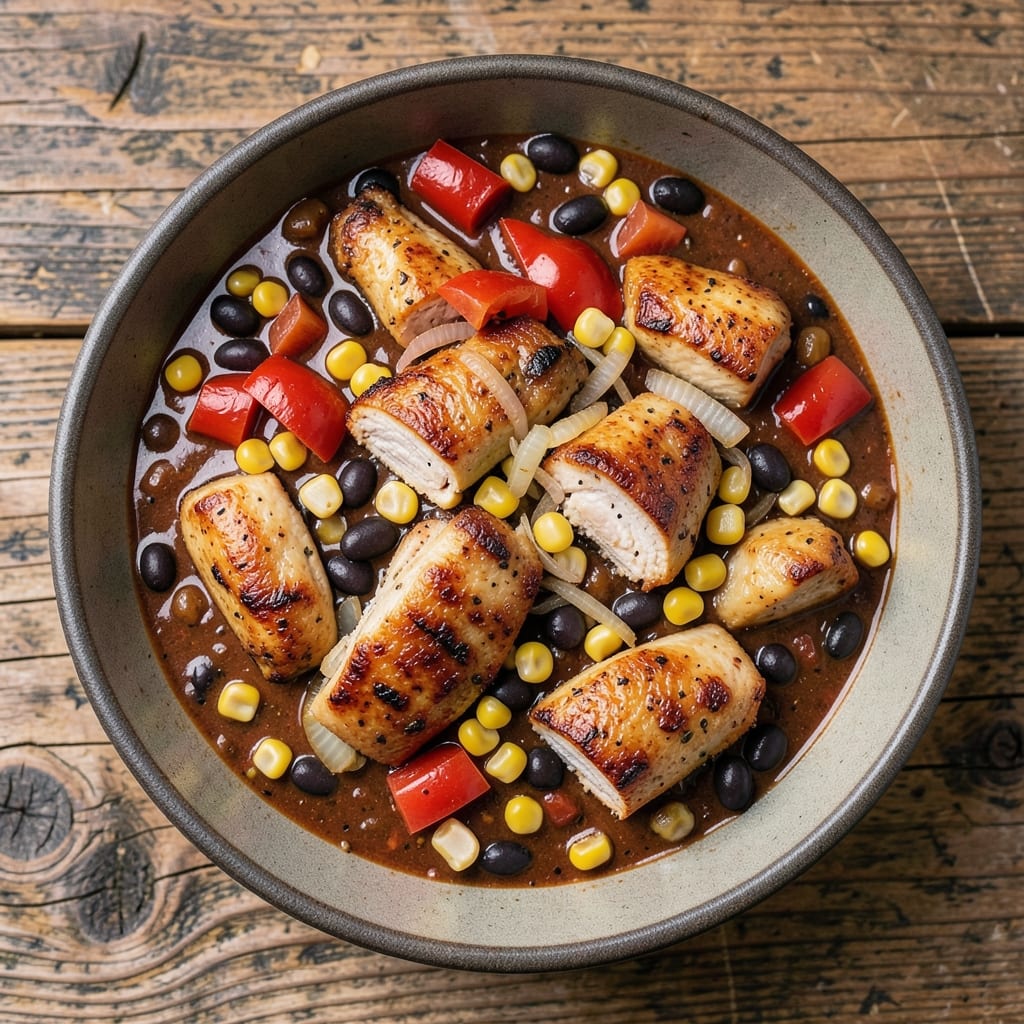
This Blue Apron chicken chili recipe delivers the deep, smoky comfort of a campfire stew right in your kitchen. The secret lies in slow-simmered chicken thighs—tender and flavorful—paired with hearty black beans, sweet corn, and a blend of spices that dance between earthy cumin and warm cinnamon. What sets this apart is the caramelized tomato base, where onions and garlic meld into a rich, velvety foundation that holds every ingredient together.
Unlike quick chili recipes, this one earns its depth through a 30-minute simmer that transforms tough chicken into melt-in-your-mouth pieces while letting the spices infuse. The addition of corn and a touch of cocoa powder adds unexpected sweetness that balances the smoky heat, making it a crowd-pleaser for both chili purists and adventurous eaters. What you’ll end up with is a pot so aromatic, it’ll have everyone asking for seconds before you even serve it.
The beauty of this recipe is its versatility—serve it with a dollop of sour cream and chopped cilantro for brightness, or top with shredded cheese and jalapeños for heat lovers. It reheats beautifully, too, so leftovers taste just as good the next day, making it perfect for meal prep. Whether you’re feeding a family or hosting game day, this chili brings warmth and satisfaction to the table.
For those watching their diet, swapping chicken for lentils or beans keeps the heartiness while cutting calories, and you can easily adjust spice levels to suit any palate. The instructions are straightforward, but the result is anything but basic—this is chili that tastes like it’s been simmering all day, even if you’re short on time. Let’s get cooking!
Ingredients for blue apron chicken chili
Pantry staples meet smoky spices for this comforting, crowd-pleasing chili.
| Ingredient | Amount | Notes |
|---|---|---|
| Chicken Thighs, Bone-In 🍗 | 1 ½ lb | Skin-on for flavor, cut into bite-sized pieces |
| Black Beans 🌽 | 1 ½ cups | Cooked or canned, drained and rinsed |
| Corn Kernels 🌽 | 1 cup | Fresh, frozen, or canned (drained) |
| Diced Tomatoes 🍅 | 1 can | 15 oz can, fire-roasted preferred |
| Yellow Onion 🧅 | 1 whole | Medium size, diced small |
| Garlic Cloves 🧄 | 4 cloves | Fresh, minced |
| Ground Cumin 🌿 | 1 tbsp | Toasted for deeper flavor |
| Chili Powder 🌶️ | 1 tbsp | Medium heat preferred |
| Cocoa Powder 🍫 | 1 tbsp | Unsweetened for subtle sweetness |
| Dried Oregano 🍃 | 1 tsp | Mexican oregano if available |
| Salt 🧂 | 1 tsp | Kosher or sea salt |
| Black Pepper 🌶️ | ½ tsp | Freshly ground preferred |
| Chicken Broth 💧 | 2 cups | Low-sodium preferred |
| Olive Oil 🫒 | 2 tbsp | For sautéing onions and garlic |
The chicken thighs are the star here—bone-in, skin-on pieces stay juicy during the long simmer. Trader Joe's or Costco usually have them pre-cut, but if you're buying whole, look for good marbling. The black beans? Dry beans save money and taste better, but canned works in a pinch. For the tomatoes, fire-roasted canned tomatoes add a smoky depth that's hard to beat—Muir Glen is my go-to. If you're using dried beans, soak them overnight or use the quick-soak method with boiling water.
No cocoa powder? Dark chocolate (1 oz, melted) works too—just reduce the amount to 1 tsp. Short on cumin? Smoked paprika at half the amount gives similar warmth. The corn can be fresh, frozen, or canned—just drain it well. For extra richness, swap 1 cup of broth for beef broth, but keep it low-sodium. Want more heat? Add 1/2 tsp cayenne or 1 chopped jalapeño. The onions should be sweet—yellow or Vidalia work best, but red adds color if that's what you've got.
This chili tastes even better the next day once flavors meld. Keeps 4-5 days in the fridge or 3 months frozen. I double the batch and portion it into containers—game day or weeknight meals sorted. To reheat, add a splash of broth or water if it's too thick. The spices lose punch after opening, so store them in airtight containers away from light. Fresh garlic keeps in the fridge for 1 week—peel and freeze whole cloves for longer storage.
Why You'll Love This Recipe
- One-Pot Magic: I swear by this recipe when I’m too tired to scrub pots—just toss everything in one pot, let it simmer, and boom. The bone-in thighs stay juicy while the onions caramelize right in the same space, cutting my cleanup time by half.
- Crave-Worthy Depth: That first bite? Rich, smoky, and layered—thanks to the bone-in thighs rendering their own flavor while the black beans and corn add texture. Honestly, it’s the kind of chili that makes me forget I’m eating something simple.
- Lunchbox Champion: Between us, this is my go-to for meal prep. The flavors only get better the next day, and I pack it in jars all week—no sad, soggy leftovers here. My kids actually ask for it, which is basically a parenting win.
- Budget-Friendly Powerhouse: Bone-in thighs stretch for miles, black beans bulk it up, and canned tomatoes keep it cheap. I’ve made this for $1.50 per serving, and it still feels like a restaurant dish. Not the prettiest, but the taste makes up for it every time.
Step-by-step instructions for smoky bean and corn chili
Here's how to build a rich, smoky chili that balances hearty chicken, tender beans, and sweet corn.
Sear the Chicken for Deep Flavor
Pat the 1.5 lb chicken thighs dry with paper towels and cut into bite-sized pieces. Heat 2 tbsp olive oil in a large Dutch oven over medium-high heat. Working in batches if needed, add the chicken pieces and cook for 5-6 minutes until golden brown on all sides. You want that crispy exterior to infuse the chili with rich flavor.
As the chicken browns, you'll see the skin crisp up and the edges turn a beautiful golden color. This is your signal to remove the chicken and set it aside on a plate. Don't overcrowd the pan—give each piece room to develop that flavorful crust. The rendered fat will become the flavor base for your chili, so don't wipe it out.
Build the Aromatic Base
In the same Dutch oven, add the diced 1 whole yellow onion and cook for 5 minutes until softened and translucent. Stir occasionally so it doesn't stick to the bottom. Add the 4 cloves minced garlic and cook for another 30 seconds until fragrant—you should smell that wonderful garlic aroma filling your kitchen.
Now add the 1 tbsp ground cumin, 1 tbsp chili powder, 1 tbsp cocoa powder, 1 tsp dried oregano, 1 tsp salt, and 0.5 tsp black pepper. Stir everything together for 1 minute until the spices are toasted and the mixture smells deeply aromatic. This spice blend forms the flavor foundation of your chili, so let those spices bloom properly.
Simmer the Chili Base
Pour in the 2 cups chicken broth and scrape up any browned bits from the bottom of the pot with a wooden spoon. Add the 1 can diced tomatoes (with juices) and bring everything to a gentle boil. Once boiling, reduce heat to medium-low and let it simmer uncovered for 10 minutes to let the flavors meld together.
After 10 minutes, add the 1.5 cups black beans and 1 cup corn kernels. Stir gently to combine, then return to a simmer. The beans and corn will absorb the rich flavors from the broth and spices. This is where the chili starts to come together—you'll notice the colors deepening and the aroma becoming more complex.
Finish with Chicken and Rest
Return the browned chicken pieces to the pot and stir gently to combine. Cover and simmer on low heat for 20-25 minutes, stirring occasionally. The chicken should be cooked through and tender, and the chili should have thickened slightly. You want it to coat the back of a spoon with a rich, velvety texture.
Taste and adjust seasoning if needed—you might want to add a pinch more salt or chili powder to suit your preference. Let the chili rest off the heat for 5 minutes before serving. This resting time allows all the flavors to fully meld together, resulting in a more cohesive and delicious bowl of chili.
Serve with Warm Accompaniments
Ladle the chili into bowls and serve immediately with warm corn bread, shredded cheese, or a dollop of sour cream. The chili should be thick enough to coat a spoon but still have a nice brothy quality. Each bite should deliver tender chicken, hearty beans, sweet corn, and that deep, smoky flavor from the spices and cocoa powder.
Don't forget to make extra—this chili tastes even better the next day as the flavors continue to develop. Store leftovers in the refrigerator for up to 4 days or freeze for up to 3 months. The combination of chicken, beans, and corn makes this a satisfying, protein-packed meal that's perfect for any occasion.
Pro Tips For Making Blue Apron Chicken Chili
- CRISP THE SKIN FIRST: Brown those bone-in thighs hard—10 minutes on each side until the skin’s deep golden and crispy. I used to skip this, and the chili ended up soggy; that crisp turns into flavor as it cooks. (Yes, even if you’re impatient like me.)
- SWEAT THE ONION LOW: Cut the yellow onion into ¼-inch slices and cook it in the pot for 8–10 minutes before adding anything else. Low heat, no rush—this softens it fully and builds the base flavor without burning. I learned this the hard way after tasting bitter chili from rushed prep.
- DON’T DRAIN THE BEANS: Rinse the black beans just enough to remove debris, then leave them in their liquid. That starchy water thickens the chili naturally as it simmers, saving you from adding extra flour or cornstarch. (Your future self will thank you.)
- SIMMER, DON’T BOIL: After everything’s in the pot, keep the heat at a gentle simmer—not a rolling boil. This keeps the corn kernels intact and the tomatoes from breaking down into mush. I was skeptical until I tried it; the texture stays perfect.
Storing and reheating this dish
Refrigerator Storage
Let your chili cool completely before transferring to airtight containers—I use glass Pyrex with snap-on lids for easy reheating. Store at 40°F or below for up to 4-5 days, though I find the flavors deepen overnight as spices meld. The corn and beans stay tender, while the chicken remains juicy when reheated properly. 💫
Freezer Prep Tips
For long-term storage, portion the chili into quart-sized freezer bags (remove excess air to prevent freezer burn). Label with the date—this chili keeps 3 months without losing texture or flavor. I like using silicone molds for portion control, making it easy to grab single servings. Thaw overnight in the fridge for best results.
Stovetop Reheating
My preferred method is stovetop reheating—it preserves the chili's rich texture. Transfer to a pot over medium-low heat and add ¼ cup water or broth to prevent sticking. Simmer for 10-15 minutes, stirring occasionally, until heated through (165°F internal temp). Taste and adjust seasoning—chili often needs a pinch more salt after reheating. 🔥
Microwave Shortcuts
For quick meals, microwave individual portions covered with a damp paper towel on 70% power for 2-3 minutes. Stir halfway through, then continue in 30-second bursts until steaming hot. Add a splash of broth if the chili looks too thick. This method works best for single servings and keeps the corn from turning mushy.
Freezer-to-Fridge Transition
When moving chili from freezer to fridge, thaw it in the fridge overnight rather than at room temperature. Once thawed, reheat using the stovetop method to maintain even heating. I avoid microwave thawing—it can create uneven temperatures and risk bacterial growth. Always check that the chili reaches 165°F before serving.
Texture Preservation
To keep the beans and corn from breaking down during storage, avoid overcooking the chili initially. The 20-25 minute simmer in the recipe is ideal—it ensures tenderness without mushiness. If reheating seems too thick, a splash of broth restores the perfect consistency. The chicken stays juicy when stored properly, making every bite satisfying. ✨
Nutrition facts
Frequently asked questions
Why does this chili recipe use bone-in chicken thighs instead of breasts?
Bone-in thighs stay juicier and more flavorful during the long simmer than breasts. The bones add depth to the broth, while the skin creates a crispy exterior that infuses the chili with rich flavor. Plus, thighs are more forgiving if slightly overcooked—they won't dry out like breasts might.
Can I make this chili in a slow cooker instead of a Dutch oven?
Brown the chicken first in a skillet, then transfer everything to a 6-quart slow cooker. Cook on low for 6-7 hours or high for 3-4 hours. The slow cooker enhances the smoky flavors while keeping the corn tender. Just add ¼ cup broth if it gets too thick during cooking.
What's the best way to adjust the spice level for kids or sensitive eaters?
Reduce the chili powder to ½ tsp and omit the cayenne or jalapeño. For extra mildness, add 1 tsp honey or maple syrup to balance any remaining heat. Kids often love the sweetness from the corn and cocoa powder—it makes the chili more approachable. Always taste as you go!
How do I prevent the chili from getting too thick or too thin?
For thicker chili, simmer uncovered for 5-10 extra minutes to reduce the liquid. If it's too thin, mash ½ cup beans with a fork or stir in 1 tbsp cornstarch mixed with 2 tbsp water. Never add flour—it can make the chili taste gritty. The ideal texture should coat the back of a spoon but still be spoonable.
Can I substitute the black beans for another type?
Yes! Try pinto beans (slightly sweeter) or kidney beans (earthier). For a lighter option, use white beans or lentils (cooked). Just adjust cooking time—lentils cook faster (15 minutes) while dried beans need 1 extra hour of simmering. Drain and rinse canned beans well to avoid excess moisture.