
Soups & Stews
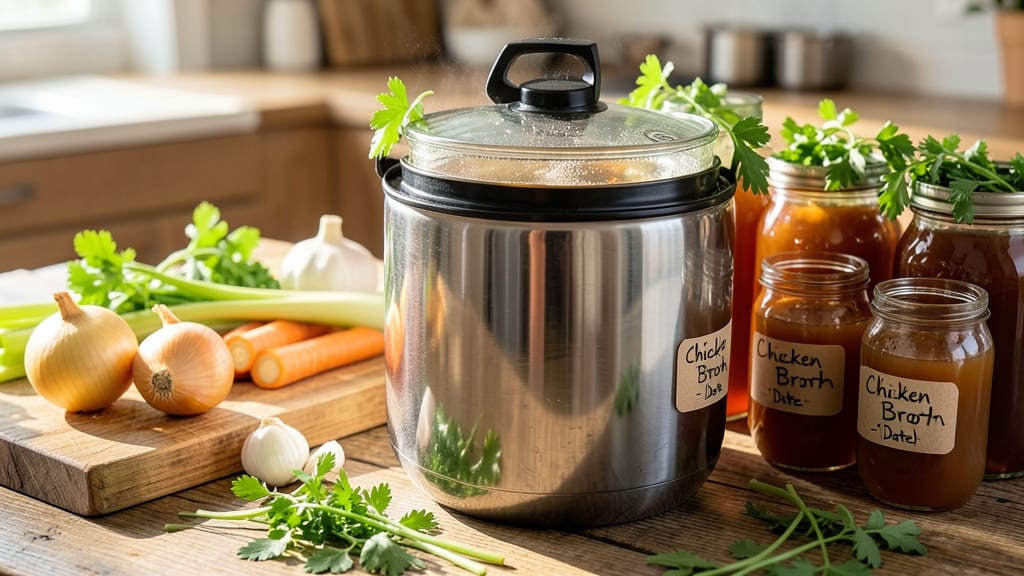
Preserving homemade chicken broth through canning transforms simple ingredients into a long-term flavor foundation for soups, stews, and sauces. This method ensures rich, aromatic broth stays safe and delicious for up to a year—critical for professional kitchens or home cooks who want restaurant-quality results without compromise.
Safety is the cornerstone of canning liquid foods, so we use pressure canning to handle the low-acid nature of broth properly. The process requires precise timing, sterilized jars, and proper sealing to prevent spoilage while locking in all that savory depth from chicken bones, vegetables, and herbs.
My years in professional kitchens taught me that even small details—like cooling jars gradually—make the difference between shelf-stable success and risk.
What you'll achieve is sterilized, shelf-stable broth that maintains its rich flavor profile for months. The pressure canning method preserves not just the liquid but the essence of your cooking—whether that's the smoky notes from slow-cooked bones or the bright herbs from your garden.
Each jar becomes a flavor reservoir ready to elevate any recipe.
This technique works equally well for light chicken broth or rich bone broth, making it versatile for any culinary need. The key is patience and precision—both of which pay off when you open a jar months later and taste that preserved quality.
Let's get started on creating your flavor foundation.
Ingredients for chicken broth canning
Simple bones and vegetables. Sterile jars. One pressure canning session for a year's worth of flavor.
| Ingredient | Amount | Notes |
|---|---|---|
| Chicken Bones 🍗 | 4 lb | Raw or cooked, marrow included |
| Yellow Onion 🧅 | 1 whole | Quartered, skin on |
| Carrots 🥕 | 2 lb | Whole, scrubbed, not peeled |
| Celery Stalks 🥬 | 4 whole | Trimmed, tough strings removed |
| Garlic Cloves 🧄 | 8 cloves | Smash lightly, don't mince |
| Fresh Parsley 🌿 | ¼ cup | Stems included, roughly chopped |
| Fresh Thyme 🌿 | ⅛ cup | Stems included, sprigs intact |
| Black Peppercorns 🌶️ | 1 tbsp | Crushed, not ground |
| Bay Leaves 🍃 | 2 whole | Dried, standard size |
| Salt 🧂 | 2 tbsp | Kosher salt, added last |
| Canning Jars 🥫 | 7 pieces | Quart-sized, new or sterilized |
| Lids and Rings 🔒 | 7 pieces | New, never used before |
| White Vinegar 🍶 | ½ cup | For jar sterilization |
| Pressure Canner 🔥 | 1 whole | 16-quart minimum capacity |
The bones are everything—marrow-rich chicken backs or neck bones give the deepest flavor. Costco or local butchers often sell them in bulk for cheap. I avoid pre-cooked bones—they're harder to clean and don't infuse as much. For vegetables, organic is ideal (no waxy skins), but regular store-bought works. The carrots and celery should be whole and scrubbed, not peeled—peels add color and nutrients. Fresh herbs? Garden-fresh or farmers market has the most aroma, but dried works in a pinch (use half the amount).
No pressure canner? Water bath won't work for broth—low-acid foods need pressure. Jars must be sterile: boil new lids 10 minutes, or run jars and rings through a dishwasher hot cycle. Vinegar sterilizes jars perfectly—just pour in, swirl, and dump. For substitutions: no parsley? Sage or tarragon works. No thyme? Rosemary sprigs add piney notes. The salt goes in last—Diamond Crystal is my go-to, but kosher is fine. Just don't skip it; flavor fades without salt.
Broth keeps 12-18 months unopened in a cool, dark pantry. Once opened, fridge for 5 days or freeze. I label jars with date and contents—sharpie on the lid lasts longer than tape. For extra safety, process an extra jar as a test first. Open it after cooling to check for proper sealing. The first batch? Save one jar to taste before canning the full run—you'll adjust seasoning next time.
Why You'll Love This Recipe
- No-Fuss Flavor Extraction: Honestly, the secret here is those 2 hours of simmering with the whole carrots, celery, and onion—skin on, stems included—plus the crushed peppercorns and smashed garlic. The marrow in the bones? That’s pure umami gold. I’ve tried store-bought broth, but this homemade version has layers I can’t get anywhere else.
- Instant Pantry Hero: Between us, this is my secret weapon for lazy weeknights. Need soup in 10 minutes? Pop open a jar. Sauces getting thin? A splash of this and boom—depth. My kids even ask for it in their mac and cheese. It’s the kind of thing that makes me feel like I’m feeding them (and myself) like a restaurant, without the fuss.
- Budget’s Best Kept Secret: I spent $12 total on chicken bones from the butcher, and that’s for seven jars. That’s less than a single bottle of pre-made broth, but it’ll last me all year. The thyme and parsley might seem like extra, but they’re cheap and make the broth taste like it cost twice as much. Win-win.
- One-Step Meal Multiplier: This isn’t just broth—it’s a flavor base for everything. Stir it into risotto, deglaze pans for sauces, or even use it to cook grains. The bay leaves and peppercorns stay in the jars, so every use is packed with flavor. I’ve got a jar in my freezer right now for my next batch of braised chicken, and honestly? It’s the only reason I bother canning anything.
Step-by-step instructions for chicken broth canning
Here's the method for preserving rich, flavorful broth that keeps for years.
Prepare the Broth Base in the Pressure Canner
Place the 4 lb chicken bones in the 16-quart pressure canner and add enough cold water to cover them by about 2 inches. Bring to a boil over high heat for 30 minutes to blanch, then drain and rinse the bones thoroughly. This removes impurities and prevents cloudy broth.
Return the cleaned bones to the canner and add 1 whole yellow onion (quartered, skin on), 2 lb carrots (whole, scrubbed), and 4 whole celery stalks (trimmed). Pour in enough cold water to cover everything by 2 inches—this should be about 8-10 cups total. Bring to a rolling boil over medium-high heat for 45 minutes, skimming any foam that rises to the surface.
Lower the heat to medium-low and add the 8 cloves garlic (lightly smashed), 0.25 cup fresh parsley (stems included), 0.125 cup fresh thyme (sprigs intact), 1 tbsp crushed black peppercorns, and 2 whole bay leaves. Simmer uncovered for 2 hours, stirring occasionally, until the broth develops deep color and rich aroma. This step extracts maximum flavor from the vegetables and bones.
Sterilize Jars and Prepare for Filling
While the broth simmers, sterilize the 7 quart-sized canning jars by filling them with hot water from the canner and keeping them submerged. Place the 7 new lids and rings in a separate pot of simmering water to soften the sealing compound. Meanwhile, strain the broth through a fine-mesh sieve into a large pot, discarding the solids. You should have about 8-10 cups of clear, flavorful broth—if needed, add water to maintain this volume.
Add the 2 tbsp kosher salt to the strained broth and stir until fully dissolved. Bring the broth back to a gentle boil over medium heat, then reduce to a simmer. Keep it hot while you prepare the jars. Here's the thing—sterilization is critical. If jars aren't properly sterilized, your broth could spoil or develop mold over time.
Fill and Seal Jars Using the Pressure Canner
Using tongs, remove the sterilized jars from the hot water and fill each one with the simmering broth, leaving 1-inch headspace at the top. Wipe the jar rims with a clean, damp cloth to ensure a proper seal. Place the lids on the jars and screw on the rings fingertip-tight—don't overtighten, as this can prevent proper sealing.
Place the filled jars into the pressure canner (still hot from the broth preparation) and add enough hot water to cover the jars by 1-2 inches. Put the canner lid on and bring to a boil over high heat. Once boiling, reduce heat to maintain a gentle boil and process for 90 minutes at 10 pounds of pressure (adjust for altitude if needed). This high-pressure processing ensures the broth remains shelf-stable for years.
Cool and Store the Canned Broth
After the processing time, turn off the heat and let the pressure canner cool completely—this can take 1-2 hours. Never open the canner until the pressure gauge reads zero and the lid can be lifted without resistance. Remove the jars carefully and place them on a clean towel, leaving 1-inch space between them for airflow.
Check the seals after 12-24 hours—press the center of each lid. If it doesn't pop back up, the jar is properly sealed. Any jars that don't seal should be refrigerated and used within 1 week. Store sealed jars in a cool, dark place. This broth will keep for up to 1 year unopened, though the flavor remains exceptional for 6-8 months. The 0.5 cup white vinegar isn't used in the broth itself but is essential for sterilizing jar lids before sealing.
Pro Tips For Making Chicken Broth Canning
- Skim Like a Pro: That first 45-minute boil isn’t just about cleaning—it’s about removing scum that’ll make your broth cloudy. Use a fine-mesh skimmer or a big spoon to pull foam off every 5 minutes while it boils. I used to skip this, and my broth always looked murky afterward—now it’s crystal clear.
- Smash, Don’t Mince Garlic: Lightly crushing those 8 cloves with the flat side of your knife lets the flavor seep into the broth without turning it bitter. Mincing releases oils that can make the broth taste harsh—trust me, I ruined a batch before I learned this.
- Salt After Straining: Adding the 2 tbsp kosher salt after straining ensures even distribution and prevents over-salting if you taste-test early. I once added it too soon and had to dilute half the batch—now I wait until the broth is clear and ready to jar.
- Hot Jars, Hot Broth: Fill sterilized jars with broth that’s still simmering—cold jars can cause thermal shock and cracks. Keep both the jars and broth hot while working, and use a funnel to avoid spills. I learned this after watching three jars shatter mid-fill.
Essential equipment for chicken broth canning
Pressure Canner Essentials
Your 16-quart pressure canner is the star of the show for safe, long-term broth storage. I rely on my All-American 16-quart model, which handles the 10 pounds of pressure needed for low-acid foods like broth.
Look for a canner with a weighted gauge (not dial) for more reliable pressure control—this is critical for safety. My vintage cast iron canner sits proudly in my kitchen, a testament to the fact that quality equipment lasts generations. 🔥
Sterilization Station
A large stockpot and a fine-mesh sieve are your best friends during prep. I use my Le Creuset Dutch oven for sterilizing jars and lids—it's heavy enough to stay stable while submerged in boiling water.
For the sieve, I swear by the OXO Good Grips model with a wide mouth for easy pouring. Don't skip sterilizing—even 5 minutes in boiling water makes a difference in preventing spoilage.
Jars and Lids
Invest in Ball or Kerr quart-sized canning jars—they're durable and come with matching lids. I prefer wide-mouth jars because they're easier to fill and clean. For lids, Ball regular mouth lids work perfectly with the new sealing compound.
Pro tip: Store your sterilized jars upside-down in a towel-lined basket to keep them clean until use. I keep an extra set of jars handy just for this purpose.
Measuring and Tools
A digital kitchen scale helps ensure you're using the exact 4 lb chicken bones specified, and I use my OXO Good Grips measuring cups for precise broth volume. For skimming foam, I've found the spoon skimmer from Misen to be invaluable—it's wide enough to catch all the impurities.
Don't forget a tongs set for handling hot jars, and a clean, damp cloth for wiping jar rims before sealing.
Safety First
Your pressure gauge tester should be tested annually—this is non-negotiable for safety. I keep mine in my canning toolkit along with a sealing tester to check each jar after processing. Never use chipped or cracked jars, and always follow altitude adjustments for your processing time.
I mark these adjustments on my canner with a permanent marker so I never forget. 💡
Nutrition facts
Frequently asked questions
Why can't I use a water bath canner for chicken broth?
Chicken broth is a low-acid food, which means it requires pressure canning to safely preserve it. Water bath canning only works for high-acid foods like tomatoes or pickles. The 10 pounds of pressure in a pressure canner kills harmful bacteria that could spoil your broth over time.
How do I know if my pressure canner is working properly?
Test your pressure gauge annually with a certified tester—this is critical for safety. A weighted gauge should maintain 10 pounds of pressure consistently. Also, check that the canner lid seals tightly and that the pressure regulator works smoothly. If unsure, consult a canning expert before use.
Can I substitute dried herbs for fresh in this recipe?
Yes! Use half the amount of dried herbs compared to fresh. For example, replace 0.25 cup fresh parsley with 1 tablespoon dried parsley. Dried herbs add flavor but won’t extract as much aroma as fresh, so adjust seasoning after testing a small batch.
What should I do if a jar doesn’t seal properly?
Unsealed jars are unsafe for long-term storage. Refrigerate the broth immediately and use it within 1 week. Check the jar for proper sealing by pressing the lid—if it pops back up, it didn’t seal. Discard any broth that smells off or has bubbles after opening.